Windows 7: A Legacy Operating System That Shaped Computing
Windows 7, released by Microsoft in 2009, quickly became one of the most popular and widely used operating systems in the world. Its user-friendly interface, enhanced performance, and improved security features made it a preferred choice for both personal and professional use. Although Windows 7 has now reached its end of support, its legacy continues to influence the computing landscape.
With its sleek and intuitive design, Windows 7 offered a seamless user experience. The Start menu received a significant overhaul, making it more organized and efficient. Users could easily access their favorite programs and files with just a few clicks. The taskbar was also enhanced with features like thumbnail previews, jump lists, and Aero Peek, providing users with quick access to their open applications.
Underneath its polished exterior, Windows 7 boasted impressive performance improvements over its predecessor, Windows Vista. It introduced a new kernel architecture that optimized resource allocation and reduced memory usage. This resulted in faster boot times, improved responsiveness, and smoother multitasking capabilities. Whether you were running resource-intensive applications or simply browsing the web, Windows 7 provided a stable and efficient platform.
Security was also a top priority for Windows 7. It introduced several new features to protect users from threats such as malware and unauthorized access. The User Account Control (UAC) feature prompted users for permission before allowing any system changes, preventing malicious software from making unauthorized modifications. Additionally, Windows Defender offered built-in protection against viruses and other malicious software.
Windows 7’s impact extended beyond individual users; it played a vital role in the business world as well. Many enterprises relied on Windows 7 due to its stability and compatibility with existing software applications. Its robust networking capabilities allowed businesses to establish secure connections between computers within their networks effortlessly.
However, as technology evolves rapidly, so do operating systems. In January 2020, Microsoft officially ended support for Windows 7, meaning that it will no longer receive security updates or technical assistance. This move was made to encourage users to migrate to newer, more secure operating systems like Windows 10.
Despite its end of support, Windows 7 remains a significant part of computing history. Its impact on the industry cannot be overstated. It served as a bridge between the less successful Windows Vista and the highly acclaimed Windows 10. Many users still have fond memories of using Windows 7 and appreciate its contribution to their computing experience.
If you are still using Windows 7, it is highly recommended to upgrade to a supported operating system for the sake of security and compatibility with newer software. However, the legacy of Windows 7 lives on in subsequent versions of Windows, which have built upon its success and continue to shape the way we interact with technology.
Windows 7 may be gone, but its influence lingers. Its user-friendly interface, enhanced performance, and focus on security set a benchmark for future operating systems. As we move forward into an increasingly digital world, we can look back at Windows 7 as a pivotal chapter in the evolution of computing.
Advantages of Windows 7: A Comprehensive Overview
- User-Friendly Interface
- Enhanced Performance
- Robust Security Features
- Compatibility with Existing Software
- Stable Networking Capabilities
- Legacy Influence
Challenges and Limitations of Windows 7: End of Support, Limited Modern Features, Hardware Compatibility, and Performance
- End of Support
- Limited Modern Features
- Hardware Compatibility Challenges
- Performance Limitations
User-Friendly Interface
User-Friendly Interface: Windows 7’s Intuitive Design
When it comes to operating systems, a user-friendly interface can make all the difference. Windows 7, released by Microsoft in 2009, brought a sleek and intuitive design that revolutionized the way users interacted with their computers.
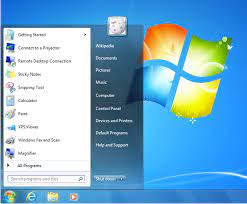
At the heart of this transformation was the redesigned Start menu. Windows 7 introduced a more organized and efficient layout, allowing users to easily access their favorite programs and files. The Start menu became a central hub for launching applications, searching for files, and accessing system settings.
The taskbar received a significant makeover as well. With features like thumbnail previews and jump lists, users could effortlessly switch between open applications or access specific tasks within an application. This streamlined workflow improved productivity by reducing the time spent navigating through different windows.
One of the standout features of Windows 7 was Aero Peek. By hovering over an application’s taskbar icon, users could quickly preview its content without actually opening it. This feature proved especially useful when working with multiple windows simultaneously, as it provided a convenient way to check on specific information or compare documents.
Windows 7’s user-friendly interface extended beyond these major changes. Small but impactful improvements were made throughout the operating system to enhance usability. For instance, window management was made easier with features like Snap and Shake. Snap allowed users to resize windows by dragging them to different edges of the screen, while Shake minimized all other open windows when one was shaken back and forth.
Moreover, customization options were expanded in Windows 7. Users could personalize their desktop backgrounds with slideshows or choose from a wide range of themes available online. These visual enhancements not only added aesthetic appeal but also allowed users to create an environment that suited their preferences.
The introduction of a user-friendly interface in Windows 7 significantly contributed to its popularity among both casual users and professionals alike. Its intuitive design made it easy for anyone to navigate the operating system, regardless of their technical expertise. Users could focus on their tasks without being hindered by complex menus or confusing layouts.
While Windows 7 has reached its end of support, its influence on subsequent versions of Windows is evident. Microsoft took note of the positive reception to the user-friendly interface and continued to refine it in newer iterations like Windows 8 and Windows 10.
Windows 7’s user-friendly interface remains a testament to the importance of intuitive design in operating systems. It set a benchmark for usability and productivity, making computing accessible to a wider audience. Even though it may no longer receive updates, its impact lives on in the way we interact with technology today.
Enhanced Performance: The Power of Windows 7
When it comes to operating systems, performance is a crucial factor that can greatly impact the user experience. In this regard, Windows 7 proved to be a game-changer. Released in 2009 as the successor to Windows Vista, it brought significant enhancements that revolutionized the way users interacted with their computers.
One of the standout features of Windows 7 was its enhanced performance compared to its predecessor. Windows Vista had faced criticism for being resource-intensive and sluggish on certain hardware configurations. However, with Windows 7, Microsoft focused on optimizing resource allocation and reducing memory usage to deliver a more efficient and responsive operating system.
One noticeable improvement was the remarkable boost in boot times. Windows 7 showcased faster startup speeds, allowing users to get up and running in no time. This was made possible by streamlining the boot process and minimizing unnecessary delays, resulting in a more seamless and efficient experience from the moment users powered on their computers.
Windows 7 also excelled in delivering improved responsiveness. The operating system’s new kernel architecture optimized how system resources were allocated, ensuring that applications received the necessary computing power without causing slowdowns or bottlenecks. This meant that even resource-intensive tasks could be handled smoothly, providing users with a fluid computing experience.
Multitasking capabilities were another area where Windows 7 shone brightly. With reduced memory usage and refined task management, users could effortlessly switch between applications without experiencing lag or performance degradation. Whether it was working on multiple documents simultaneously or running demanding software, Windows 7 handled multitasking with finesse.
These performance enhancements not only benefited individual users but also had a significant impact on businesses and organizations. Faster boot times meant that employees could start their work promptly without wasting valuable time waiting for their computers to load. Improved responsiveness and multitasking capabilities allowed professionals to work efficiently with multiple applications open simultaneously, enhancing productivity across various industries.
While Windows 7’s enhanced performance was undoubtedly a standout feature, it’s important to note that the operating system has reached its end of support. As technology advances and security threats evolve, it is recommended to transition to a supported operating system like Windows 10 to ensure ongoing protection and compatibility with the latest software.
Nevertheless, the legacy of Windows 7’s performance improvements lives on in subsequent versions of Windows. Its optimization techniques and focus on delivering a responsive user experience have influenced the development of newer operating systems, continuing to shape the way we interact with our computers.
Windows 7’s enhanced performance was a testament to Microsoft’s commitment to providing users with a more efficient and enjoyable computing environment. Its faster boot times, improved responsiveness, and enhanced multitasking capabilities set a new standard for operating systems at the time. While its journey has come to an end, its impact on the world of computing will be remembered as an important milestone in enhancing overall performance.
Robust Security Features
Robust Security Features: Windows 7’s Commitment to User Protection
When it comes to operating systems, security is paramount. Windows 7, released by Microsoft in 2009, made significant strides in prioritizing user protection. With its robust security features, it provided users with a safer computing experience.
One of the standout security features introduced in Windows 7 was User Account Control (UAC). UAC aimed to prevent unauthorized system changes by prompting users for permission before allowing any modifications that could potentially affect the computer’s stability or security. This added layer of protection ensured that malicious software or unauthorized users couldn’t make changes without the user’s knowledge or consent. UAC helped users maintain control over their systems and minimized the risk of accidental or malicious alterations.
Windows 7 also incorporated Windows Defender, a built-in antivirus and antispyware solution. This powerful tool provided real-time protection against viruses, malware, and other malicious software that could compromise system integrity and steal sensitive information. Windows Defender continuously scanned files, downloads, and email attachments to identify potential threats and took prompt action to neutralize them. By integrating this protective shield into the operating system itself, Windows 7 offered users peace of mind knowing that their systems were fortified against common digital threats.
The emphasis on security in Windows 7 was a response to the growing concern over cybercrime and identity theft. Microsoft recognized the need for an operating system that not only delivered on performance but also safeguarded user data from evolving online threats. With UAC and Windows Defender working together seamlessly, users were equipped with powerful tools to combat digital risks effectively.
While Windows 7’s robust security features were commendable at the time of its release, it is important to note that the operating system has reached its end of support. As technology advances rapidly and new vulnerabilities emerge, it is crucial for users still running Windows 7 to upgrade to a supported operating system like Windows 10 or explore other security-conscious alternatives. Regular security updates and patches are essential to stay protected in today’s digital landscape.
Nevertheless, the legacy of Windows 7’s emphasis on security lives on. It set a benchmark for subsequent Windows versions, inspiring the integration of even more advanced security features. The lessons learned from Windows 7’s commitment to protecting users have shaped the way operating systems today approach cybersecurity.
Windows 7’s robust security features were a testament to Microsoft’s dedication to user protection. By introducing UAC and Windows Defender, it empowered users with greater control over their systems and provided an essential layer of defense against digital threats. While it is time to bid farewell to Windows 7, its contributions to enhancing operating system security will always be remembered.
Compatibility with Existing Software
Windows 7: The Perfect Fit for Existing Software Compatibility
One of the standout advantages of Windows 7 was its exceptional compatibility with existing software applications. This feature proved to be a game-changer for many businesses, allowing them to seamlessly transition to the new operating system without disruption or the need for extensive software updates.
For enterprises, the compatibility factor was crucial. Many businesses heavily relied on specific software applications that were tailored to their unique needs and processes. These applications often represented significant investments in terms of time, money, and training. The thought of migrating to a new operating system and potentially facing compatibility issues with their critical software was a daunting prospect.
Fortunately, Windows 7 addressed this concern head-on. It was designed with a strong emphasis on maintaining compatibility with older software applications and ensuring a smooth transition for businesses. This meant that companies could upgrade their operating systems without worrying about their existing software becoming obsolete or dysfunctional.
The seamless compatibility of Windows 7 allowed businesses to continue using their trusted software applications without interruption. This not only saved valuable time but also eliminated the need for expensive and time-consuming updates or replacements. Companies could leverage the benefits offered by Windows 7 while retaining the familiarity and efficiency of their existing software tools.
Moreover, this compatibility factor also reduced the learning curve for employees. Since they were already familiar with their current software applications, they could easily adapt to Windows 7 without having to undergo extensive retraining or learn entirely new programs. This smooth transition ensured minimal disruption to daily operations and productivity levels.
Windows 7’s commitment to maintaining compatibility with existing software applications was a significant advantage that set it apart from other operating systems at the time. It demonstrated Microsoft’s understanding of the importance of preserving investments made by businesses in their specialized tools.
However, it is worth noting that as technology advances, there comes a point when older software may no longer be compatible with newer operating systems due to changes in architecture or security requirements. Therefore, while Windows 7 provided excellent compatibility during its time, it is essential for businesses to regularly assess their software needs and consider upgrading to newer operating systems to ensure continued support and security.
In conclusion, Windows 7’s compatibility with existing software applications was a key pro that made it an attractive choice for businesses. It allowed companies to smoothly transition without disrupting their operations or investing heavily in software updates. This compatibility factor not only saved time and money but also ensured a seamless user experience for employees. While Windows 7 has reached its end of support, its legacy as a reliable and compatible operating system lives on in the business world.
Stable Networking Capabilities
Stable Networking Capabilities: A Key Advantage of Windows 7
Windows 7, the popular operating system released by Microsoft in 2009, brought numerous improvements to the computing experience. One standout feature was its stable networking capabilities, which proved to be a significant advantage for businesses and organizations.
In the modern digital landscape, networking is crucial for seamless communication and efficient collaboration within an organization. Windows 7 recognized this need and provided robust networking features that made it easier for businesses to establish secure connections within their networks.
One of the key benefits of Windows 7’s networking capabilities was its ability to simplify network management. With its intuitive interface and comprehensive tools, administrators could effortlessly set up and configure networks according to their specific requirements. Whether it was connecting computers within an office or establishing secure connections across different locations, Windows 7 provided a reliable framework for building and managing network infrastructures.
Security was also a top priority in Windows 7’s networking capabilities. The operating system offered various security protocols and encryption options to ensure that data transmitted over the network remained protected from unauthorized access. This allowed businesses to establish secure connections between devices, protecting sensitive information from potential threats.
Furthermore, Windows 7 supported advanced networking features such as Virtual Private Networks (VPNs) and Remote Desktop Protocol (RDP). These features enabled employees to securely access their work computers or connect to company resources from remote locations. This flexibility proved invaluable for organizations with remote teams or employees who needed access to company resources while on the go.
The stability of Windows 7’s networking capabilities meant that businesses could rely on consistent connectivity without disruptions. It minimized network downtime and ensured smooth operations by providing a reliable platform for data transfer and communication within the organization.
While Windows 10 has since taken over as Microsoft’s flagship operating system, the stable networking capabilities introduced in Windows 7 have carried forward. Businesses that have upgraded to newer versions of Windows continue to benefit from enhanced networking features, building upon the foundation laid by Windows 7.
In conclusion, Windows 7’s stable networking capabilities were a key advantage for businesses. The operating system provided an intuitive interface, robust security measures, and advanced networking features that made it easier for organizations to establish secure connections within their networks. As technology continues to evolve, the influence of Windows 7’s networking capabilities can still be felt in modern operating systems, ensuring efficient communication and collaboration for businesses worldwide.
Legacy Influence
Legacy Influence: Windows 7’s Lasting Impact on Computing
With the end of support for Windows 7, many users bid farewell to an operating system that served them well for years. However, its legacy lives on in subsequent versions of Windows, particularly in the highly acclaimed Windows
The positive aspects of user experience, performance improvements, and security enhancements from Windows 7 have been carried forward, ensuring a seamless transition to newer iterations of the operating system.
One of the key strengths of Windows 7 was its user-friendly interface. The Start menu received a significant overhaul, making it more intuitive and organized. This design philosophy was embraced in Windows 10, where the Start menu made a triumphant return after being absent in Windows
Users familiar with Windows 7 found themselves at home with the familiar layout and easy access to their favorite programs and files.
Windows 7 also introduced performance improvements that have had a lasting impact. Its optimized resource allocation and reduced memory usage resulted in faster boot times and improved responsiveness. These enhancements were carried forward into subsequent versions of Windows, including Windows
Users experienced smoother multitasking capabilities and overall better system performance.
Security has always been a top concern for Microsoft, and this was evident in Windows 7’s emphasis on protecting users from threats. The User Account Control (UAC) feature prompted users for permission before allowing any system changes, preventing unauthorized modifications by malicious software. This security mindset continued in later versions like Windows 10, which introduced even more robust security features such as Windows Hello facial recognition and enhanced encryption options.
The influence of Windows 7 extends beyond individual users to businesses as well. Many enterprises relied on its stability and compatibility with existing software applications. As businesses transitioned to newer versions like Windows 10, they could build upon the foundation laid by their experience with Windows
While it is important to upgrade to supported operating systems for security reasons, the positive aspects of Windows 7 have undeniably left their mark on subsequent versions. The user experience, performance improvements, and security enhancements from Windows 7 continue to shape the way we interact with the operating system today.
As technology continues to evolve, we can appreciate the legacy of Windows 7 and its lasting influence on computing. It served as a stepping stone towards more advanced versions like Windows 10, ensuring a smooth transition for users while building upon the strengths of its predecessor.
Windows 7 may have reached the end of its journey, but its impact lives on. Its positive attributes have been embraced and evolved in subsequent versions, making Windows 10 a robust and user-friendly operating system. The legacy of Windows 7 serves as a reminder that even as technology progresses, the foundations laid by earlier innovations continue to shape our digital experiences.
End of Support
End of Support: A Significant Drawback of Windows 7
While Windows 7 was undoubtedly a popular and reliable operating system, it is important to acknowledge one significant drawback that users should be aware of: its end of support. Microsoft officially ended support for Windows 7 in January 2020, which means that the operating system no longer receives security updates or technical assistance from Microsoft.
The end of support for Windows 7 poses potential risks for users who continue to rely on the operating system. Without regular security updates, the vulnerabilities and weaknesses in the software may remain unaddressed. This leaves users more exposed to security risks, such as malware, viruses, and other cyber threats. As new vulnerabilities are discovered over time, there will be no official patches or fixes provided by Microsoft to protect Windows 7 users.
Additionally, with the advancement of technology and software development, compatibility issues may arise for those using Windows 7. As newer applications and programs are designed to work optimally with more recent operating systems, Windows 7 users may find themselves unable to install or run certain software smoothly. This can limit their ability to access new features and take advantage of technological advancements.
To ensure a secure computing environment and keep up with evolving software requirements, it is highly recommended that users consider upgrading to a supported operating system like Windows 10. By doing so, they can benefit from ongoing security updates and technical assistance from Microsoft. Upgrading not only enhances security but also ensures compatibility with newer software applications.
While it is understandable that some users may have grown accustomed to the familiarity and functionality of Windows 7, it is crucial to weigh the potential risks associated with using an unsupported operating system. Taking proactive steps towards upgrading will help safeguard personal data, protect against emerging threats, and ensure a seamless computing experience.
In conclusion, while Windows 7 had its strengths as an operating system, its end of support should be considered a significant drawback. Users who continue to rely on Windows 7 face increased security risks and potential compatibility issues with newer software. It is advisable to transition to a supported operating system to maintain a secure and up-to-date computing environment.
Limited Modern Features
Windows 7: Limited Modern Features
While Windows 7 was a beloved operating system in its time, it does have its limitations compared to more recent versions like Windows 10. One notable drawback is the absence of certain modern features and functionalities that have become commonplace in today’s computing landscape.
One significant omission from Windows 7 is the virtual assistant Cortana. Introduced in Windows 10, Cortana revolutionized the way users interact with their devices by providing voice-activated assistance and personalized recommendations. With Cortana, users can perform tasks, search the web, set reminders, and more using just their voice. Unfortunately, Windows 7 users do not have access to this convenient and intuitive feature.
Another aspect where Windows 7 falls short is the lack of the Microsoft Store. The Microsoft Store serves as a central hub for downloading and updating applications, games, and other content. It provides a streamlined experience by offering a wide range of apps that are verified for security and compatibility. This makes it easier for users to discover new software and stay up to date with the latest releases. However, Windows 7 users miss out on this convenient marketplace for accessing applications.
Furthermore, newer versions of Windows offer improved user experiences through advancements in design and interface. Features like the revamped Start menu in Windows 10 provide a more organized and customizable layout compared to its predecessor. Additionally, newer versions often introduce productivity tools like virtual desktops, improved multitasking capabilities, enhanced file management systems, and better integration with cloud services – features that are absent in Windows 7.
It is important to note that these limitations are not necessarily criticisms of Windows 7 itself but rather reflect the natural progression of technology over time. As operating systems evolve to meet changing user expectations and demands, newer versions tend to incorporate innovative features that enhance productivity and user experience.
If you are someone who values cutting-edge features or relies heavily on virtual assistants or app marketplaces for your daily computing needs, you may find Windows 7’s limited modern features to be a significant drawback. In such cases, upgrading to a more recent operating system like Windows 10 would be a recommended course of action.
However, it is worth acknowledging that Windows 7 still remains a reliable and functional operating system for those who prioritize stability, familiarity, and compatibility with older software. Despite its limitations, it continues to serve the needs of many users around the world.
Ultimately, the decision to stick with Windows 7 or upgrade to a newer version depends on individual preferences and requirements. Assessing your specific needs and considering the benefits offered by newer operating systems can help you make an informed choice that aligns with your computing goals.
Hardware Compatibility Challenges
Hardware Compatibility Challenges: A Con of Windows 7
Windows 7, despite its many strengths, is not without its limitations. One significant drawback that users may encounter when using Windows 7 is the potential for hardware compatibility challenges. As technology progresses at a rapid pace, older operating systems like Windows 7 may struggle to keep up with the latest hardware components.
The issue arises from the fact that manufacturers often prioritize developing drivers and software updates for newer operating systems. This means that some devices or peripherals may not have updated drivers available specifically designed for Windows
As a result, users may experience limited functionality or encounter stability issues when using these devices.
When a device lacks compatible drivers, it can lead to various problems. For instance, certain features or advanced functionalities of a device might not work as intended or could be entirely unavailable. This can be frustrating for users who rely on specific hardware capabilities for their work or personal needs.
Furthermore, the absence of updated drivers can also result in stability issues within the operating system itself. Incompatibilities between hardware and software can lead to system crashes, freezing, or even unexpected errors. These issues can disrupt productivity and cause frustration for users who rely on their computers for various tasks.
It’s important to note that while Windows 7 initially had broad hardware compatibility upon its release, as time goes on and newer technologies emerge, this compatibility becomes increasingly limited. Manufacturers naturally shift their focus towards developing drivers and updates for more recent operating systems to ensure optimal performance and compatibility.
To mitigate these challenges, users may need to explore alternative solutions if they wish to continue using newer hardware components with Windows
This could involve searching for unofficial driver updates from third-party sources or seeking assistance from online communities where individuals share workarounds or modified drivers.
However, it’s crucial to approach such solutions with caution as they may not always provide reliable results and can potentially compromise system security or stability. Additionally, relying on outdated operating systems like Windows 7 for prolonged periods increases the risk of exposure to security vulnerabilities, as these systems are no longer receiving official security updates from Microsoft.
In conclusion, one of the downsides of Windows 7 is its potential for hardware compatibility challenges. As technology advances, older operating systems may struggle to keep up with the latest hardware components. Users may encounter limited functionality or stability issues when using devices that lack updated drivers specifically designed for Windows 7. To ensure optimal performance and security, it is advisable to consider upgrading to a newer, supported operating system that aligns better with the latest hardware technologies.
Performance Limitations: Windows 7’s Struggle to Keep Up with Modern Hardware
When Windows 7 was released, it brought significant performance improvements over its predecessor, Windows Vista. However, as technology continues to advance at a rapid pace, Windows 7 may struggle to keep up with resource-intensive tasks on modern hardware configurations. This limitation is worth considering for users who require high-performance computing capabilities or want to take full advantage of advanced graphics technologies.
While Windows 7 performs admirably on older hardware or less demanding tasks, it may not fully harness the potential of cutting-edge hardware components found in modern computers. As technology evolves, software developers optimize their applications and games for the latest operating systems that take advantage of the latest hardware architectures.
Users who engage in activities that demand substantial computing power, such as video editing, 3D rendering, or running resource-intensive software applications, might find that Windows 7 falls short in meeting their needs. The operating system’s architecture and design were not specifically tailored for the advancements in processing power and memory capacities seen in newer hardware.
Furthermore, those seeking to explore the realm of advanced graphics technologies like virtual reality (VR) or augmented reality (AR) may encounter compatibility issues with Windows 7. These technologies require robust hardware support and optimized drivers that are often developed for more recent operating systems like Windows 10.
It is important to note that while Windows 7 may face performance limitations on modern hardware configurations compared to newer operating systems optimized for these setups, it does not mean that it becomes entirely unusable or obsolete. Many users still find value in using Windows 7 for less demanding tasks or on older machines where its performance limitations are less noticeable.
However, if you rely heavily on resource-intensive applications or cutting-edge technologies that demand the full potential of your computer’s capabilities, it might be worth considering upgrading to a more recent operating system like Windows 10. These newer versions are designed with modern hardware in mind, ensuring better performance, enhanced compatibility, and improved support for the latest technologies.
In conclusion, while Windows 7 undoubtedly brought significant performance improvements over its predecessor, it may struggle to keep up with the demands of modern hardware configurations and resource-intensive tasks. Users requiring high-performance computing or those wanting to explore advanced graphics technologies might find that upgrading to a more recent operating system optimized for modern hardware is a wise choice. It is essential to assess your specific needs and consider the capabilities of your hardware when deciding on an operating system that best suits your requirements.