Linux Download: Your Gateway to Open-Source Power
Linux, the renowned open-source operating system, has been revolutionizing the world of computing for decades. With its unparalleled flexibility, robustness, and security, Linux has become a go-to choice for tech enthusiasts, developers, and businesses alike. If you’re ready to embark on a journey into the world of open-source software, downloading Linux is your first step towards unlocking a whole new realm of possibilities.
Why Choose Linux?
Unlike proprietary operating systems like Windows or macOS, Linux is built on the principles of collaboration and community-driven development. This means that anyone can access and modify its source code to suit their specific needs. The result? A highly customizable and adaptable operating system that can be tailored to fit various use cases.
Moreover, Linux boasts exceptional stability and security. Its modular design allows for efficient resource management and ensures that system crashes are rare occurrences. With a vast array of built-in security features and frequent updates from the community, Linux is widely regarded as one of the most secure operating systems available.
Choosing the Right Distribution
One of the unique aspects of Linux is its diverse range of distributions or “distros.” Each distro offers a different user experience and caters to specific requirements. From beginner-friendly options like Ubuntu and Linux Mint to more advanced choices like Arch Linux or Fedora, there’s a distribution out there for everyone.
When deciding which distro to download, consider factors such as ease of use, hardware compatibility, available software packages, and community support. It’s always recommended to research different distributions before making your choice to ensure it aligns with your needs and goals.
Downloading Linux
Downloading Linux is an easy process that can be completed in just a few simple steps:
- Choose Your Distro: Visit the official website of your preferred distribution (e.g., ubuntu.com) or explore reputable third-party websites that provide download links for various distros.
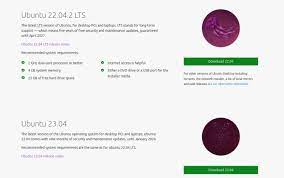
- Select the Version: Most distributions offer different versions, such as LTS (Long-Term Support) or rolling releases. LTS versions provide stable and supported releases, while rolling releases offer the latest updates but may be less stable.
- Download the ISO: Once you’ve chosen your version, locate the download link for the ISO file. The ISO file contains all the necessary files to install Linux on your computer.
- Create a Bootable USB or DVD: After downloading the ISO file, you’ll need to create a bootable USB drive or burn it onto a DVD. This will allow you to install Linux on your machine.
- Install Linux: Restart your computer and boot from the USB drive or DVD. Follow the installation instructions provided by your chosen distribution to complete the installation process.
Joining the Linux Community
Once you’ve downloaded and installed Linux, you’ll become part of a vibrant community of like-minded individuals passionate about open-source software. Engage with fellow users through forums, mailing lists, and social media channels specific to your chosen distribution. Ask questions, share knowledge, and contribute back to the community by reporting bugs or even developing your own software.
Conclusion
Linux offers an unparalleled level of freedom, security, and customizability that sets it apart from other operating systems. By downloading Linux and immersing yourself in its ecosystem, you’re opening doors to endless possibilities in software development, system administration, and beyond.
So why wait? Take that first step towards open-source empowerment by downloading Linux today. Join millions of users worldwide who have embraced this transformative operating system and discover a world of innovation waiting at your fingertips.
8 Pros of Linux Download: Embrace the Power of Free, Secure, Customizable, Compatible, Resource-Efficient, Reliable, Open Source Linux with Community Support and No Licence Fees
- Free to download and use
- High level of security
- Easy to customize
- Compatible with many hardware devices
- Low resource usage
- Reliable updates
- Open source community support
- No licence fees required
6 Cons to Consider When Downloading Linux: A Guide for UK Users
- It can be difficult to find the right version of Linux for your system due to the large number of versions available.
- Many users report that they experience slow download speeds when downloading Linux files.
- Some Linux distributions may not work with certain hardware or software, so compatibility issues may arise.
- Installing Linux can be a complex process, and it may require some technical knowledge in order to get it working properly on your system.
- There is no guarantee that all applications will work on a particular version of Linux, so you may need to experiment with different versions in order to find one that works for you.
- Security vulnerabilities are more common in open-source software like Linux, which means that malicious actors may target your system if you don’t keep up with security updates regularly
Free to download and use
Linux Download: Embrace the Freedom of Open Source
One of the most enticing advantages of downloading Linux is its open-source nature, which grants users the freedom to access, use, and modify the software without any restrictions. Unlike proprietary operating systems that come with a price tag, Linux is available for free, making it accessible to anyone with an internet connection and a desire for exploration.
Open Source Freedom
Linux’s open-source philosophy embodies the spirit of collaboration and community-driven development. The source code of Linux is freely available to anyone who wishes to examine it or contribute improvements. This transparency not only fosters innovation but also ensures that users have complete control over their computing experience.
No Cost Barrier
The absence of financial barriers associated with Linux is a significant advantage. Users can freely download and install Linux on any number of devices without worrying about licensing fees or restrictive usage terms. This makes it an ideal choice for individuals, businesses, educational institutions, and even governments looking to reduce costs while maintaining a high level of functionality and security.
Endless Possibilities
The freedom offered by Linux’s open-source nature extends beyond cost savings. It empowers users to customize their operating system according to their specific needs and preferences. Whether you are a developer seeking a platform to build cutting-edge applications or an individual looking for a user-friendly interface tailored to your workflow, Linux provides endless possibilities for personalization.
Community Support
The open-source community surrounding Linux is vibrant and supportive. With millions of users worldwide, there are numerous forums, chat rooms, mailing lists, and online communities dedicated to helping newcomers navigate the world of Linux. From troubleshooting technical issues to sharing tips and tricks, this collective knowledge base ensures that assistance is readily available whenever needed.
Security Through Collaboration
Linux’s open-source nature also contributes to its exceptional security. With thousands of developers scrutinizing the code for vulnerabilities and actively working on fixes, potential security threats are identified quickly and efficiently addressed. This collaborative approach strengthens the overall security of the operating system, providing users with peace of mind in an increasingly digital world.
Conclusion
The freedom to download and use Linux without any restrictions is a compelling reason to explore this open-source operating system. By embracing Linux, users can tap into a world of innovation, customization, and community support. Whether you’re an individual seeking a cost-effective solution or an organization looking for a reliable and secure platform, Linux’s open-source nature ensures that you have the freedom to shape your digital experience according to your needs. So why not embark on this journey of exploration and embrace the power of Linux today?
High level of security
High Level of Security: Linux’s Fortress Against Threats
When it comes to security, Linux stands tall as an impenetrable fortress in the world of operating systems. Its robust architecture and open-source nature make it a highly secure platform that is notoriously difficult to hack into or infect with viruses. If you prioritize the safety of your digital ecosystem, downloading Linux is a wise choice.
One of the key reasons behind Linux’s exceptional security lies in its design philosophy. The collaborative nature of open-source development means that thousands of developers worldwide scrutinize and continuously improve the codebase. This collective effort ensures that vulnerabilities are quickly identified and patched, making Linux inherently more secure than proprietary alternatives.
Additionally, Linux utilizes a strong permissions system that restricts user access to critical system files and processes. This prevents malicious software or unauthorized users from causing harm or gaining control over the system. With fine-grained control over user permissions, administrators can limit potential attack vectors and minimize the impact of any security breaches.
Furthermore, Linux benefits from a smaller target audience compared to other operating systems like Windows or macOS. While this may seem counterintuitive, it actually works in favor of Linux’s security posture. Malicious actors tend to focus their efforts on larger user bases where they can maximize their impact. As a result, Linux users are less likely to encounter widespread malware attacks commonly seen on other platforms.
Another advantage is that Linux distributions offer centralized software repositories managed by trusted sources. This means users can download applications and updates directly from these repositories, reducing the risk of inadvertently installing compromised software from untrusted sources.
Moreover, regular updates play a crucial role in maintaining the security integrity of any operating system. The Linux community excels in promptly addressing vulnerabilities as they are discovered and releasing timely updates to ensure user protection against emerging threats.
In summary, choosing Linux for its high level of security is a prudent decision for individuals and organizations alike. Its open-source nature fosters constant scrutiny and improvement, resulting in a robust defense against potential threats. With a strong permissions system, a smaller target audience, centralized software repositories, and timely updates, Linux provides a secure foundation for users to build upon.
By downloading Linux, you are not only embracing a powerful and flexible operating system but also prioritizing the safety of your digital environment. Join the millions of users who trust Linux to safeguard their data and experience peace of mind in an increasingly connected world.
Easy to customize
Easy to Customize: Tailor Linux to Suit Your Needs
One of the greatest advantages of downloading Linux is the unparalleled ability to customize the operating system according to your preferences and requirements. Unlike proprietary operating systems, Linux empowers users to take control of their computing experience and shape it to fit their unique needs.
Whether you are a developer, a power user, or simply someone who appreciates having complete control over their system, Linux offers an array of customization options that go far beyond what other operating systems can provide.
With Linux, you have the freedom to modify everything from the desktop environment and user interface to the kernel itself. This means you can choose from a wide range of desktop environments such as GNOME, KDE, Xfce, or Cinnamon, each offering its own look and feel. You can customize themes, icons, fonts, and even keyboard shortcuts to create a personalized computing environment that suits your workflow.
Furthermore, Linux allows users to install only the software packages they need. Unlike bloated proprietary systems that come preloaded with numerous applications and features that may never be used, Linux distributions offer package managers that enable users to select and install only the software they require. This not only saves valuable disk space but also ensures a leaner and more efficient system tailored specifically for your needs.
For developers and advanced users, Linux provides access to an extensive command-line interface (CLI) where powerful tools and utilities are readily available. This allows for deep customization at a granular level by modifying configuration files or writing scripts. The possibilities are virtually limitless when it comes to tweaking your system precisely how you want it.
Moreover, with its open-source nature, Linux benefits from an active community constantly developing new customizations and enhancements. Online forums and repositories provide an abundance of resources such as themes, icon packs, extensions, plugins, and scripts created by fellow Linux enthusiasts. These resources make it easy for users to further personalize their experience or enhance functionality to suit their specific needs.
In conclusion, Linux’s exceptional customizability sets it apart from other operating systems. Whether you’re a developer, a power user, or simply someone who appreciates having complete control over your computing environment, Linux gives you the freedom to tailor your system precisely as you desire. From choosing the desktop environment to installing only the software packages you need, Linux empowers users to create a personalized and efficient computing experience. Embrace the power of customization with Linux and unlock a world of endless possibilities.
Compatible with many hardware devices
Linux Download: Compatible with Many Hardware Devices
When it comes to compatibility, Linux stands out as an operating system that effortlessly connects with a wide range of hardware devices. Unlike some proprietary systems that may have limited support, Linux enjoys extensive backing from hardware manufacturers, making it a breeze to connect printers, scanners, and various other peripherals to your computer.
One of the key advantages of Linux is its open-source nature, which encourages collaboration and fosters cooperation between developers and hardware manufacturers. This means that many companies actively develop drivers and provide support for their devices on the Linux platform. As a result, you can expect seamless integration between your Linux-powered system and a vast array of hardware options.
Whether you’re setting up a home office or working in an enterprise environment, having the ability to connect different devices to your computer is essential. With Linux, you can easily find compatible drivers for popular printers, scanners, webcams, graphics tablets, and more. This broad compatibility eliminates the frustration of searching for specific drivers or encountering compatibility issues that can hinder productivity.
Moreover, Linux’s compatibility extends beyond just mainstream devices. It also encompasses niche or specialized hardware used in fields such as scientific research or industrial automation. This versatility makes Linux an attractive choice for professionals who rely on specific hardware configurations tailored to their unique requirements.
To connect your hardware devices to a Linux system, simply plug them in and let the operating system do the rest. In most cases, Linux will automatically detect and configure the device without any additional steps required from you. If there are any specific settings or configurations needed for optimal performance, you can typically find comprehensive documentation online or seek assistance from the vibrant Linux community.
The wide-ranging compatibility of Linux not only simplifies device connectivity but also ensures long-term support for older hardware models. Unlike some proprietary systems that may drop support for older devices as newer models are released, Linux often continues to provide driver updates and compatibility improvements even years after a device’s release. This commitment to backward compatibility ensures that your hardware investments remain functional and supported for an extended period.
In conclusion, Linux’s compatibility with a vast array of hardware devices is a significant advantage that sets it apart from other operating systems. With extensive support from hardware manufacturers and a dedicated community of developers, Linux makes it easy to connect printers, scanners, and various peripherals to your computer without hassle. Embrace the power of Linux and enjoy seamless integration with your hardware devices, ensuring a smooth and productive computing experience.
Low resource usage
Linux Download: Low Resource Usage for Enhanced Efficiency
When it comes to operating systems, Linux stands out as a powerhouse in terms of efficiency and resource management. One significant advantage of downloading Linux is its low resource usage, which allows users to accomplish more with less power consumption and enjoy faster speeds compared to other operating systems like Windows.
Resource efficiency is crucial for several reasons. Firstly, it enables users to maximize the capabilities of their hardware without straining system performance. Linux’s lightweight design ensures that even older or less powerful machines can run smoothly, extending their lifespan and reducing the need for frequent hardware upgrades.
Furthermore, low resource usage translates into energy savings. With Linux, you can achieve more while consuming fewer resources, leading to reduced power consumption and lower electricity bills. This aspect not only benefits individual users but also contributes positively to environmental sustainability by minimizing energy waste.
The efficient use of resources also results in faster speeds and improved responsiveness. Linux’s streamlined architecture allows for swift execution of tasks, ensuring that your computer operates smoothly even when running multiple applications simultaneously. Whether you’re a developer compiling code or a professional working on resource-intensive projects, Linux’s low resource usage ensures that your system remains responsive and efficient.
In addition to these practical benefits, low resource usage enhances productivity by minimizing interruptions caused by sluggish performance or system freezes. With Linux, you can work seamlessly without experiencing frustrating delays or having your workflow disrupted by unnecessary background processes hogging system resources.
Linux achieves its low resource usage through several mechanisms. Firstly, its modular design enables users to install only the components they require, eliminating unnecessary bloatware that often accompanies other operating systems. This customization empowers users to tailor their Linux distribution precisely to their needs while optimizing resource allocation.
Additionally, Linux’s open-source nature fosters continuous improvement and optimization by a vast community of developers worldwide. They constantly refine the codebase and develop efficient algorithms that ensure minimal resource consumption without compromising functionality or security.
In conclusion, the low resource usage of Linux is a compelling reason to consider downloading this open-source operating system. By utilizing fewer resources, Linux allows you to achieve more with your existing hardware, reduces power consumption, boosts speed and responsiveness, and enhances overall productivity. Whether you’re a casual user or a professional seeking an efficient computing experience, Linux’s resource efficiency will undoubtedly elevate your computing journey. Experience the power of Linux download and unlock a world of enhanced efficiency and performance.
Reliable updates
Reliable Updates: Linux Keeps You Up to Date and Secure
When it comes to operating systems, regular updates are crucial for maintaining security, improving performance, and adding new features. While Windows often requires major overhauls every few years with its Service Packs or significant updates, Linux stands out for its reliable and seamless update process.
Unlike its Windows counterpart, Linux offers frequent updates that keep the system running smoothly and securely at all times. With Linux, you won’t have to wait years for a new version release to benefit from essential improvements. Instead, updates are regularly rolled out to address vulnerabilities, enhance functionality, and introduce exciting new features.
The beauty of Linux’s update system lies in its efficiency. Rather than relying on occasional large-scale updates that require extensive installation processes and potential disruptions to your workflow, Linux delivers smaller and more manageable updates on a consistent basis. This approach ensures that your system remains up to date without causing significant interruptions or inconveniences.
Moreover, Linux’s update mechanism is designed with security in mind. The dedicated community of developers behind the operating system works diligently to identify and patch vulnerabilities promptly. This means that you can trust that your Linux system is continuously fortified against emerging threats.
Linux also offers flexibility when it comes to choosing how you want to receive updates. Most distributions provide options for automatic or manual updates, allowing users to customize their preferences based on their specific needs and comfort level.
By offering reliable updates without the need for major overhauls or disruptive installations, Linux streamlines the process of keeping your system secure and up to date. With regular small-scale updates seamlessly integrated into your workflow, you can focus on what matters most without worrying about falling behind or compromising security.
So whether you’re a tech enthusiast or a business professional seeking stability and security in your operating system, Linux’s commitment to reliable updates ensures that you can enjoy a smooth computing experience while staying protected from potential threats.
Choose Linux for an operating system that prioritizes your security and keeps you up to date with regular, hassle-free updates. Embrace the power of a system that evolves with you, allowing you to focus on what you do best without the interruptions and frustrations associated with major overhauls. Experience the reliability of Linux updates and unlock a world of possibilities for your digital journey.
Open Source Community Support: Enhancing Your Linux Experience
One of the key advantages of downloading Linux is the unparalleled support provided by its vibrant open-source community. As an open-source project, Linux has fostered a global network of passionate individuals who are dedicated to helping users make the most out of their Linux experience. This community-driven support system offers a wealth of resources, tips, and troubleshooting assistance that can greatly enhance your journey with Linux.
Linux’s open-source nature encourages collaboration and knowledge-sharing among its users. This means that if you encounter any issues or have questions while using Linux, there is a vast pool of expertise available to assist you. Whether you’re a beginner seeking guidance or an experienced user looking for advanced tips and tricks, the Linux community is always ready to lend a helping hand.
The Linux community thrives on various platforms such as forums, mailing lists, social media channels, and dedicated websites. These platforms serve as virtual meeting places where users come together to share their knowledge and experiences. Here, you can find detailed tutorials, step-by-step guides, and insightful discussions on various aspects of Linux usage.
If you’re facing a specific problem or need troubleshooting assistance, reaching out to the community can be immensely beneficial. The collective expertise within the community ensures that someone has likely encountered a similar issue before and can provide guidance or solutions. By actively engaging with the community, you not only receive prompt assistance but also contribute to the collective knowledge base for future users.
The open-source ethos extends beyond mere technical support. It encompasses a culture of inclusivity and collaboration that encourages users to share their ideas, contribute code improvements, report bugs, and suggest new features. This collaborative spirit fosters innovation within the Linux ecosystem and ensures that the operating system continues to evolve based on user needs.
Furthermore, being part of an active open-source community allows you to connect with like-minded individuals who share your passion for technology and free software. Engaging in discussions, attending meetups or conferences, and participating in open-source projects can lead to valuable connections and opportunities for personal and professional growth.
In conclusion, the open-source community support is a significant advantage of downloading Linux. The wealth of knowledge, assistance, and camaraderie offered by the Linux community is unparalleled. By tapping into this vast network of experts and enthusiasts, you can enhance your Linux experience, overcome challenges with ease, and actively contribute to the growth of this remarkable open-source operating system. Embrace the power of community support and unlock the true potential of Linux today!
No licence fees required
No Licence Fees Required: Save Money with Linux Download
When it comes to operating systems, Linux stands out as a cost-effective choice that offers a multitude of benefits. One of the most significant advantages is that you don’t need to pay any licence fees when downloading Linux. This means that by opting for Linux, you can save a considerable amount of money compared to other operating systems that require costly licences.
Unlike proprietary operating systems such as Windows or macOS, which often come with substantial price tags, Linux is built on the principles of open-source software. This means that the source code is freely available for anyone to use, modify, and distribute. Consequently, there are no licensing fees associated with downloading and using Linux.
The absence of licence fees makes Linux an attractive option for individuals, businesses, educational institutions, and organizations of all sizes. Whether you’re a student looking for an affordable yet powerful operating system or a business aiming to reduce software costs, Linux provides an excellent solution.
By choosing Linux and avoiding licensing expenses, you can allocate your budget towards other essential areas. You have the freedom to invest in hardware upgrades, additional software tools or applications specific to your needs, or even contribute back to the open-source community by supporting projects that align with your interests.
Furthermore, the cost savings extend beyond initial acquisition expenses. With Linux’s exceptional stability and security features, you can potentially reduce long-term maintenance costs associated with frequent updates and security patches often required by proprietary systems.
In addition to saving money on licence fees, Linux also offers unparalleled flexibility and customizability. The open-source nature allows users to tailor their operating system precisely according to their requirements without any restrictions imposed by licensing agreements.
Whether you’re an individual user exploring new possibilities or an organization seeking cost-effective solutions without compromising performance and security standards, downloading Linux is a wise choice. Not only will you enjoy substantial savings in licence fees but also gain access to a vast ecosystem of open-source software and a supportive community.
So, take advantage of Linux’s no licence fee policy and embark on a journey towards a cost-effective, powerful, and customizable operating system. Discover the world of open-source software and join millions of users who have embraced Linux as their preferred choice, saving money while enjoying the freedom to innovate and explore.
It can be difficult to find the right version of Linux for your system due to the large number of versions available.
Navigating the Vast Sea of Linux Versions: Overcoming the Challenge of Finding the Right One
Linux, with its wide range of distributions or “distros,” offers users an incredible level of choice and flexibility. However, this abundance can sometimes be overwhelming, making it challenging to find the perfect version that suits your system’s needs. With countless options available, it’s important to approach the Linux download process with a bit of patience and research.
The Diverse World of Linux Distros
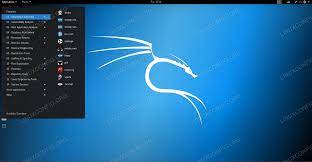
Linux distros come in various flavours, each catering to different user preferences and requirements. From beginner-friendly distros with user-friendly interfaces to advanced versions designed for specific purposes like server management or ethical hacking, there is a distro out there for everyone.
However, this diversity can make it difficult for newcomers to navigate the Linux landscape. Without proper guidance, finding the right version can feel like searching for a needle in a haystack.
Overcoming the Challenge
While it may seem daunting at first, there are several strategies you can employ to simplify your search for the perfect Linux distribution:
- Define Your Needs: Take some time to assess your requirements and preferences. Are you looking for a user-friendly interface? Do you need specific software packages or hardware compatibility? Understanding what you need from your operating system will help narrow down your options.
- Research and Compare: Visit reputable websites that provide information and comparisons on different Linux distros. These resources often highlight key features, target audiences, and system requirements, making it easier to identify potential matches for your needs.
- Seek Recommendations: Engage with the Linux community through forums or social media platforms dedicated to open-source enthusiasts. Seek advice from experienced users who can suggest distros based on their own experiences or similar use cases.
- Try Live Versions: Many Linux distros offer “live” versions that allow you to boot from a USB drive or DVD without installing anything on your system. This enables you to test the distro’s interface, functionality, and compatibility with your hardware before committing to a full installation.
- Start with Popular Distros: If you’re unsure where to begin, consider starting with well-established and widely used distros like Ubuntu or Linux Mint. These distros often have extensive documentation, user-friendly interfaces, and strong community support.
Remember, finding the right Linux version may require some trial and error. Don’t be discouraged if your first choice doesn’t meet your expectations; the beauty of Linux is that you can always explore other options until you find the perfect fit.
Embrace the Adventure
While it’s true that the vast number of Linux versions can pose a challenge for newcomers, it’s important to view this as an opportunity for exploration and discovery. Each distro brings its own unique strengths and features to the table, allowing users to tailor their operating system precisely to their needs.
By approaching the Linux download process with patience, research, and a willingness to experiment, you’ll soon find yourself immersed in a world of open-source possibilities. So embrace the adventure and dive into the diverse sea of Linux distros — your perfect match is waiting to be discovered!
Many users report that they experience slow download speeds when downloading Linux files.
Addressing Slow Download Speeds: Overcoming a Common Challenge in Linux Downloads
While Linux is renowned for its numerous benefits, like any other operating system, it is not without its challenges. One of the common issues reported by users is slow download speeds when downloading Linux files. While this can be frustrating, there are steps you can take to overcome this hurdle and ensure a smoother downloading experience.
Understanding the Causes
Several factors can contribute to slow download speeds when obtaining Linux files. Let’s explore some of the common causes:
Network Congestion: Heavy network traffic or congestion can significantly impact download speeds. This can occur during peak usage hours or if multiple users on your network are simultaneously downloading large files.
Server Load: The server from which you’re downloading Linux files may experience high demand, resulting in slower response times and reduced download speeds.
Geographical Location: Your physical location in relation to the server hosting the files can affect download speeds due to latency and distance-related issues.
Internet Service Provider (ISP) Limitations: Some ISPs may impose throttling or bandwidth limitations that could impact your download speeds.
Overcoming Slow Download Speeds
Fortunately, there are several strategies you can employ to mitigate slow download speeds:
Choose Alternative Mirrors: Many popular Linux distributions offer multiple mirrors from which you can choose to download their files. Experiment with different mirrors to find one that provides better download speeds for your location.
Use Torrents: Some Linux distributions offer torrent downloads as an alternative method. Torrents utilize peer-to-peer technology, allowing users to share the burden of file distribution and potentially achieve faster download speeds.
Download During Off-Peak Hours: Try scheduling your downloads during off-peak hours when network congestion is likely to be lower. This may result in improved speeds due to reduced competition for bandwidth.
Utilize Download Managers: Download managers are tools specifically designed to optimize the downloading process. They can help improve download speeds by splitting files into smaller segments and utilizing multiple connections simultaneously.
Check Your Internet Connection: Ensure that your internet connection is stable and functioning optimally. Troubleshoot any issues with your router, modem, or network configuration to eliminate potential bottlenecks.
Contact Your ISP: If you consistently experience slow download speeds despite trying various solutions, it may be worth contacting your ISP to inquire about any potential limitations or issues on their end.
Conclusion
While slow download speeds can be a frustrating con when downloading Linux files, there are practical steps you can take to improve the situation. By experimenting with different mirrors, utilizing torrents, scheduling downloads during off-peak hours, using download managers, ensuring a stable internet connection, and reaching out to your ISP if necessary, you can overcome this challenge and enjoy a smoother Linux downloading experience.
Remember that the benefits of Linux far outweigh this temporary setback. With its open-source nature and vast community support, Linux continues to empower users worldwide with its flexibility, security, and endless possibilities for customization and innovation.
Some Linux distributions may not work with certain hardware or software, so compatibility issues may arise.
Navigating Compatibility: Addressing Potential Hurdles in Linux Downloads
Linux, the renowned open-source operating system, has garnered a reputation for its flexibility, stability, and security. However, like any software, it’s not without its challenges. One potential hurdle that users may encounter when downloading Linux is compatibility issues with certain hardware or software.
While Linux boasts impressive hardware compatibility overall, there are instances where specific distributions may not work seamlessly with certain devices. This can lead to frustrations for users who find their hardware components unsupported or not functioning optimally. It’s important to note that this issue primarily arises from the vast array of hardware configurations available in the market.
Similarly, compatibility issues can also arise when attempting to run certain proprietary software on Linux. Some software developers primarily focus on creating products for more widely used operating systems such as Windows or macOS, resulting in limited support or availability for Linux users. However, it’s worth mentioning that the open-source community continuously works towards developing alternative solutions and encouraging software developers to embrace cross-platform compatibility.
To mitigate these potential challenges, it is crucial to research and select a Linux distribution that aligns with your specific hardware requirements. Many popular distributions provide comprehensive lists of supported devices and offer forums where users can seek assistance from the community regarding compatibility concerns.
Additionally, exploring alternative open-source software options can help overcome limitations associated with proprietary applications. The Linux ecosystem offers a vast range of powerful alternatives across various domains such as office suites, graphic design tools, video editors, and more.
Furthermore, engaging with the Linux community can prove invaluable when navigating compatibility hurdles. Online forums and dedicated support channels provide opportunities to seek advice from experienced users who may have encountered similar issues before. The collaborative nature of the community often leads to creative workarounds and solutions.
It’s important to approach compatibility challenges in a pragmatic manner while keeping in mind the inherent advantages offered by Linux. The open-source philosophy encourages innovation and collaboration among developers, resulting in continuous improvements and expanded compatibility over time.
In conclusion, while compatibility issues may occasionally arise when downloading Linux, they can be addressed through thorough research, community engagement, and exploring alternative software options. By understanding the potential hurdles and leveraging the vast resources available within the Linux community, users can overcome these challenges and fully embrace the power of open-source technology.
Installing Linux can be a complex process, and it may require some technical knowledge in order to get it working properly on your system.
Navigating the Complexity: Installing Linux and the Need for Technical Know-How
Linux, the versatile open-source operating system, has gained immense popularity for its flexibility, security, and customizability. However, it’s important to acknowledge that installing Linux can sometimes be a complex process that may require a certain level of technical knowledge. While this can be seen as a con for some users, it’s essential to understand the reasons behind it and how to overcome any potential challenges.
Compared to commercial operating systems like Windows or macOS, Linux offers a wide range of distributions with different installation methods and configurations. This diversity allows users to choose an option that best suits their needs, but it also means that the installation process can vary significantly between distributions.
For newcomers or users without prior experience with Linux, this complexity can be intimidating. Understanding partitioning schemes, selecting appropriate drivers, configuring hardware settings, and troubleshooting potential issues may seem daunting at first. However, it’s important to note that there are resources available to help simplify the installation process.
Firstly, many Linux distributions provide user-friendly installers with graphical interfaces that guide users through each step of the installation process. These installers often include automated partitioning tools and driver management systems to simplify setup on a wide range of hardware configurations.
Additionally, numerous online communities and forums dedicated to Linux offer extensive documentation and step-by-step guides tailored for beginners. These resources provide valuable insights into common installation issues and troubleshooting techniques. Engaging with these communities can help users overcome any technical hurdles they may encounter during the installation process.
Furthermore, various distribution-specific forums or chat channels allow users to seek assistance from experienced community members who are eager to help newcomers get started with Linux. Don’t hesitate to ask questions or share concerns; these communities thrive on collaboration and support.
While installing Linux may require some technical knowledge initially, it’s important to remember that this learning curve is an investment in gaining control over your computing experience. Once Linux is successfully installed, you’ll have access to a vast array of open-source software, powerful development tools, and a supportive community that can help you explore and customize your system to fit your needs.
In conclusion, while the complexity of installing Linux may pose a challenge for some users, it’s important to approach it with an open mind and a willingness to learn. With the wealth of resources available and the support of the Linux community, even those with limited technical knowledge can successfully install and enjoy the benefits of this remarkable operating system. Embrace the opportunity to expand your skills and embark on a journey into the world of open-source computing with Linux.
There is no guarantee that all applications will work on a particular version of Linux, so you may need to experiment with different versions in order to find one that works for you.
Exploring Linux: The Challenge of Application Compatibility
Linux, the renowned open-source operating system, offers a multitude of benefits, from its flexibility and security to its vibrant community. However, like any platform, Linux has its own set of challenges. One such challenge is the compatibility of applications across different versions of the operating system.
Unlike proprietary operating systems that have strict compatibility standards, Linux distributions vary in their software libraries and configurations. This means that there is no guarantee that all applications will work seamlessly on a particular version of Linux. As a result, users may need to experiment with different distributions or versions to find one that suits their needs.
This lack of universal application compatibility can be frustrating for users who rely heavily on specific software or have unique requirements. It may require investing time and effort into testing various distributions or seeking alternative software solutions. However, it’s important to note that this challenge is not exclusive to Linux but also exists in other operating systems to some extent.
The diverse nature of the Linux ecosystem also contributes to this challenge. With numerous distributions available, each with its own package management system and software repositories, ensuring application compatibility across the board becomes a complex task. Developers often focus their efforts on specific distributions or prioritize certain software packages over others due to limited resources.
However, despite these challenges, the Linux community actively works towards improving application compatibility. Many popular applications are readily available for major distributions like Ubuntu or Fedora. Additionally, efforts such as containerization technologies like Docker have made it easier to package and deploy applications across multiple Linux distributions.
To navigate this con effectively, it’s advisable for users to research and choose a distribution based on their specific application requirements. Community support forums and documentation can provide valuable insights into which distributions are more likely to support particular applications.
Furthermore, exploring alternative open-source applications can sometimes provide viable solutions when compatibility issues arise. The vast array of open-source software available for Linux ensures that there are often multiple options to choose from, allowing users to find alternatives that work seamlessly on their chosen distribution.
In conclusion, while it is true that Linux may present challenges when it comes to application compatibility, these challenges are not insurmountable. With careful research, experimentation, and the support of the Linux community, users can find distributions or alternative software solutions that meet their needs. Embracing the open-source philosophy of adaptability and collaboration allows users to leverage the power of Linux while finding workarounds for any compatibility hurdles they may encounter.
Security vulnerabilities are more common in open-source software like Linux, which means that malicious actors may target your system if you don’t keep up with security updates regularly
The Importance of Regular Security Updates in Linux
Linux, the renowned open-source operating system, has garnered a reputation for its robustness, flexibility, and security. However, like any software, it is not immune to vulnerabilities. While the open-source nature of Linux allows for rapid identification and patching of security flaws, it also means that malicious actors may target systems if regular security updates are neglected.
One of the key advantages of open-source software is the active community that constantly scrutinizes the code for vulnerabilities. This collaborative effort ensures that any security issues are swiftly identified and addressed. However, this also means that once a vulnerability is discovered, it becomes public knowledge. Malicious actors can then exploit these vulnerabilities to gain unauthorized access or disrupt systems.
To mitigate this risk, it is crucial to keep up with regular security updates provided by your chosen Linux distribution. These updates often include patches and fixes for known vulnerabilities, strengthening the overall security of your system. Neglecting these updates can leave your system exposed to potential threats.
Fortunately, most Linux distributions offer automated update mechanisms that make staying up-to-date relatively effortless. By enabling automatic updates or regularly checking for updates manually, you can ensure that your system remains protected against emerging security risks.
Additionally, adopting good security practices is equally important when using Linux or any other operating system. This includes using strong passwords, implementing proper firewall configurations, exercising caution when downloading software from untrusted sources, and regularly backing up important data.
Furthermore, actively participating in the Linux community can provide valuable insights into emerging threats and best practices for securing your system. Engaging in forums and following trusted sources dedicated to Linux security can help you stay informed about potential risks and proactive measures you can take to enhance your system’s security.
While it is true that open-source software like Linux may attract more attention from malicious actors due to its widespread use and transparent codebase, this does not necessarily mean it is inherently less secure. On the contrary, the active community and frequent security updates contribute to Linux’s overall robustness. By diligently keeping up with security updates and adhering to best practices, you can maintain a secure Linux environment.
In conclusion, regular security updates are crucial for maintaining the integrity and security of your Linux system. By promptly installing patches and fixes provided by your distribution, you can effectively mitigate potential risks and ensure that your system remains protected against evolving threats. Embrace the power of open-source while prioritizing security to fully enjoy the benefits that Linux has to offer.