rpmlinux.org

Loading

linux installer

Streamlining the Linux Experience: Unleashing the Power of the Linux Installer

The Power of Linux Installer: Simplifying the Operating System Setup

When it comes to installing an operating system, the process can often be intimidating and time-consuming. However, Linux, with its powerful and user-friendly installer, has revolutionized this experience by simplifying the setup process and making it accessible to users of all levels of expertise.

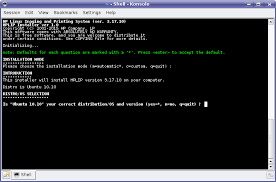
Linux installer, often referred to as a distribution’s installation wizard or setup utility, is designed to guide users through the installation process step-by-step. It provides a graphical interface that eliminates the need for complex command-line instructions, making it easier for both beginners and experienced users to get their operating system up and running quickly.

One of the key advantages of a Linux installer is its flexibility. With various distributions available, each tailored to different needs and preferences, users have the freedom to choose an installer that aligns with their requirements. Whether you are a developer seeking a lightweight distribution or a creative professional looking for multimedia-focused features, there is an installer out there that caters to your specific needs.

The Linux installer offers a range of options during the installation process. Users can customize their system by selecting software packages they want to install or omitting those they don’t need. This flexibility allows for a more streamlined installation, ensuring that users have only what they require on their system from the start.

Moreover, Linux installers often provide advanced partitioning tools that allow users to allocate disk space efficiently. This feature enables users to create separate partitions for their root directory (/), home directory (/home), and swap space (used for virtual memory). By managing partitions effectively, users can optimize system performance and ensure data safety.

Another noteworthy aspect of Linux installers is their focus on security. During the installation process, users are prompted to set up strong passwords and configure firewall settings. This emphasis on security ensures that your newly installed operating system is protected right from the start.

Furthermore, Linux installers offer comprehensive hardware detection, making it easier for users to install Linux on a wide range of hardware configurations. Whether you are using a desktop computer, laptop, or even a Raspberry Pi, Linux installers can identify and configure the necessary drivers to ensure seamless compatibility.

For those who prefer a more hands-on approach, Linux installers also provide an advanced mode that allows users to dive deeper into the installation process. This mode offers additional options such as disk encryption, network configuration, and software RAID setup. Advanced users can take full control over their system’s setup while still benefiting from the installer’s user-friendly interface.

In conclusion, the Linux installer has transformed the process of setting up an operating system by simplifying it and making it accessible to users of all skill levels. Its flexibility, customization options, security features, and hardware detection capabilities make it a powerful tool for anyone looking to explore the world of Linux. So whether you are a novice or an experienced user, embrace the power of Linux installer and experience the simplicity and versatility it brings to your operating system setup.


8 Essential Tips for Installing Linux

  1. Choose the right distribution
  2. Verify system requirements
  3. Back up your data
  4. Create a bootable USB or DVD
  5. Test it out with Live mode
  6. Partitioning correctly
  7. Set up user accounts and passwords
  8. Post-installation updates

Choose the right distribution

Choosing the Right Distribution: A Key Tip for Linux Installers

When it comes to installing Linux, one crucial tip that can greatly impact your experience is choosing the right distribution. With a wide range of distributions available, each catering to different needs and preferences, selecting the one that aligns with your requirements is essential for a successful installation.

The beauty of Linux lies in its diversity. Whether you are a developer, a student, or a casual user, there is a distribution out there designed specifically for you. Each distribution offers its own unique set of features, software packages, and user interfaces, allowing you to tailor your Linux experience to suit your needs.

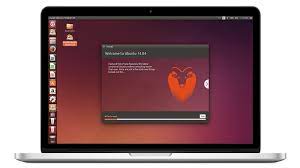
For beginners or those transitioning from other operating systems, user-friendly distributions like Ubuntu or Linux Mint are excellent choices. These distributions provide intuitive interfaces and comprehensive documentation, making it easier for newcomers to get started with Linux.

If you are more experienced or have specific requirements such as lightweight systems or advanced customization options, distributions like Arch Linux or Gentoo may be more suitable. These distributions offer more flexibility and control over your system but require a higher level of technical knowledge during the installation process.

Consider what you plan to use your Linux system for. If you are looking for a stable and reliable platform for servers or enterprise environments, distributions like CentOS or Debian may be ideal due to their strong focus on security and long-term support.

For multimedia enthusiasts or creative professionals, distributions such as Fedora or openSUSE provide excellent multimedia capabilities and extensive software repositories tailored to these needs.

It’s also worth considering the community support and documentation available for each distribution. Robust communities can offer valuable assistance when troubleshooting issues or seeking advice. Checking forums and online resources specific to your chosen distribution can provide insights into its popularity and level of community engagement.

Finally, don’t be afraid to experiment! Many distributions offer live environments that allow you to test them out before committing to an installation. Take advantage of this feature to get a feel for the distribution, explore its software offerings, and ensure compatibility with your hardware.

In summary, choosing the right distribution is a key tip for Linux installers. By considering your needs, preferences, and level of expertise, you can select a distribution that will provide the best possible experience. Remember to research available options, explore their features and communities, and even test them out before making your final decision. With the right distribution in hand, you’ll be well on your way to enjoying the power and flexibility of Linux.

Verify system requirements

The Importance of Verifying System Requirements When Installing Linux

When it comes to installing Linux, one crucial step that should never be overlooked is verifying the system requirements. Ensuring that your hardware meets the necessary specifications is essential for a smooth installation process and optimal performance of your operating system.

Linux distributions come in various flavors, each with its own set of hardware requirements. These requirements typically include specifications such as processor speed, RAM capacity, disk space, and graphics capabilities. By checking these requirements before installation, you can avoid potential issues and ensure that your system is capable of running the chosen distribution.

Verifying system requirements is relatively straightforward. Most Linux distributions provide detailed documentation on their official websites or within their installation guides. These resources outline the minimum and recommended hardware specifications for a successful installation.

When checking system requirements, pay close attention to factors such as processor architecture (32-bit or 64-bit), minimum RAM capacity, available disk space, and any specific graphics card requirements. It’s important to note that while meeting the minimum requirements may allow you to install Linux, it may not provide an optimal experience. If possible, aim for hardware that meets or exceeds the recommended specifications for better performance.

By verifying system requirements beforehand, you can avoid encountering issues such as slow performance, crashes, or compatibility problems during or after installation. Failing to meet the minimum requirements can result in a frustrating experience and may require additional troubleshooting or upgrading your hardware.

Additionally, verifying system requirements allows you to plan ahead and make informed decisions about which Linux distribution is best suited for your hardware. Some distributions are specifically designed for older or low-resource systems, while others are optimized for high-performance machines. By understanding your hardware limitations upfront, you can choose a distribution that aligns perfectly with your needs.

It’s worth noting that even if your current hardware doesn’t meet the recommended specifications for a particular distribution, there are lightweight alternatives available that can still provide a satisfactory Linux experience. These lightweight distributions are designed to run efficiently on older or less powerful hardware, allowing you to enjoy the benefits of Linux without needing to invest in new equipment.

In conclusion, verifying system requirements is an essential step when installing Linux. By ensuring that your hardware meets the necessary specifications, you can avoid potential issues and ensure a smooth installation process. Take the time to research and understand the requirements of your chosen distribution, and if needed, consider lightweight alternatives for older or less powerful systems. With proper verification of system requirements, you’ll be on your way to a successful Linux installation that meets your computing needs.

Back up your data

Essential Tip for Linux Installer: Back Up Your Data

When it comes to installing a new operating system using a Linux installer, one crucial tip that cannot be stressed enough is to back up your data beforehand. While the installation process is generally smooth and reliable, unforeseen circumstances can occur, potentially leading to data loss. By taking the time to back up your important files and documents, you can ensure that your valuable information remains safe and secure throughout the installation process.

Why should you back up your data? Well, installing a new operating system involves making changes to your computer’s storage drive. Although modern installers are designed to minimize the risk of data loss, there is always a small chance that something could go wrong during the process. It could be an unexpected power outage, a hardware malfunction, or even an accidental click of the wrong button.

By creating a backup of your important files and documents before proceeding with the installation, you are essentially creating a safety net. This backup will act as an insurance policy against any potential mishaps during the installation process. Should anything unexpected happen, you can simply restore your backed-up data and continue where you left off without losing any valuable information.

So how can you back up your data effectively? There are several methods available depending on your preferences and needs. One common approach is to use an external storage device such as an external hard drive or USB flash drive. Simply copy all relevant files onto this external device and keep it in a safe place until the installation is complete. Cloud storage services also offer convenient options for backing up your data online, allowing you to access it from anywhere with an internet connection.

It’s important to note that backing up your data doesn’t have to be a complicated or time-consuming task. Most Linux distributions provide user-friendly tools that simplify the backup process by offering automated backup solutions or step-by-step instructions for manual backups. Take advantage of these resources to make the backup process as smooth and hassle-free as possible.

In summary, before embarking on the Linux installation journey, remember to prioritize the safety of your data by backing it up. This simple yet crucial step can save you from potential headaches and frustrations in case of any unexpected events during the installation process. By taking a few minutes to back up your important files, you can ensure that your data remains intact and secure, allowing you to proceed with confidence and peace of mind as you explore the world of Linux.

Create a bootable USB or DVD

Create a Bootable USB or DVD: A Handy Tip for Linux Installers

When it comes to installing Linux on your computer, having a bootable USB or DVD can be an absolute game-changer. This handy tip allows you to easily install your preferred Linux distribution on any compatible system without the need for a physical installation medium like CDs or DVDs.

Creating a bootable USB or DVD is a straightforward process that offers several advantages. Firstly, it provides the flexibility to install Linux on multiple devices without the hassle of burning multiple discs. Whether you want to try out different distributions or install Linux on various computers, having a bootable USB or DVD makes the process much more convenient.

To create a bootable USB, all you need is a blank USB drive with sufficient storage capacity and the ISO file of your chosen Linux distribution. There are various tools available, both command-line and graphical, that can assist you in creating the bootable USB. Simply follow the instructions provided by your chosen tool, and within minutes, you will have a portable installation medium ready to go.

Similarly, if you prefer using DVDs, you can burn the ISO file onto a blank DVD using burning software such as Brasero or K3b. This method allows you to have an easily accessible installation medium that can be used whenever needed.

The beauty of having a bootable USB or DVD lies in its versatility. Not only does it allow you to install Linux on different computers at your convenience, but it also serves as a valuable tool for troubleshooting and system recovery. In case of any issues with your operating system, having a bootable USB or DVD enables you to access recovery options and perform necessary repairs.

Additionally, creating a bootable USB or DVD ensures that you always have an up-to-date installation medium at hand. As Linux distributions release updates regularly, using an outdated installation disc may result in missing out on important security patches and new features. By creating a bootable USB or DVD, you can easily update it with the latest ISO file, guaranteeing a fresh and secure installation every time.

In conclusion, creating a bootable USB or DVD is a simple yet powerful tip for Linux installers. It offers flexibility, convenience, and the ability to troubleshoot and recover your system when needed. So, next time you embark on a Linux installation journey or want to explore different distributions, remember to create a bootable USB or DVD. It will undoubtedly make your Linux installation experience smoother and more efficient.

Test it out with Live mode

Unlock the Full Potential of Linux Installer: Test it Out with Live Mode

If you’re considering installing Linux as your operating system, there’s a handy tip that can enhance your experience and ensure a smooth transition. Before committing to the installation process, take advantage of the Live mode feature offered by many Linux installers.

Live mode allows you to run the Linux operating system directly from a USB drive or DVD without making any changes to your existing system. This means you can explore and test out Linux’s capabilities, features, and user interface before making a permanent switch. It’s like taking a test drive before purchasing a car!

By booting into Live mode, you get a glimpse of what it feels like to use Linux on your hardware without any installation hassle. You can experiment with different distributions and desktop environments, such as Ubuntu, Fedora, or Linux Mint, and see which one resonates with you the most.

During this trial run, you can evaluate how well Linux performs on your computer or laptop. Pay attention to aspects like system responsiveness, application compatibility, and hardware recognition. This is particularly useful if you have specific hardware requirements or if you rely heavily on certain software applications for work or hobbies.

Live mode also allows you to test out various pre-installed applications that come bundled with the distribution. You can explore productivity tools, multimedia software, development environments, and more. This hands-on experience helps you gauge whether Linux offers everything you need for your daily tasks.

Additionally, Live mode gives you an opportunity to ensure that all your peripherals are recognized and function properly with Linux. Test out printers, scanners, webcams, and other devices to ensure seamless integration into your workflow.

Furthermore, Live mode provides an excellent opportunity for those new to Linux to familiarize themselves with its interface and navigation. Take the time to explore menus, customize settings, and try out different applications in order to gain confidence in using this powerful open-source operating system.

Once you’re satisfied with your experience in Live mode and feel confident about making the switch, you can then proceed with the installation process. Most Linux installers conveniently offer an option to launch the installer directly from the Live mode environment, making the transition smooth and effortless.

So, before taking the plunge and installing Linux as your primary operating system, remember to utilize Live mode to test it out. This invaluable feature allows you to explore Linux’s capabilities, evaluate hardware compatibility, and get a feel for its user interface. With Live mode, you can make an informed decision and embark on your Linux journey with confidence.

Partitioning correctly

The Importance of Partitioning Correctly: A Crucial Tip for Linux Installers

When it comes to installing Linux, one crucial aspect that often gets overlooked is partitioning. Properly partitioning your hard drive during the installation process can significantly impact the performance, organization, and security of your operating system. Understanding the importance of partitioning correctly is a valuable tip for Linux installers.

Partitioning involves dividing your hard drive into separate sections, or partitions, each serving a specific purpose. Here are a few reasons why partitioning correctly is essential:

  1. System Performance: By allocating different partitions for the root directory (/), home directory (/home), and swap space, you can optimize system performance. The root directory contains essential system files, while the home directory stores user data and personal files. Separating these directories allows for better organization and prevents one from affecting the other in case of errors or crashes. Additionally, having dedicated swap space improves system responsiveness by providing virtual memory when physical RAM becomes limited.
  2. Data Safety: Partitioning helps safeguard your data by isolating it from potential issues or system failures. If a particular partition becomes corrupted or needs reformatting, only the data within that partition is affected while other partitions remain intact. This separation reduces the risk of losing all your data in case of unforeseen circumstances.
  3. Multiboot Environments: If you plan to have multiple operating systems on your computer (such as dual-booting with Windows), proper partitioning allows for seamless coexistence between different systems. Each operating system can have its own dedicated partition, ensuring they do not interfere with one another.
  4. System Upgrades and Backups: When it comes time to upgrade your Linux distribution or perform backups, having separate partitions makes these processes more manageable and less risky. Upgrading becomes as simple as reinstalling the root directory without affecting user data in the home directory.

To ensure you are partitioning correctly, consider the following tips:

a. Plan Ahead: Before starting the installation process, think about how you want to structure your partitions. Consider the size requirements of each partition and how you intend to use your system.

b. Separate System and User Data: Allocate a sufficient amount of space for both the root directory (/) and the home directory (/home). This separation allows for easier maintenance and prevents user data from affecting system files.

c. Create a Swap Partition: While modern systems with ample RAM may not heavily rely on swap space, it is still recommended to allocate a small partition for it. This provides an extra safety net when memory usage peaks.

d. Backup Important Data: Before partitioning or making any changes to your hard drive, ensure you have backups of all important data. Mistakes can happen, and having a backup ensures you can recover your files if needed.

e. Research File System Options: Linux offers various file systems like ext4, XFS, or Btrfs. Research their features and choose one that best suits your needs in terms of performance, reliability, and compatibility.

Remember, partitioning correctly is an investment in the stability and efficiency of your Linux installation. Take the time to plan ahead, understand your requirements, and make informed decisions during the installation process. By doing so, you’ll create a well-organized system that performs optimally while keeping your data safe and secure.

Set up user accounts and passwords

Setting Up User Accounts and Passwords: Enhancing Security with Linux Installer

One of the fundamental steps in securing your Linux system is setting up user accounts and passwords during the installation process. Linux installers provide a straightforward and efficient way to create user accounts, ensuring that your system remains protected from unauthorized access.

During the installation, the Linux installer prompts you to create a primary user account. This account will have administrative privileges, allowing you to perform system-level tasks such as installing software or modifying system settings. It is crucial to choose a strong username for this account, preferably one that is unique and not easily guessable.

Next, you will be prompted to set up a password for your primary user account. It is essential to choose a strong and secure password that combines uppercase and lowercase letters, numbers, and special characters. Avoid using common words or easily guessable combinations. A strong password adds an extra layer of protection against potential intruders.

Linux installers also allow you to create additional user accounts during the setup process. These accounts can be used for other individuals who will be using the system. Each user account should have its unique username and password, ensuring that every person accessing the system has their own credentials.

Creating separate user accounts has several benefits. Firstly, it allows for better accountability as each action performed on the system can be attributed to a specific user. Secondly, it limits access privileges for individual users, preventing accidental modifications or deletions of critical files or settings. Lastly, in case of any security breaches or compromised accounts, having separate user accounts minimizes the impact on other users’ data and settings.

It’s worth noting that some Linux distributions offer additional security features during the account setup process. For example, they may prompt you to enable automatic login or require users to enter their passwords when performing administrative tasks (known as “sudo” authentication). These options further enhance security by adding an extra layer of authentication for critical operations.

Remember, setting up user accounts and strong passwords is just the first step. Regularly updating and changing passwords is crucial to maintaining system security. Additionally, educating users about best practices for password management, such as not sharing passwords and avoiding reuse across multiple accounts, is essential for maintaining a secure Linux environment.

By taking advantage of the user account and password setup options provided by Linux installers, you can significantly enhance the security of your system from the very beginning. These simple yet powerful measures help protect your data, maintain privacy, and safeguard against potential threats. So when installing Linux on your system, don’t overlook the importance of setting up user accounts and passwords – it’s a vital step towards a secure computing experience.

Post-installation updates

Maximizing Your Linux Experience: The Importance of Post-Installation Updates

Congratulations! You’ve successfully installed Linux using a user-friendly installer, and now you’re ready to embark on your open-source journey. But before you dive into exploring the vast possibilities of this powerful operating system, there’s one crucial step you shouldn’t overlook – post-installation updates.

Post-installation updates are essential for ensuring that your Linux distribution remains secure, stable, and up to date with the latest features and improvements. Here’s why they matter:

Security Enhancements: Cyber threats are constantly evolving, and developers work diligently to patch vulnerabilities and strengthen the security of your Linux distribution. By regularly updating your system, you benefit from these security enhancements, reducing the risk of potential attacks and keeping your data safe.

Bug Fixes: No software is perfect, including Linux distributions. Post-installation updates often include bug fixes that address issues discovered after the initial release. These fixes can improve system stability, performance, and compatibility with various hardware configurations.

New Features and Functionality: Linux is a dynamic ecosystem that continually evolves with new features and functionality being introduced regularly. By staying up to date with post-installation updates, you gain access to these exciting additions that can enhance your overall experience and productivity.

So how do you ensure that you’re taking full advantage of post-installation updates? Here are a few simple steps:

Update Regularly: Set aside some time each week or month (depending on your preference) to check for updates and apply them to your system. Most Linux distributions provide an update manager or command-line tools like ‘apt’ or ‘yum’ that make this process straightforward.

Enable Automatic Updates: If you prefer a more hands-off approach, many distributions offer the option to enable automatic updates. This ensures that critical security patches and important updates are installed without requiring manual intervention.

Stay Informed: Keep an eye on the release notes or announcements from your distribution’s community or developers. These resources often provide valuable information about new features, bug fixes, and security updates. By staying informed, you can better understand the benefits of each update and make informed decisions about when and how to install them.

Remember, post-installation updates are not just a chore but an essential part of maintaining a secure and optimized Linux system. Embrace the habit of regularly updating your distribution to make the most out of your Linux experience.

So, as you embark on your open-source journey, don’t forget to prioritize post-installation updates. By doing so, you’ll ensure that your Linux distribution remains at its best – secure, stable, and equipped with the latest features for a truly exceptional computing experience.

installing linux

Unleashing Open-Source Freedom: A Beginner’s Guide to Installing Linux

Installing Linux: A Beginner’s Guide to Open-Source Freedom

Linux, the renowned open-source operating system, offers users a world of freedom, flexibility, and customization. If you’re new to Linux and eager to explore this exciting alternative to proprietary software, this beginner’s guide will walk you through the process of installing Linux on your computer.

Step 1: Choosing a Linux Distribution

The first step in installing Linux is selecting a distribution (commonly referred to as a distro). There are numerous options available, each with its own unique features and target audience. Popular choices include Ubuntu, Fedora, Debian, and Linux Mint. Consider factors such as ease of use, community support, and compatibility with your hardware when making your selection.

Step 2: Preparing Your Computer

Before diving into the installation process, it’s crucial to back up any important data on your computer. While the installation itself generally doesn’t affect existing files or partitions, it’s always better to be safe than sorry.

Next, ensure that your computer meets the minimum system requirements for the chosen Linux distribution. These requirements can usually be found on the official website of the distribution you’ve selected.

Step 3: Creating Installation Media

Once you’ve chosen a distribution and verified your computer’s compatibility, it’s time to create installation media. Most distributions offer ISO files that can be burned onto a DVD or written onto a USB flash drive using specialized software like Rufus or Etcher.

Follow the instructions provided by the distribution’s website or documentation for creating bootable media specific to your operating system (Windows/macOS/Linux).

Step 4: Booting from Installation Media

With your bootable media ready, restart your computer and enter its BIOS/UEFI settings by pressing a specific key during startup (commonly Del or F12). In the BIOS/UEFI settings menu, change the boot order so that your installation media (DVD/USB) is at the top.

Save your changes and exit the BIOS/UEFI settings. Your computer will now boot from the installation media you created.

Step 5: Installing Linux

Once your computer boots from the installation media, you’ll be presented with a graphical or text-based installer. Follow the on-screen instructions to choose your language, keyboard layout, and other basic settings.

The installer will then guide you through partitioning your hard drive. You can choose to install Linux alongside an existing operating system or wipe your hard drive completely for a fresh installation. Take care during this step to avoid accidentally deleting important data.

After partitioning, select the installation location and configure any additional settings as prompted by the installer. These may include creating a user account, setting up network connections, and selecting software packages to install.

Step 6: Completing the Installation

Once you’ve configured all necessary settings, proceed with the installation. The process may take some time depending on your hardware and chosen distribution.

After completion, restart your computer and remove the installation media when prompted. Your system should now boot into Linux, presenting you with a login screen where you can enter your username and password.

Congratulations! You’ve successfully installed Linux on your computer. Take some time to explore the new operating system, customize it to suit your preferences, and discover its vast array of free and open-source software available for download.

Remember that learning Linux is an ongoing journey filled with exciting possibilities. The open-source community is always ready to assist you through forums, documentation, and online resources as you embark on this new chapter of open-source freedom.

Enjoy your Linux experience!


Commonly Asked Questions about Installing Linux

  1. Can I run Linux on Windows?
  2. What are the requirements for installing Linux?
  3. Which Linux is best for beginners?
  4. Which Linux should I install?

Can I run Linux on Windows?

Yes, it is possible to run Linux on a Windows computer. There are a few different methods to achieve this:

  1. Dual Boot: With this method, you can install Linux alongside Windows on your computer, allowing you to choose which operating system to boot into when you start your computer. During the installation process, you will be prompted to create partitions on your hard drive for both Windows and Linux. This way, each operating system has its own dedicated space. When you start your computer, you can select either Windows or Linux from a boot menu.
  2. Virtualization: Another option is to use virtualization software such as Oracle VM VirtualBox or VMware Workstation Player. These programs allow you to create a virtual machine (VM) within your Windows operating system and then install Linux onto that virtual machine. This allows you to run Linux as a guest operating system within Windows, providing a sandboxed environment for experimentation without affecting your main Windows installation.
  3. WSL (Windows Subsystem for Linux): If you are using Windows 10 (version 1607 or later), Microsoft provides the WSL feature that allows running a full-fledged Linux distribution directly within Windows without the need for virtualization or dual booting. WSL provides a compatibility layer that enables running native Linux binaries on Windows. You can install various Linux distributions from the Microsoft Store and access them through the command line interface.

Each method has its own advantages and considerations, so it’s important to choose the one that best suits your needs and technical proficiency.

Remember that running Linux alongside or within Windows requires sufficient hardware resources and may have specific compatibility requirements depending on the chosen method. It’s always recommended to check the official documentation of the specific method or software you plan to use for detailed instructions and system requirements.

By running Linux on your Windows computer, you can enjoy the benefits of both operating systems and explore the open-source world while maintaining access to all of your Windows applications and files.

What are the requirements for installing Linux?

The specific requirements for installing Linux can vary depending on the distribution you choose. However, here are some general guidelines to consider:

  1. Processor (CPU): Most modern processors are compatible with Linux. However, it’s recommended to have at least a 1 GHz processor or higher for optimal performance.
  2. Memory (RAM): The minimum RAM requirement varies among different distributions, but typically 2 GB is sufficient for basic usage. For more resource-intensive tasks or running multiple applications simultaneously, 4 GB or more is recommended.
  3. Storage: Linux distributions generally require a minimum of 10-20 GB of free disk space for installation. However, it’s advisable to allocate more space if you intend to install additional software or store large files.
  4. Graphics: Linux supports a wide range of graphics cards and drivers, including both integrated and dedicated GPUs. Most distributions provide open-source drivers by default, but proprietary drivers may be needed for certain hardware configurations or advanced features.
  5. Display: Linux works well with most monitors and resolutions. Ensure that your display supports the desired resolution and refresh rate.
  6. Network Connectivity: While not mandatory during installation, having an internet connection is beneficial for downloading updates and additional software packages after installation.
  7. Bootable Media: You will need a DVD drive or a USB port to create bootable media (DVD/USB) containing the Linux distribution you want to install.

It’s important to note that these requirements are general recommendations and may vary depending on the specific distribution and its intended use case (e.g., desktop usage, server deployment). Always check the official documentation of your chosen distribution for accurate system requirements before proceeding with the installation process.

Which Linux is best for beginners?

When it comes to choosing a Linux distribution (distro) for beginners, there are a few options that are particularly user-friendly and well-suited for those new to the Linux ecosystem. Here are three popular choices:

  1. Ubuntu: Ubuntu is one of the most widely recommended distributions for beginners due to its focus on ease of use and extensive community support. It offers a clean and intuitive interface, a vast software repository, and regular updates. Ubuntu also has an official flavor called “Ubuntu GNOME” that provides a more traditional desktop experience.
  2. Linux Mint: Based on Ubuntu, Linux Mint is another beginner-friendly distro known for its user-friendly interface and out-of-the-box multimedia support. It offers a familiar desktop environment similar to Windows, making the transition smoother for newcomers. Linux Mint provides excellent hardware compatibility and stability.
  3. Zorin OS: Zorin OS is designed specifically with beginners in mind, offering an interface that closely resembles Windows, making it easy for new users to navigate. It provides a smooth and polished experience with pre-installed software and customization options.

These distributions prioritize simplicity, ease of use, and have large communities that provide support through forums, documentation, and tutorials. However, remember that personal preferences may vary, so it’s worth exploring different distros to find the one that best suits your needs and preferences as you delve into the world of Linux.

Which Linux should I install?

When choosing a Linux distribution, it ultimately depends on your specific needs and preferences. Here are a few popular options to consider:

  1. Ubuntu: Ubuntu is one of the most widely used and beginner-friendly distributions. It offers a polished user interface, extensive software availability, and strong community support.
  2. Fedora: Fedora is known for its cutting-edge features and commitment to open-source principles. It’s a great choice for those who want access to the latest software updates and technologies.
  3. Linux Mint: Linux Mint provides a user-friendly experience with a familiar desktop environment similar to Windows. It focuses on stability, ease of use, and multimedia support.
  4. Debian: Debian is known for its stability, security, and vast software repository. It’s popular among advanced users who value reliability and customization options.
  5. Arch Linux: Arch Linux is a minimalist distribution that allows users to build their system from the ground up. It’s highly customizable but requires more technical knowledge during installation and configuration.
  6. CentOS: CentOS is based on the source code of Red Hat Enterprise Linux (RHEL) and provides a stable platform suitable for servers and enterprise environments.

Consider factors such as your level of experience with Linux, hardware compatibility, desired software availability, and specific use cases (e.g., desktop usage or server deployment) when making your decision.

It may be helpful to try out different distributions by running them from Live USBs or virtual machines before committing to an installation. This way, you can get a feel for each distribution’s user interface, performance, and available applications.

Remember that many distributions offer different flavors or desktop environments (such as GNOME or KDE), allowing you to further customize your experience based on personal preference.

Ultimately, the best Linux distribution is the one that aligns with your needs, goals, and level of comfort with technology.

slackware

Embracing the Timeless Simplicity of Slackware: A Journey into Linux’s Classic Distro

Slackware: The Timeless Power of Simplicity

In the ever-evolving landscape of Linux distributions, one name stands out for its unwavering commitment to simplicity and stability – Slackware. Since its inception in 1993 by Patrick Volkerding, Slackware has remained true to its principles, attracting a loyal following of users who appreciate its straightforward approach to Linux.

At the core of Slackware’s philosophy is the belief that an operating system should provide users with complete control over their system without unnecessary complexity. Unlike many modern distributions that focus on user-friendliness and automation, Slackware embraces a more hands-on approach, allowing users to customize their system from the ground up.

One of the key strengths of Slackware lies in its simplicity. The installation process is straightforward and minimalistic, requiring users to make manual choices during setup rather than relying on automated scripts. This hands-on installation experience not only gives users a deeper understanding of their system but also allows them to tailor it precisely to their needs.

Slackware’s commitment to stability is another reason why it has garnered a dedicated user base over the years. The distribution follows a conservative release cycle, prioritizing reliability over cutting-edge features. This approach ensures that each release undergoes rigorous testing and only includes stable software packages. As a result, Slackware is known for its rock-solid performance and long-term support.

Another distinguishing feature of Slackware is its adherence to traditional Unix principles. The distribution embraces the simplicity and elegance of the command-line interface (CLI), making it an attractive choice for experienced Linux users who prefer working with text-based tools. While it does offer a graphical environment through X Window System, Slackware encourages users to explore the power and flexibility of the CLI.

One aspect that sets Slackware apart from other distributions is its package management system. Built around the venerable package format called “.tgz,” Slackware’s package manager allows for easy installation, removal, and upgrading of software packages. This simplicity in package management aligns with the distribution’s overall philosophy and makes it a favorite among those who value transparency and control.

Slackware’s community plays a vital role in its success. Despite being one of the oldest Linux distributions, Slackware has managed to maintain an active and helpful community of users and developers. The Slackware community is known for its friendly atmosphere, where users readily share their knowledge and assist newcomers in navigating the distribution’s intricacies.

While Slackware may not be the most beginner-friendly distribution, it offers a unique learning experience for those willing to delve into the inner workings of Linux. Its simplicity, stability, and respect for Unix traditions make it an ideal choice for enthusiasts, sysadmins, and anyone seeking a reliable platform that allows complete control over their system.

In a world where complexity often reigns supreme, Slackware remains steadfast in its commitment to simplicity. It continues to attract users who appreciate its no-nonsense approach to Linux while providing a solid foundation for building customized systems. With its timeless power and unwavering dedication to its core principles, Slackware stands as a testament to the enduring value of simplicity in the world of open-source software.


8 Essential Tips for Getting Started with Slackware

  1. Read the official documentation – Slackware has excellent, comprehensive documentation which can help you get started and answer any questions you may have.
  2. Familiarise yourself with the package manager – Slackware uses a package manager called ‘Slackpkg’ which makes it easy to install and update packages on your system.
  3. Use a text editor – Slackware does not come with a graphical text editor so you will need to use one from the command line such as vi or nano.
  4. Customise your installation – You can customise your installation of Slackware by editing configuration files in /etc/rc.d or using tools such as swaret or slapt-get for automated updates and installations of software packages.
  5. Utilise third-party repositories – There are several third-party repositories available that provide additional software packages for Slackware, including AlienBob’s repository and Slacky’s repository, which can be added to your package manager for easy access to extra software packages.
  6. Check out the forums – The official forums are an excellent source of information about all things related to Slackware, from troubleshooting tips to advice on how best to configure certain applications or features on your system; it is well worth spending some time reading through them before attempting any major changes or installations on your system!
  7. Install security updates regularly – As with any operating system, it is important to keep up-to-date with security patches and updates in order to protect yourself from potential vulnerabilities; this is particularly true when running a server as part of a networked environment where there may be more sensitive data at risk if left unprotected!
  8. Back up regularly – It is always wise to back up important files periodically in case anything goes wrong; this could be done either manually (e.g., using tar) or by setting up an automated backup script (e g., using rsync).

Read the official documentation – Slackware has excellent, comprehensive documentation which can help you get started and answer any questions you may have.

Unlocking the Power of Slackware: Embrace the Official Documentation

When venturing into the world of Slackware, one tip stands out as essential: take advantage of the official documentation. The creators of Slackware have painstakingly crafted a comprehensive resource that serves as a guide for both newcomers and seasoned users alike.

Slackware’s official documentation is renowned for its excellence, providing a wealth of information to help you navigate the intricacies of this unique Linux distribution. Whether you are just starting out or seeking answers to specific questions, this documentation is your gateway to unlocking the full potential of Slackware.

For beginners, the official documentation acts as a friendly mentor, guiding you through the installation process and introducing you to the fundamental concepts of Slackware. It explains key components such as package management, system configuration, and network setup in a clear and concise manner. With step-by-step instructions and helpful explanations, even those new to Linux can quickly grasp the essentials.

But it doesn’t stop there. The documentation delves deeper into advanced topics, offering guidance on system administration tasks, security measures, kernel customization, and much more. It serves as an invaluable reference for experienced users who want to fine-tune their system or troubleshoot any issues that may arise.

The beauty of relying on official documentation lies in its reliability and accuracy. As an authoritative source directly from the creators themselves, you can trust that it is up-to-date and reflects best practices for using Slackware. This ensures that you are working with accurate information tailored specifically to your distribution.

Additionally, exploring the official documentation allows you to tap into the collective wisdom of a vibrant community surrounding Slackware. From user forums to mailing lists, there are numerous resources available where fellow enthusiasts share their insights and experiences. By immersing yourself in this community-driven knowledge base alongside the official documentation, you gain access to a vast network of support that can enhance your understanding and proficiency with Slackware.

So, whether you are a newcomer eager to embark on your Slackware journey or a seasoned user seeking to expand your expertise, remember to consult the official documentation. It is an invaluable resource that will accompany you every step of the way, offering guidance and answering any questions you may have.

Embrace the power of knowledge and let Slackware’s official documentation be your trusted companion. Unlock the full potential of this remarkable Linux distribution and embark on a rewarding journey of exploration and mastery.

Familiarise yourself with the package manager – Slackware uses a package manager called ‘Slackpkg’ which makes it easy to install and update packages on your system.

Familiarize Yourself with Slackware’s Package Manager: Slackpkg

When it comes to managing software packages on your Slackware system, one tool that you should become acquainted with is the package manager called ‘Slackpkg’. This powerful utility simplifies the process of installing and updating packages, making it an essential tool for any Slackware user.

Slackpkg provides a straightforward and efficient way to handle software packages on your system. With its intuitive command-line interface, you can easily search for available packages, install new ones, upgrade existing ones, or remove unwanted software. This level of control allows you to keep your system up-to-date with the latest software releases and security patches.

Installing packages using Slackpkg is a breeze. You can simply specify the package name or use regular expressions to match multiple packages at once. The package manager takes care of resolving dependencies automatically, ensuring that all required components are installed correctly.

Updating your system with Slackpkg is equally simple. By running a single command, you can check for updates and download the latest versions of installed packages. This streamlined process ensures that you have access to the most recent bug fixes and feature enhancements without any hassle.

One of the notable features of Slackpkg is its support for official Slackware mirrors. These mirrors host repositories containing a vast collection of pre-compiled packages for different versions of Slackware. With a few configuration tweaks, you can easily switch between different mirrors or set up a local mirror for faster package downloads.

Slackpkg also offers additional functionalities such as blacklisting specific packages from being upgraded or removing them entirely from your system. This level of flexibility allows you to tailor your package management according to your specific needs and preferences.

To get started with Slackpkg, it’s recommended to read through its comprehensive documentation that provides detailed instructions on configuring and using the package manager effectively. By familiarizing yourself with this powerful tool, you will gain greater control over your Slackware system and enjoy a smoother software management experience.

In conclusion, Slackpkg is an invaluable asset for Slackware users. Its user-friendly interface and robust functionality make it a reliable companion for installing, updating, and managing packages on your system. By harnessing the power of Slackpkg, you can ensure that your Slackware environment remains up-to-date, secure, and tailored to your specific requirements.

Use a text editor – Slackware does not come with a graphical text editor so you will need to use one from the command line such as vi or nano.

Mastering the Command Line: Text Editors in Slackware

Slackware, known for its commitment to simplicity and control, offers a unique experience for Linux enthusiasts. One aspect that sets Slackware apart is its reliance on the command line interface (CLI) for various tasks. When it comes to editing text files, Slackware does not come bundled with a graphical text editor. Instead, users are encouraged to embrace the power of command line-based editors such as vi or nano.

While some may find this approach daunting at first, using a text editor from the command line can be a rewarding experience once you become familiar with it. Let’s explore two popular command line text editors available in Slackware:

1. Vi: Vi is a powerful and widely-used text editor that has been around for decades. It may seem intimidating at first due to its unique modes and commands, but mastering Vi can greatly enhance your efficiency when working with text files. It offers features like syntax highlighting, search and replace functionality, and the ability to edit multiple files simultaneously.

To open a file with Vi, simply type `vi filename` in the command line. Once inside Vi, you’ll need to switch between different modes – command mode for executing commands and insert mode for editing text. Pressing ‘i’ enters insert mode, allowing you to make changes to the file. To save changes and exit Vi, switch back to command mode by pressing ‘Esc’ followed by ‘:wq’ (write and quit).

2. Nano: If you prefer a more beginner-friendly option without sacrificing functionality, Nano is an excellent choice. It provides a user-friendly interface with on-screen menus that guide you through various operations. Nano supports syntax highlighting, search and replace functions, as well as other essential features expected from a modern text editor.

To open a file with Nano, simply type `nano filename` in the command line. The interface will display helpful shortcuts at the bottom of the screen. You can navigate through the file using arrow keys and make changes directly. To save changes and exit Nano, press ‘Ctrl + X’ to bring up the prompt, followed by ‘Y’ to confirm and ‘Enter’ to finalize.

Embracing a command line text editor may require a slight adjustment in your workflow, but it offers several advantages. Command line editors are lightweight, fast, and do not rely on graphical environments. They can be accessed remotely via SSH or used in recovery scenarios when graphical interfaces are unavailable.

By using a text editor from the command line in Slackware, you gain a deeper understanding of how files are manipulated and edited within the system. This knowledge empowers you to take full control over your text files and provides valuable skills that extend beyond Slackware itself.

So, whether you choose to master Vi’s powerful commands or opt for Nano’s user-friendly interface, embracing a command line text editor in Slackware opens up a world of possibilities for efficient editing and customization. Embrace the simplicity and power of command line editors in Slackware – you’ll soon discover their true potential!

Customise your installation – You can customise your installation of Slackware by editing configuration files in /etc/rc.d or using tools such as swaret or slapt-get for automated updates and installations of software packages.

Customise Your Slackware Installation: Unleash the Power of Personalization

One of the greatest strengths of Slackware lies in its flexibility and the ability to tailor your installation to suit your specific needs. By customizing your Slackware installation, you can create a personalized Linux environment that perfectly aligns with your preferences and requirements.

To embark on this journey of customization, look no further than the configuration files nestled within the /etc/rc.d directory. Here, you will find a treasure trove of options that allow you to fine-tune various aspects of your system. Whether it’s tweaking network settings, managing services, or adjusting system startup behavior, these configuration files provide a wealth of possibilities.

Editing these configuration files may seem daunting at first, but fear not – Slackware’s documentation and helpful community are there to guide you every step of the way. With a little patience and understanding, you can unlock the potential to mold your system according to your desires.

If diving into manual file editing isn’t your cup of tea, fret not – there are convenient tools available that simplify the process. Two popular choices among Slackware users are swaret and slapt-get. These package management tools enable automated updates and installations of software packages, making it easier for you to keep your system up-to-date without manually hunting down each update.

Swaret offers a command-line interface that allows you to effortlessly manage software packages by providing commands for updating, installing, or removing packages. Its simplicity and efficiency make it a go-to choice for many Slackware enthusiasts who prefer a hands-on approach.

On the other hand, slapt-get provides a user-friendly front-end for package management with easy-to-use commands resembling those found in Debian-based distributions. Slapt-get simplifies package installations and upgrades while keeping dependencies in check – all with just a few simple commands.

Both swaret and slapt-get offer efficient methods for managing software packages, saving you time and effort in maintaining your Slackware system.

By customizing your Slackware installation through manual configuration file edits or utilizing automated package management tools, you open up a world of possibilities. You can fine-tune your system to match your workflow, optimize performance, and ensure that the software packages you need are readily available.

Remember, the beauty of Slackware lies in its ability to empower users to take control of their Linux experience. Whether you choose the hands-on approach of editing configuration files or embrace the convenience of automated tools, customizing your Slackware installation allows you to create a truly personalized Linux environment that reflects your unique preferences and needs.

So go ahead, explore the depths of /etc/rc.d or embrace the efficiency of swaret and slapt-get. Unleash the power of customization and make Slackware truly yours.

Utilise third-party repositories – There are several third-party repositories available that provide additional software packages for Slackware, including AlienBob’s repository and Slacky’s repository, which can be added to your package manager for easy access to extra software packages.

Expanding the Horizons of Slackware: Utilizing Third-Party Repositories

One of the strengths of Slackware lies in its simplicity and stability. However, if you’re looking to broaden your software options beyond what is included in the official repositories, you’ll be pleased to know that Slackware offers a solution – third-party repositories. These repositories provide access to additional software packages, allowing you to enhance your Slackware experience with a wider range of applications.

One popular third-party repository for Slackware is AlienBob’s repository. Maintained by Eric Hameleers, also known as AlienBob, this repository offers a wealth of extra packages that are not included in the official Slackware distribution. From multimedia tools and desktop environments to development libraries and utilities, AlienBob’s repository provides a treasure trove of software options for users looking to expand their system’s capabilities.

Adding AlienBob’s repository to your package manager is a straightforward process. By following the provided instructions on the AlienBob website, you can easily configure your package manager to include this valuable resource. Once added, you’ll have access to an array of additional software packages that can be installed and managed just like any other package in Slackware.

Another notable third-party repository for Slackware is Slacky’s repository. Maintained by the Italian Slackware community, this repository offers an extensive collection of software packages that are not part of the official distribution. From productivity tools and multimedia applications to games and system utilities, Slacky’s repository caters to various user needs and preferences.

To make use of Slacky’s repository, visit their website and follow the provided instructions for adding it to your package manager. Once integrated into your system, you’ll gain access to an abundance of additional software packages that can be effortlessly installed and managed alongside your existing packages.

Utilizing these third-party repositories opens up new possibilities for customizing your Slackware system according to your specific requirements. Whether you’re seeking specialized software for a particular task or looking to explore alternative applications, these repositories offer a convenient way to expand the software ecosystem of your Slackware installation.

However, it is important to exercise caution when installing packages from third-party repositories. Ensure that the repository you choose is reputable and trustworthy, as the security and integrity of your system should always be a top priority. Stick to well-known repositories like AlienBob’s and Slacky’s, which have established themselves as reliable sources within the Slackware community.

By utilizing third-party repositories, you can enrich your Slackware experience by accessing additional software packages that complement the official distribution. Whether you’re an enthusiast, a developer, or simply someone who wants more options at their fingertips, these repositories provide a valuable resource for expanding the capabilities of your Slackware system. Embrace the flexibility and freedom that third-party repositories offer and unlock new horizons in your Linux journey with Slackware.

Check out the forums – A Treasure Trove of Slackware Knowledge

If you’re a Slackware user or considering diving into this venerable Linux distribution, there’s an invaluable resource waiting for you – the official forums. These forums are a treasure trove of information, offering a wealth of knowledge on all things related to Slackware.

Whether you’re troubleshooting an issue, seeking advice on configuring specific applications, or looking for tips on optimizing your system, the official Slackware forums are an excellent place to start. The community is filled with experienced users and experts who willingly share their wisdom and help fellow enthusiasts navigate the intricacies of Slackware.

Before embarking on any major changes or installations on your system, it’s highly recommended to spend some time reading through the forums. You’ll find threads discussing various topics, ranging from hardware compatibility and driver issues to software recommendations and customization tips. Chances are high that someone has encountered a similar challenge before and has shared their solution or workaround.

By exploring the forums, you can tap into a vast pool of collective knowledge that can save you time and frustration. The discussions often provide step-by-step guides, detailed explanations, and even scripts to automate certain tasks. You may discover new tricks or discover alternative approaches that enhance your Slackware experience.

Beyond technical assistance, the forums also foster a sense of community among Slackware users. It’s a place where people share their success stories, showcase their setups, and engage in friendly conversations about their passion for this distribution. You’ll find like-minded individuals who appreciate the simplicity and stability that Slackware offers.

To access the official Slackware forums, simply visit their website and navigate to the community section. Registering an account is usually quick and straightforward. Once you’re in, take some time to browse through different categories relevant to your interests or use the search function to find specific topics.

Remember that while the forums are an excellent resource, it’s always important to exercise caution and verify information from reliable sources. Double-check any commands or instructions shared by other users before implementing them on your system. Additionally, be respectful and follow the forum guidelines to maintain a positive and helpful community environment.

So, if you’re seeking a wealth of information, troubleshooting tips, or simply want to engage with fellow Slackware enthusiasts, don’t miss out on the official forums. They are a valuable asset that can enhance your Slackware journey and help you make the most of this powerful Linux distribution.

Install security updates regularly – As with any operating system, it is important to keep up-to-date with security patches and updates in order to protect yourself from potential vulnerabilities; this is particularly true when running a server as part of a networked environment where there may be more sensitive data at risk if left unprotected!

Protecting Your Slackware System: Install Security Updates Regularly

In today’s interconnected world, where cyber threats are constantly evolving, ensuring the security of your operating system is paramount. Slackware, known for its simplicity and stability, is no exception. To safeguard your Slackware system and protect yourself from potential vulnerabilities, it is crucial to regularly install security patches and updates.

Just like any other operating system, Slackware releases security updates to address known vulnerabilities and strengthen the overall security of the system. These updates are designed to patch any weaknesses that may have been discovered, ensuring that your system remains resilient against potential attacks.

When running a server as part of a networked environment, it becomes even more critical to keep up-to-date with security updates. Servers often handle sensitive data and provide services to multiple users or devices. Neglecting regular security updates can leave these systems vulnerable to exploitation by malicious actors seeking unauthorized access or data breaches.

By installing security updates promptly, you minimize the risk of potential vulnerabilities being exploited. These updates include patches for software components such as the kernel, libraries, network protocols, and various applications that are essential for the smooth functioning of your Slackware system.

Slackware provides a reliable package management system that simplifies the process of updating your system with the latest security patches. The package management tools allow you to easily identify and install available updates without much hassle.

To ensure you stay protected:

  1. Regularly check for available security updates using the package management tools provided by Slackware.
  2. Follow best practices recommended by Slackware’s official documentation or community resources regarding update procedures.
  3. Set up automatic notifications or reminders to prompt you when new security updates are released.
  4. Schedule regular maintenance windows dedicated to applying these updates promptly.

Remember that maintaining a secure system is an ongoing effort. Cyber threats continue to evolve rapidly, and developers work diligently to address emerging vulnerabilities promptly. By staying vigilant and regularly installing security updates, you fortify your Slackware system’s defenses and minimize the risk of potential security breaches.

Protecting your data and ensuring the integrity of your system should always be a top priority. By prioritizing the installation of security updates on your Slackware system, you take a proactive step towards maintaining a secure and reliable computing environment.

Back up regularly – It is always wise to back up important files periodically in case anything goes wrong; this could be done either manually (e.g., using tar) or by setting up an automated backup script (e g., using rsync).

Back up regularly – Safeguarding Your Valuable Data in Slackware

In the world of computing, unexpected events can occur at any time, potentially leading to the loss of important files and data. To protect yourself from such unfortunate incidents, it is essential to make regular backups of your valuable files. This tip holds true for all operating systems, including Slackware.

Slackware, known for its simplicity and stability, provides users with the flexibility to choose their preferred method of backing up files. Whether you prefer a manual approach or an automated script, Slackware offers various options to ensure the safety of your data.

One simple method is to manually create backups using tools like “tar.” Tar is a command-line utility that allows you to compress and archive files or directories into a single file. By creating tar archives periodically, you can store copies of your important files in a compressed format. These archives can then be stored on external storage devices or uploaded to cloud storage services for added security.

For those seeking a more automated solution, Slackware offers the option of setting up backup scripts using tools like “rsync.” Rsync is a powerful utility that synchronizes files and directories between different locations. By configuring an rsync script, you can define specific source and destination directories and schedule regular backups at desired intervals. This ensures that any changes made to your important files are automatically mirrored in a backup location.

When deciding on your backup strategy in Slackware, it’s important to consider both the frequency and location of your backups. Regularly backing up your data helps minimize potential losses by ensuring that recent changes are captured. Additionally, storing backups in separate physical or remote locations provides an extra layer of protection against hardware failures or disasters.

Remember that backing up isn’t just about protecting against hardware failures; it also guards against accidental deletions, malware attacks, or system errors. Losing valuable data can be devastating, but with regular backups in place, you can restore your files and resume your work with minimal disruption.

In conclusion, regardless of the operating system you use, including Slackware, regularly backing up your important files is a wise practice. Whether you choose to create manual backups using tools like tar or set up automated backup scripts with rsync, the key is to establish a routine that ensures the safety of your data. By taking this proactive step, you can have peace of mind knowing that your valuable files are protected from unexpected events and potential loss.

linux ubuntu

Exploring the Power and Simplicity of Linux Ubuntu: A Comprehensive Overview

Linux Ubuntu: Power and Simplicity Combined

Linux Ubuntu, often referred to simply as Ubuntu, is a popular open-source operating system that has gained a strong following since its initial release in 2004. Developed by Canonical Ltd., Ubuntu has become known for its seamless blend of power, versatility, and user-friendly interface. In this article, we will explore the key features and benefits of Linux Ubuntu that have made it a go-to choice for individuals and organizations alike.

One of the standout features of Linux Ubuntu is its commitment to simplicity. From installation to everyday use, the developers have prioritized creating an intuitive experience for users. The installation process is straightforward, with a user-friendly interface guiding you through the necessary steps. Whether you are a seasoned Linux user or a complete beginner, you can get up and running with Ubuntu quickly and easily.

Ubuntu’s desktop environment offers a clean and modern design that is both visually appealing and functional. The default desktop environment, called GNOME, provides an intuitive interface that allows users to navigate effortlessly through their applications and files. Additionally, Ubuntu offers different flavors with alternative desktop environments such as KDE Plasma or Xfce to cater to individual preferences.

Another notable aspect of Ubuntu is its vast software repository. With over 50,000 packages available through the official repositories, users have access to a wide range of free and open-source software applications for various purposes. From productivity tools like LibreOffice to multimedia software like VLC Media Player, you can find everything you need without having to scour the internet.

Ubuntu’s commitment to security is also commendable. Regular updates are released to address vulnerabilities promptly and ensure that your system remains secure. The community-driven approach means that issues are identified quickly and resolved efficiently by both Canonical’s developers and the wider Linux community.

For developers and programmers, Ubuntu provides an ideal platform with extensive support for different programming languages such as Python, C++, Java, and more. The inclusion of tools like the GNU Compiler Collection (GCC) and the powerful terminal emulator, along with access to various libraries and frameworks, makes Ubuntu an excellent choice for software development.

Moreover, Ubuntu’s compatibility with a wide range of hardware ensures that it can be installed on most desktops, laptops, and servers. Whether you are using older machines or the latest hardware, Ubuntu offers excellent performance and stability.

Ubuntu’s community is also worth mentioning. The Ubuntu community is known for its inclusivity and helpfulness. Online forums, discussion boards, and chat channels provide a platform for users to seek assistance, share knowledge, and collaborate on projects. This strong community support ensures that users can find answers to their questions or troubleshoot any issues they may encounter.

In conclusion, Linux Ubuntu is a powerful yet user-friendly operating system that continues to gain popularity among individuals and organizations worldwide. With its commitment to simplicity, extensive software repository, security updates, developer-friendly environment, hardware compatibility, and supportive community, Ubuntu offers a compelling package for anyone seeking a reliable open-source operating system.

Whether you are a student looking for an alternative to proprietary software or an organization in search of a cost-effective solution for your IT infrastructure, Linux Ubuntu has proven itself as a trustworthy choice. Embrace the power of open-source technology with Ubuntu and unlock a world of possibilities for your computing needs.


7 Essential Tips for Securing and Maintaining Your Ubuntu System

  1. Always keep your Ubuntu system up to date with the latest security patches and software updates.
  2. Make sure you have a good antivirus installed and that it is regularly updated.
  3. Use strong passwords for all your accounts, especially those related to root access or sudo privileges.
  4. Be aware of the risks associated with using sudo or root privileges when running commands on your system – only use them when absolutely necessary!
  5. Install any additional software from trusted sources, such as the official Ubuntu repositories or PPAs (Personal Package Archives).
  6. Regularly back up important data in case of system failure or other unforeseen events.
  7. Familiarise yourself with the basics of Linux so you can troubleshoot any issues that may arise while using Ubuntu

Always keep your Ubuntu system up to date with the latest security patches and software updates.

Secure Your Ubuntu System: Stay Up to Date

When it comes to keeping your Ubuntu system secure, one of the most crucial practices is to ensure you are always up to date with the latest security patches and software updates. Regularly updating your system not only enhances its performance but also safeguards it against potential vulnerabilities and threats.

Ubuntu, being an open-source operating system, benefits from a vast community of developers and contributors who actively work to identify and address security issues promptly. Updates are released regularly to patch vulnerabilities and improve the overall stability of the system.

To keep your Ubuntu system up to date, follow these simple steps:

  1. Enable Automatic Updates: Ubuntu offers a convenient feature that allows you to enable automatic updates. This ensures that critical security patches and software updates are installed without any manual intervention. To enable this feature, go to “Software & Updates” in the System Settings menu and select the “Updates” tab. From there, choose your preferred update settings.
  2. Use the Update Manager: Ubuntu provides an intuitive Update Manager tool that makes it easy to check for available updates manually. Simply open the Update Manager from the applications menu or use the command “sudo apt update” in the terminal. The Update Manager will display a list of available updates for your system.
  3. Install Available Updates: Once you have identified available updates through either automatic updates or the Update Manager, it is essential to install them promptly. Security patches often address vulnerabilities that could be exploited by malicious actors if left unpatched. Installing updates helps ensure that your system remains protected against emerging threats.
  4. Restart When Required: Some software updates may require a restart for changes to take effect fully. It is important not to overlook this step as certain critical components may not function optimally until a restart has been performed.

By following these steps and maintaining an up-to-date Ubuntu system, you can significantly reduce potential security risks and enjoy a more secure computing experience. Regular updates not only protect your system from known vulnerabilities but also improve its performance and stability.

Remember, security is an ongoing process, and staying vigilant with updates is a fundamental aspect of maintaining a secure Ubuntu system. Make it a habit to check for updates regularly or enable automatic updates to ensure that your Ubuntu system is always fortified against potential threats.

Take control of your Ubuntu system’s security today by embracing the power of regular updates. Safeguard your data, protect your privacy, and enjoy a worry-free computing experience with an up-to-date Ubuntu system.

Make sure you have a good antivirus installed and that it is regularly updated.

Protecting Your Linux Ubuntu System: The Importance of Antivirus

When it comes to computer security, many users tend to overlook the need for antivirus software on their Linux Ubuntu systems. However, it is crucial to understand that even though Linux is generally considered more secure than other operating systems, it is not immune to threats. In this article, we will emphasize the importance of having a good antivirus installed on your Linux Ubuntu system and ensuring that it is regularly updated.

Contrary to popular belief, viruses and malware do exist in the Linux ecosystem. While the number of threats may be relatively lower compared to other platforms, they can still pose a significant risk if left unchecked. Cybercriminals are continuously evolving their tactics and targeting vulnerabilities in all operating systems, including Linux.

Installing a reliable antivirus solution on your Linux Ubuntu system provides an additional layer of protection against potential threats. It helps detect and remove any malicious software that may have made its way onto your system. Additionally, antivirus software can prevent the spread of malware by scanning files and applications before they are executed.

Regularly updating your antivirus software is crucial in maintaining its effectiveness. New threats emerge regularly, and antivirus developers constantly release updates to address these vulnerabilities. By keeping your antivirus up to date, you ensure that it can identify and neutralize the latest threats effectively.

Choosing a suitable antivirus solution for your Linux Ubuntu system can be overwhelming due to the variety of options available. However, several reputable vendors offer robust antivirus software specifically designed for Linux environments. Researching and selecting an antivirus solution that suits your needs is essential.

It’s worth noting that while having an antivirus program installed adds an extra layer of protection, it should not be relied upon as the sole means of securing your system. Practicing good online habits such as avoiding suspicious websites or downloading files from untrusted sources remains crucial in preventing infections.

In conclusion, safeguarding your Linux Ubuntu system with a good antivirus solution is vital in ensuring its security. While Linux is known for its resilience against threats, it is not invincible. By installing reliable antivirus software and keeping it regularly updated, you can enhance your system’s protection and minimize the risk of falling victim to malware or other malicious activities.

Take the necessary steps to protect your Linux Ubuntu system today. Stay vigilant, keep your antivirus up to date, and enjoy a secure computing experience on your favourite open-source operating system.

Protecting Your Ubuntu System: The Power of Strong Passwords

In the digital age, where our personal and sensitive information is increasingly stored and accessed online, the importance of strong passwords cannot be overstated. When it comes to Linux Ubuntu, a robust password policy is crucial for safeguarding your system’s integrity and ensuring that unauthorized access is kept at bay.

One of the fundamental principles of securing your Ubuntu system is using strong passwords for all your accounts, particularly those associated with root access or sudo privileges. These privileged accounts hold significant power over your system and can potentially cause irreparable damage if they fall into the wrong hands. By implementing strong passwords, you create an additional layer of defense against potential security breaches.

So, what exactly constitutes a strong password? Here are some essential guidelines to follow:

  1. Length: Aim for a minimum password length of 12 characters or more. Longer passwords are generally more secure as they increase the complexity and make it harder for attackers to crack them.
  2. Complexity: Utilize a combination of uppercase and lowercase letters, numbers, and special characters within your password. This mix adds complexity and makes it more challenging to guess or crack through brute-force attacks.
  3. Avoid Personal Information: Stay away from using easily guessable information like your name, birthdate, or common words in your password. Attackers often employ automated tools that can quickly guess such obvious choices.
  4. Unique Passwords: Avoid reusing passwords across multiple accounts or services. If one account gets compromised, having unique passwords ensures that other accounts remain protected.
  5. Regular Updates: Change your passwords periodically to reduce the risk of long-term vulnerabilities. Consider setting reminders to update them every few months or whenever there’s a potential security incident.

Implementing these practices not only strengthens the security of your Ubuntu system but also extends to other online accounts you may have—email, social media platforms, banking portals—wherever sensitive information is stored.

Ubuntu provides a straightforward way to manage passwords through the user management system and the use of tools like passwd. Additionally, you can consider employing password managers that generate and securely store complex passwords for you, ensuring that you don’t have to remember them all.

Remember, your Ubuntu system’s security is only as strong as the weakest password associated with it. By using strong passwords for all your accounts, especially those tied to root access or sudo privileges, you significantly reduce the risk of unauthorized access and protect your system from potential harm.

Stay vigilant, stay secure—embrace the power of strong passwords and fortify your Ubuntu experience.

Be aware of the risks associated with using sudo or root privileges when running commands on your system – only use them when absolutely necessary!

The Importance of Caution with Sudo or Root Privileges in Linux Ubuntu

When it comes to managing your Linux Ubuntu system, there may be times when you need to run commands with elevated privileges using sudo or as the root user. While these privileges are essential for performing certain tasks, it is crucial to exercise caution and only use them when absolutely necessary. Understanding the risks associated with sudo or root access can help ensure the security and stability of your system.

One of the primary reasons for exercising caution is that running commands with sudo or as root grants you extensive control over your system. With such power comes the potential for unintentional mistakes that could have severe consequences. A simple typo or a misunderstood command can lead to unintended modifications or deletions of critical files, rendering your system unstable or even unusable.

Moreover, running commands with elevated privileges increases the risk of falling victim to malicious software or exploits. When you execute a command as root, you grant it unrestricted access to your system. If a malicious program manages to exploit this access, it can wreak havoc on your files, compromise sensitive data, or even gain control over your entire system.

To mitigate these risks, it is crucial to adopt best practices when using sudo or root privileges. Here are some guidelines to consider:

  1. Only use sudo or root access when necessary: Before executing a command with elevated privileges, ask yourself if it is truly required. Limiting the use of sudo or root can minimize the chances of accidental errors and reduce exposure to potential threats.
  2. Double-check commands: Take extra care when entering commands that involve sudo or root access. Verify each character and ensure that you understand what the command will do before proceeding.
  3. Use specific user accounts: Whenever possible, create separate user accounts with limited privileges for everyday tasks. Reserve sudo or root access for administrative tasks that explicitly require them.
  4. Keep backups: Regularly back up important files and configurations to an external location. This precaution ensures that even if mistakes occur or your system is compromised, you can restore your data and settings.
  5. Stay updated: Keep your Linux Ubuntu system up to date with the latest security patches and updates. Regularly check for software vulnerabilities and apply patches promptly to minimize the risk of exploitation.

By following these precautions, you can reduce the potential risks associated with using sudo or root privileges in Linux Ubuntu. Remember, it is always better to err on the side of caution when it comes to system administration. Taking a proactive approach to security and being aware of the potential dangers will help safeguard your system and ensure a smoother computing experience.

Install any additional software from trusted sources, such as the official Ubuntu repositories or PPAs (Personal Package Archives).

Installing Additional Software on Linux Ubuntu: A Tip for Enhanced Security and Reliability

Linux Ubuntu, renowned for its stability and security, offers users a multitude of software options to cater to their diverse needs. While the default installation provides essential applications, there may be instances where you require additional software to expand your system’s capabilities. In such cases, it is crucial to follow a best practice: install any additional software from trusted sources, such as the official Ubuntu repositories or PPAs (Personal Package Archives).

The official Ubuntu repositories serve as a vast collection of pre-packaged software that has been thoroughly tested and verified by the Ubuntu team. These repositories include a wide range of applications spanning various categories like productivity tools, multimedia software, development environments, and more. By installing software from these repositories, you can be confident in their reliability and compatibility with your Ubuntu system.

To access the official Ubuntu repositories, you can use the built-in package management tool called APT (Advanced Package Tool). This command-line utility allows you to search for available packages, install them with ease, and automatically handle any dependencies required by those packages. The APT system ensures that all installed software is properly integrated into your system and receives updates when necessary.

In addition to the official repositories, PPAs (Personal Package Archives) offer another trusted source for obtaining additional software on Ubuntu. PPAs are created by individuals or teams who maintain their own repository of packages that may not be available in the official Ubuntu repositories. These packages often provide newer versions of applications or specialized software tailored to specific user requirements.

When using PPAs, it is essential to exercise caution and choose reputable sources. Stick with well-known developers or teams with a track record of maintaining quality packages. Before adding a PPA to your system, research its credibility and ensure that it aligns with your security standards.

Once you have identified a PPA that meets your criteria, adding it to your system is relatively straightforward. Ubuntu provides a graphical tool called “Software & Updates” that allows you to manage software sources, including PPAs. Alternatively, you can add a PPA using the command line by utilizing the “add-apt-repository” command.

By installing additional software from trusted sources like the official Ubuntu repositories or reputable PPAs, you can enhance the security and reliability of your Ubuntu system. Packages from these sources undergo rigorous testing and are regularly updated to address any vulnerabilities or bugs. This ensures that your system remains secure and stable while benefiting from a wide range of software options.

Remember to keep your system up to date by regularly installing updates provided by Ubuntu. These updates include security patches, bug fixes, and improvements to installed software, further bolstering the overall stability and security of your system.

In conclusion, when expanding the capabilities of your Linux Ubuntu system with additional software, it is crucial to install from trusted sources such as the official Ubuntu repositories or reputable PPAs. By adhering to this best practice, you can ensure that any installed software is reliable, secure, and seamlessly integrated into your Ubuntu environment. Safeguard your system while enjoying an extensive selection of software tailored to meet your needs on Linux Ubuntu.

Regularly back up important data in case of system failure or other unforeseen events.

The Importance of Regularly Backing Up Your Data on Linux Ubuntu

In the digital age, where our lives are increasingly intertwined with technology, it is crucial to protect our valuable data from potential loss. Whether it’s important documents, cherished memories in the form of photos and videos, or critical work files, losing them due to system failure or other unforeseen events can be devastating. That is why regularly backing up your data on Linux Ubuntu is a vital practice that should not be overlooked.

Linux Ubuntu provides several reliable and convenient methods for backing up your data. One popular option is to utilize the built-in backup tool called Déjà Dup. This user-friendly application allows you to schedule automatic backups of your files and directories to an external hard drive, network storage, or even cloud services such as Google Drive or Dropbox.

By setting up regular backups with Déjà Dup, you can ensure that your important data remains safe and accessible even if your system encounters issues. In the event of hardware failure, accidental deletion, or malware attacks, having a recent backup readily available will significantly reduce the impact of these unfortunate circumstances.

Another advantage of regularly backing up your data is the ability to recover previous versions of files. Sometimes we make changes to documents or mistakenly delete something important only to realize later that we need it back. With proper backups in place, you can easily retrieve earlier versions of files or restore deleted items without hassle.

It’s worth noting that while using external storage devices like external hard drives or USB flash drives for backups is a common practice, it’s advisable to keep an offsite backup as well. Storing copies of your data in a different physical location protects against scenarios like theft, fire, or natural disasters that may affect both your computer and its peripherals.

Remember that creating backups should not be a one-time task but rather an ongoing process. As you continue to create new files and modify existing ones, updating your backups regularly will ensure that your most recent data is protected. Setting up automated backups with Déjà Dup or other backup solutions available for Linux Ubuntu can simplify this process and provide peace of mind.

In conclusion, regularly backing up your important data on Linux Ubuntu is a crucial practice to safeguard against system failures, accidental deletions, or other unforeseen events. By utilizing tools like Déjà Dup and adopting a consistent backup routine, you can protect your valuable files, recover previous versions if needed, and mitigate the potential impact of data loss. Take the proactive step today to secure your digital assets by implementing regular backups and enjoy the peace of mind that comes with knowing your data is safe.

Familiarise yourself with the basics of Linux so you can troubleshoot any issues that may arise while using Ubuntu

Familiarize Yourself with Linux Basics: Empower Your Ubuntu Experience

As you embark on your Linux Ubuntu journey, it’s essential to familiarize yourself with the basics of Linux. By doing so, you equip yourself with the knowledge and skills needed to troubleshoot any issues that may arise while using Ubuntu. Understanding the fundamentals of Linux not only enhances your overall experience but also empowers you to take full control of your operating system.

Linux, at its core, is built on a robust and secure foundation. It operates differently from traditional operating systems like Windows or macOS, which may require a slight adjustment in approach. By dedicating some time to learning the basics, you can navigate through Ubuntu’s powerful features more effectively and resolve any potential problems that may occur.

One of the first steps in familiarizing yourself with Linux is getting acquainted with the command line interface (CLI). While Ubuntu provides a user-friendly graphical interface, knowing how to use the CLI can greatly enhance your troubleshooting capabilities. The command line allows for precise control over your system, enabling you to perform advanced tasks and access additional tools not readily available through graphical interfaces.

Learning basic commands such as navigating directories, creating files and folders, managing permissions, and installing software via the package manager will prove invaluable in troubleshooting various issues. Additionally, understanding how to read log files can provide crucial insights into system errors or application crashes.

Another fundamental aspect of Linux is its file system structure. Unlike other operating systems that may have different drive letters or partitions for various purposes, Linux organizes everything under a single root directory. Familiarizing yourself with this hierarchical structure will help you locate files and directories efficiently and troubleshoot issues related to file permissions or disk space.

Moreover, exploring the concept of users and groups in Linux is essential for maintaining security and managing access rights effectively. Understanding how permissions work at different levels (read, write, execute) empowers you to troubleshoot permission-related errors or configure access for different users or applications.

The Linux community is vast and supportive, with numerous resources available to help you learn and troubleshoot any issues you encounter. Online forums, documentation, and tutorials provide valuable insights and solutions shared by experienced Linux users. By actively engaging with the community, you can expand your knowledge and seek guidance when facing challenges.

Remember, troubleshooting is a continuous learning process. As you encounter various issues while using Ubuntu, don’t be discouraged. Instead, embrace them as opportunities to expand your understanding of Linux and refine your troubleshooting skills. With time and practice, you’ll become more proficient in resolving problems efficiently.

In conclusion, familiarizing yourself with the basics of Linux is a crucial step towards becoming a confident Ubuntu user. By understanding the command line interface, file system structure, permissions, and engaging with the Linux community, you empower yourself to troubleshoot any issues that may arise. Embrace this learning journey and unlock the full potential of Ubuntu while gaining valuable skills applicable to the broader world of Linux.

redhat linux

Red Hat Linux: Unleashing the Power of Open Source Innovation

Red Hat Linux: Unleashing the Power of Open Source

In the vast realm of operating systems, Red Hat Linux stands as a true pioneer and a shining example of the power and potential of open-source technology. With its robust features, unwavering commitment to security, and extensive community support, Red Hat Linux has become a go-to choice for individuals and enterprises alike.

At its core, Red Hat Linux is an open-source distribution built on the foundation of the renowned Linux kernel. Developed by the passionate team at Red Hat Inc., this operating system embodies the principles of collaboration, transparency, and accessibility that define the open-source movement.

One of the key strengths of Red Hat Linux lies in its stability and reliability. With rigorous testing procedures and a meticulous approach to software development, Red Hat ensures that each release is thoroughly vetted before it reaches users’ hands. This commitment to quality has made Red Hat Linux a trusted choice for mission-critical environments where downtime is not an option.

Furthermore, Red Hat’s emphasis on security sets it apart from many other operating systems. The team behind Red Hat Linux continually monitors security vulnerabilities and promptly provides patches and updates to address them. This proactive approach ensures that users can operate in a secure environment, safeguarding their data and protecting against potential threats.

Red Hat’s dedication to supporting its users is evident through its extensive community ecosystem. The thriving community surrounding Red Hat Linux consists of developers, system administrators, enthusiasts, and beginners alike. This vibrant network provides a wealth of resources, including forums, documentation, tutorials, and collaborative projects. Whether you’re seeking assistance or looking to contribute your expertise back to the community, you’ll find ample support within this diverse ecosystem.

One notable aspect that sets Red Hat apart is its focus on enterprise solutions. With offerings like Red Hat Enterprise Linux (RHEL), businesses can harness the power of open-source technology while enjoying enterprise-level support from certified professionals. RHEL provides a stable and scalable platform for businesses of all sizes, empowering them to innovate, streamline operations, and drive growth.

Red Hat’s commitment to open-source values extends beyond its own products. The company actively contributes to numerous open-source projects, collaborating with developers worldwide to foster innovation and drive the evolution of technology. By nurturing these collaborative efforts, Red Hat Linux helps shape the future of open-source software.

In conclusion, Red Hat Linux has established itself as a force to be reckoned with in the world of operating systems. Its unwavering commitment to open-source principles, combined with its robust features, security focus, and extensive community support, make it a preferred choice for individuals and enterprises seeking a reliable and powerful operating system. With Red Hat Linux, you can unlock the true potential of open-source technology and join a global community that is shaping the future of computing.


Frequently Asked Questions About RedHat Linux: Answers to Your Queries on Versions, Installation, Configuration, System Requirements, Support, Compatibility, and Security

  1. What is the best version of RedHat Linux?
  2. How do I install RedHat Linux?
  3. How do I configure RedHat Linux?
  4. What are the system requirements for running RedHat Linux?
  5. Is there any support available for using RedHat Linux?
  6. Can I use RedHat Linux on my laptop or desktop computer?
  7. How secure is Red Hat Linux compared to other operating systems?

What is the best version of RedHat Linux?

The best version of RedHat Linux depends on your specific needs and preferences. Some popular versions of RedHat Linux include RHEL 8, CentOS 8, Fedora 32 and Oracle Linux 8.

How do I install RedHat Linux?

Installing Red Hat Linux is a straightforward process that can be accomplished by following these general steps:

  1. Obtain the Red Hat Linux Installation Media: Visit the official Red Hat website and download the installation ISO image for the desired version of Red Hat Linux. Make sure to choose the appropriate architecture (32-bit or 64-bit) based on your computer’s hardware.
  2. Create a Bootable USB/DVD: Once you have downloaded the ISO image, create a bootable USB drive or burn it to a DVD. There are various tools available, such as Rufus or Etcher, which can assist you in creating a bootable media.
  3. Configure BIOS/UEFI Settings: Restart your computer and access the BIOS/UEFI settings by pressing the appropriate key during startup (usually F2, F10, or Del). Ensure that your system is set to boot from the USB drive or DVD before any other storage devices.
  4. Start the Installation Process: Insert the bootable USB drive or DVD into your computer and restart it. The system should now boot into the Red Hat Linux installation environment.
  5. Select Installation Options: Follow the on-screen instructions to select your preferred language, keyboard layout, and other settings. You will also need to accept any license agreements presented during this stage.
  6. Partitioning: Choose how you want to partition your hard drive(s). You can either let Red Hat Linux automatically partition your disk(s) or manually configure partitions based on your requirements.
  7. Set Hostname and Network Configuration: Provide a hostname for your system and configure network settings such as IP address, DNS servers, and proxy settings if necessary.
  8. Select Software Packages: Choose which software packages you want to install with Red Hat Linux. You can opt for predefined package groups like “Minimal Install” or customize selections based on specific needs (e.g., development tools, graphical interface options).
  9. Create User Accounts: Set up user accounts by providing usernames, passwords, and other relevant details. You can create multiple user accounts with different privileges.
  10. Begin Installation: Double-check all the settings you have chosen and start the installation process. Red Hat Linux will begin copying files to your hard drive and configuring the system based on your selections.
  11. Reboot and Log In: Once the installation is complete, remove the installation media and restart your computer. You will be prompted to log in with the username and password you created during the installation process.

Congratulations! You have successfully installed Red Hat Linux on your system. From here, you can further customize your setup, install additional software packages, and explore the wide range of features and capabilities offered by Red Hat Linux.

How do I configure RedHat Linux?

Configuring Red Hat Linux involves various aspects, including system settings, network configuration, package management, user management, and more. Here are some general steps to get you started:

Initial Setup:

– Install Red Hat Linux on your system following the installation guide provided.

– Set the root password during the installation process.

System Settings:

– Configure basic system settings such as hostname, time zone, and language preferences using the graphical interface or command-line tools like `system-config-date` or `timedatectl`.

– Customize system services and startup programs using tools like `systemctl` or `chkconfig`.

Network Configuration:

– Configure network interfaces by editing the network configuration files located in `/etc/sysconfig/network-scripts/`. Use tools like `nmcli` or `nmtui` for a more user-friendly approach.

– Set up DNS resolution by editing `/etc/resolv.conf`.

– Configure firewall rules using tools like `firewalld` or `iptables`.

Package Management:

– Use the package manager ‘yum’ (prior to RHEL 8) or ‘dnf’ (from RHEL 8 onwards) to install, update, and remove software packages.

– Enable additional software repositories if needed.

– Explore package management commands such as installing packages (`yum install `), updating packages (`yum update`), and searching for packages (`yum search `).

User Management:

– Create new users and manage existing ones using commands such as `useradd`, `passwd`, and `usermod`.

– Assign appropriate user permissions and manage user groups.

File System Configuration:

– Mount additional storage devices using the `/etc/fstab` file or the ‘mount’ command.

– Manage file permissions and ownership using commands like `chmod` and `chown`.

Security:

– Regularly update your system using the package manager to ensure you have the latest security patches.

– Configure SELinux (Security-Enhanced Linux) to enforce access controls and enhance system security.

Logging and Monitoring:

– Explore log files located in `/var/log/` to troubleshoot issues or monitor system activity.

– Utilize monitoring tools like ‘sar’, ‘top’, or ‘nagios’ to monitor system performance.

These steps provide a general overview of configuring Red Hat Linux. However, it’s important to consult the official Red Hat documentation, specific guides, and manuals for detailed instructions that match your version and requirements.

What are the system requirements for running RedHat Linux?

To run Red Hat Linux smoothly and efficiently, your system should meet the following minimum requirements:

Processor: A 64-bit x86-64 compatible processor is recommended. However, Red Hat Linux also supports other architectures such as ARM and IBM Power Systems.

Memory (RAM): At least 2 GB of RAM is required for a minimal installation. However, for better performance, it is recommended to have 4 GB or more.

Storage: A minimum of 20 GB of available storage space on the hard drive is required for a minimal installation. For a more comprehensive installation with additional software packages and data, it is advisable to have more storage capacity.

Graphics: A graphics card capable of displaying at least 800×600 resolution is recommended for graphical installations and graphical user interface (GUI) usage.

Network: A network interface card (NIC) or wireless adapter may be required for network connectivity, depending on your specific needs.

Additional Requirements: Red Hat Linux requires a compatible DVD-ROM drive or USB port for installation from media. Additionally, a reliable internet connection is recommended for updates and accessing online resources.

It’s important to note that these are minimum requirements, and depending on your specific use case or intended workload, you may need higher specifications to ensure optimal performance.

For detailed information regarding system requirements and compatibility with specific versions of Red Hat Linux, it’s advisable to refer to the official documentation provided by Red Hat Inc.

Is there any support available for using RedHat Linux?

Yes, Red Hat provides comprehensive support for users of Red Hat Linux. They offer various support options to ensure that users have access to assistance and resources when needed.

  1. Red Hat Customer Portal: The Red Hat Customer Portal is a valuable online resource that provides access to a vast knowledge base, documentation, technical articles, and troubleshooting guides. Users can search for solutions to common issues, explore best practices, and stay up-to-date with the latest updates and announcements.
  2. Red Hat Support Subscriptions: Red Hat offers support subscriptions that provide access to technical support from their team of experts. Subscribers can open support cases through the customer portal and receive assistance for their specific issues or inquiries. The support team is available 24/7 to address critical situations promptly.
  3. Knowledgebase and Documentation: Red Hat maintains an extensive knowledgebase and documentation library that covers a wide range of topics related to Red Hat Linux. Users can find detailed guides, step-by-step instructions, configuration information, and troubleshooting tips to help them navigate their Linux environment effectively.
  4. Training and Certification: Red Hat offers training courses designed to enhance users’ skills in deploying, managing, and troubleshooting Red Hat Linux systems. These courses cover various topics and are available in different formats, including classroom training, virtual classrooms, self-paced online courses, and on-site training options. Additionally, Red Hat provides certification programs that validate individuals’ expertise in using Red Hat technologies.
  5. Community Support: The vibrant community surrounding Red Hat Linux is another valuable source of support. Users can engage with fellow enthusiasts through forums, mailing lists, social media groups, and other community platforms where they can seek advice, share experiences, and collaborate on projects.

By offering these comprehensive support options, Red Hat ensures that users have the necessary resources at their disposal to effectively utilize their Red Hat Linux systems. Whether it’s self-help resources through the customer portal or direct assistance from the support team, Red Hat is committed to helping users succeed with their Linux deployments.

Can I use RedHat Linux on my laptop or desktop computer?

Absolutely! Red Hat Linux can be installed and used on both laptops and desktop computers. It is designed to be compatible with a wide range of hardware configurations, making it suitable for personal use on your own devices.

To get started, you can download the installation media from the official Red Hat website. Red Hat offers different editions, including the free Fedora distribution, which is a community-driven project closely affiliated with Red Hat. Alternatively, if you require enterprise-level support and features, you can explore options like Red Hat Enterprise Linux (RHEL).

Once you have obtained the installation media, you can follow the step-by-step instructions provided by Red Hat to install the operating system on your laptop or desktop computer. The installation process typically involves creating a bootable USB drive or DVD from the downloaded image and then booting your computer from that media to initiate the installation.

During the installation process, you will have options to customize various settings such as partitioning your hard drive, selecting software packages to install, and configuring user accounts. Red Hat provides an intuitive installer that guides you through these steps.

After successful installation, you will have access to all the features and benefits of Red Hat Linux on your laptop or desktop computer. You can explore its extensive software repository to install additional applications tailored to your needs.

Remember that before installing any new operating system, it’s always a good idea to back up any important data on your device. Additionally, ensure that your hardware meets the minimum system requirements specified by Red Hat for optimal performance.

So go ahead and unleash the power of Red Hat Linux on your laptop or desktop computer! Enjoy the flexibility, security, and community-driven experience that this renowned open-source operating system has to offer.

How secure is Red Hat Linux compared to other operating systems?

Red Hat Linux has gained a reputation for its strong focus on security, making it a secure choice compared to many other operating systems. Here are some key factors that contribute to Red Hat Linux’s robust security posture:

  1. Proactive Security Response: Red Hat has a dedicated security team that actively monitors vulnerabilities and promptly provides patches and updates to address them. This proactive approach ensures that users can quickly mitigate potential security risks.
  2. Rigorous Testing and Quality Assurance: Red Hat Linux undergoes extensive testing and quality assurance processes before each release. This meticulous approach helps identify and rectify security vulnerabilities, minimizing the risk of exploits and ensuring a more secure operating system.
  3. SELinux (Security-Enhanced Linux): Red Hat Linux leverages SELinux, a powerful security framework integrated into the kernel. SELinux enforces mandatory access controls, limiting the potential damage caused by malicious software or unauthorized access.
  4. Security Certifications: Red Hat Linux holds various industry certifications, such as Common Criteria Certification, which verifies compliance with rigorous security standards. These certifications provide assurance that Red Hat takes security seriously and adheres to recognized best practices.
  5. Active Community Support: The vibrant community surrounding Red Hat Linux includes skilled professionals who actively contribute to enhancing its security features. The community’s collective expertise helps identify vulnerabilities, develop patches, and share best practices for securing the operating system.
  6. Secure Defaults and Hardening: Red Hat Linux is designed with secure defaults in mind, minimizing potential attack vectors right from the initial installation process. Additionally, it offers various hardening tools and guidelines to further enhance system security.

It is important to note that no operating system is completely immune to security risks or vulnerabilities. However, Red Hat’s commitment to timely updates, proactive response measures, rigorous testing procedures, and strong community support make it a secure choice when compared to many other operating systems.

Ultimately, maintaining a secure environment depends not only on the operating system but also on factors such as proper system configuration, regular updates, user practices, and network security measures. By combining Red Hat Linux’s security features with good security practices, users can significantly enhance the overall security of their systems.

linux user guide

The Ultimate Linux User Guide: Unleashing the Power of Open-Source Technology

The Linux User Guide: Unlocking the Power of Open-Source

In today’s digital age, where technology plays a pivotal role in our lives, having a solid understanding of operating systems is crucial. Among the many options available, Linux stands out as a powerful and versatile open-source operating system that has gained popularity worldwide. Whether you are a tech enthusiast, a programmer, or simply someone looking to explore new horizons, this Linux user guide will provide you with an overview of what Linux is and how to get started.

What is Linux?

Linux is an open-source operating system that was first developed by Linus Torvalds in 1991. It is based on Unix, an earlier operating system known for its stability and security. Unlike proprietary operating systems such as Windows or macOS, Linux is freely available and can be modified and distributed by anyone. This open nature has fostered a vibrant community of developers who continuously contribute to its improvement.

Why Choose Linux?

There are several reasons why people choose Linux over other operating systems. Firstly, it offers exceptional stability and security due to its robust architecture. Additionally, Linux provides users with unparalleled customization options, allowing them to tailor their experience according to their needs and preferences. Moreover, Linux supports a wide range of hardware configurations and offers excellent performance even on older machines.

Getting Started with Linux

To start your journey with Linux, you’ll need to choose a distribution (commonly referred to as a “distro”) that suits your requirements. Popular distros include Ubuntu, Fedora, Debian, and CentOS – each offering different features and targeting various user groups. Once you have selected your preferred distro, you can download it from the official website or request installation media from distributors.

Installation Process

Installing Linux on your computer can be done in several ways depending on your chosen distro. Most distributions provide detailed installation guides that walk you through the process step by step. It usually involves creating a bootable USB drive or DVD, booting from it, and following the on-screen instructions to install the operating system. It’s important to note that during installation, you may be given the option to dual-boot Linux alongside your existing operating system or replace it entirely.

Exploring the Linux Interface

Once you have successfully installed Linux, you will be greeted by its graphical user interface (GUI). The Linux GUI varies depending on the desktop environment chosen during installation. Common desktop environments include GNOME, KDE Plasma, Xfce, and Cinnamon. Each offers a unique look and feel but shares common elements such as a taskbar, application menu, and file manager.

Software Management

One of the standout features of Linux is its package management system. Unlike other operating systems where software is typically downloaded from various websites, Linux uses central repositories where users can easily search for and install software packages. This centralized approach ensures that software is up-to-date and secure. Package managers like apt-get (used in Ubuntu) or dnf (used in Fedora) simplify the process of installing, updating, and removing software.

Exploring the Command Line

While Linux offers a user-friendly graphical interface, it also provides a powerful command-line interface (CLI) for advanced users who prefer working with text-based commands. The CLI allows users to perform tasks efficiently and automate processes through scripts. Learning basic command-line operations can greatly enhance your productivity and help you delve deeper into the inner workings of Linux.

Joining the Linux Community

Linux has a thriving community of enthusiasts who are always ready to help newcomers navigate their way through any challenges they may encounter. Online forums, chat channels, and mailing lists provide excellent platforms for seeking assistance or engaging in discussions with like-minded individuals.

Conclusion

Linux is an incredible open-source operating system that empowers users with freedom, flexibility, and control over their computing experience. By embracing Linux’s vast potential, you can unlock a world of possibilities and embark on a journey of exploration and innovation. With this Linux user guide as your starting point, you are well-equipped to venture into the exciting realm of open-source technology. Embrace the power of Linux and join the global community that continues to shape the future of computing.


Frequently Asked Questions: A Comprehensive Linux User Guide for Beginners

  1. What is the best way to learn Linux?
  2. How do I install Linux on my computer?
  3. How do I use the command line in Linux?
  4. What are some tips for using a Linux user guide?
  5. What are some common commands in Linux?
  6. How can I customize my desktop environment in Linux?
  7. How can I troubleshoot problems with my Linux system?
  8. Is there a way to automate tasks in Linux?

What is the best way to learn Linux?

Learning Linux can be an exciting and rewarding journey. Here are some of the best ways to get started and become proficient in using Linux:

  1. Online Tutorials and Courses: There are numerous online platforms that offer comprehensive Linux tutorials and courses, ranging from beginner to advanced levels. Websites like Udemy, Coursera, and edX provide a wide range of Linux courses taught by experienced instructors.
  2. Official Documentation: Most Linux distributions have extensive official documentation available on their websites. These resources cover topics such as installation, configuration, command-line usage, and troubleshooting. Reading through the official documentation can provide a solid foundation for understanding Linux.
  3. Books: Many books are dedicated to teaching Linux, catering to different skill levels and areas of interest. Some popular titles include “The Linux Command Line” by William Shotts, “Linux Bible” by Christopher Negus, and “How Linux Works” by Brian Ward.
  4. Virtual Machines: Setting up a virtual machine (VM) on your computer allows you to run different distributions of Linux without affecting your main operating system. VM software like VirtualBox or VMware Workstation enables you to experiment with various distributions and practice different tasks in a safe environment.
  5. Joining Online Communities: Engaging with the vibrant Linux community can be invaluable for learning from experienced users and seeking support when needed. Websites like Reddit’s r/linux community or forums like LinuxQuestions.org provide platforms for asking questions, sharing knowledge, and participating in discussions.
  6. Hands-on Practice: The best way to learn is through hands-on experience. Install a distribution of your choice on your computer or use a virtual machine, then explore its features, experiment with commands in the terminal, install software packages, configure settings, and troubleshoot issues as they arise.
  7. YouTube Tutorials: Video tutorials on platforms like YouTube can be an excellent resource for visual learners. Many content creators offer step-by-step guides on various Linux topics, including installation, command-line usage, desktop customization, and software management.
  8. Linux User Groups and Meetups: Locally organized Linux user groups (LUGs) or meetups provide opportunities to connect with other Linux enthusiasts in your area. Attending these gatherings allows you to network, share knowledge, and learn from experienced users.

Remember that learning Linux is an ongoing process. As you become more comfortable with the basics, challenge yourself by undertaking projects or contributing to open-source software. The key is to practice regularly and embrace the community’s spirit of collaboration and knowledge-sharing.

How do I install Linux on my computer?

Installing Linux on your computer is a straightforward process. Here are the general steps to get you started:

  1. Choose a Linux Distribution (Distro): There are numerous Linux distributions available, each with its own features and target audience. Popular choices include Ubuntu, Fedora, Debian, and CentOS. Research and select the distribution that best suits your needs.
  2. Download the ISO Image: Visit the official website of your chosen Linux distribution and download the ISO image file for the version you want to install. Make sure to select the appropriate architecture (32-bit or 64-bit) based on your computer’s specifications.
  3. Create Installation Media: Once you have downloaded the ISO image, you need to create installation media such as a bootable USB drive or DVD. You can use tools like Rufus (for Windows) or Etcher (for Windows, macOS, and Linux) to create a bootable USB drive from the ISO file.
  4. Backup Your Data: Before proceeding with the installation, it’s always recommended to back up any important data on your computer. While installing Linux should not affect other partitions or operating systems on your hard drive, it’s better to be safe than sorry.
  5. Boot from Installation Media: Insert the bootable USB drive or DVD into your computer and restart it. Access your computer’s BIOS settings by pressing a specific key during startup (usually F2, F12, or Del). In the BIOS settings, change the boot order so that your computer boots from the installation media first.
  6. Install Linux: After restarting with the installation media inserted, follow the on-screen instructions provided by your chosen Linux distribution’s installer. You will typically be asked to select language preferences, partition disks (you may choose automatic partitioning if you’re new), set up user accounts and passwords, and configure additional settings.
  7. Complete Installation: Once you have gone through all necessary steps in the installer, proceed with the installation process. The installer will copy files, install packages, and configure the system. This may take some time depending on your computer’s speed and the distribution you are installing.
  8. Reboot: After the installation is complete, you will be prompted to reboot your computer. Remove the installation media (USB drive or DVD) before restarting.
  9. Explore Linux: Upon rebooting, your computer should now boot into your newly installed Linux distribution. Take some time to familiarize yourself with the interface and start exploring the features and applications available.

Remember, these steps provide a general overview of the installation process. The exact steps may vary depending on your chosen distribution and specific requirements. It’s always recommended to refer to the official documentation or installation guides provided by your chosen Linux distribution for detailed instructions tailored to their specific installer.

How do I use the command line in Linux?

Using the command line in Linux can initially seem intimidating, but with a little practice, it becomes a powerful tool for executing tasks efficiently. Here are some basic steps to get you started:

  1. Open the Terminal: The Terminal is the command-line interface in Linux. You can usually find it in the Applications menu or by pressing Ctrl+Alt+T.
  2. Navigate the File System: The command line operates within the file system. Use commands like `cd` (change directory) to navigate between folders. For example, `cd Documents` will take you to the “Documents” folder.
  3. Execute Commands: To execute a command, type it into the terminal and press Enter. Commands can be single words or a combination of words and options. For example, `ls` lists the files and folders in your current directory, while `mkdir new_folder` creates a new folder named “new_folder”.
  4. Understand Command Syntax: Most commands follow a specific syntax, which includes options and arguments. Options modify how a command behaves, while arguments provide additional information or specify targets for the command.
  5. Get Help: If you’re unsure about a command or need more information, use the `man` command followed by the name of the command you want to learn about. For example, `man ls` displays the manual page for the “ls” command.
  6. Use Auto-Completion: The terminal offers auto-completion functionality that saves time and reduces errors. Pressing Tab will automatically complete partially typed commands or suggest available options and file names.
  7. Redirect Output: You can redirect a command’s output using symbols like `>` (to overwrite) or `>>` (to append). For example, `ls > file.txt` saves the output of “ls” into a file named “file.txt”.
  8. Chain Commands: You can chain multiple commands together using operators like `&&` (execute the next command if the previous one succeeds) or `|` (pipe the output of one command as input to another). For example, `command1 && command2` executes “command2” only if “command1” succeeds.
  9. Use Sudo: Some commands require administrative privileges. To run a command as a superuser, use the `sudo` prefix. You will be prompted to enter your password for authentication.
  10. Explore Advanced Topics: As you become more comfortable with the basics, you can explore more advanced topics like shell scripting, regular expressions, and command-line tools specific to your needs.

Remember, the command line provides immense power but requires caution. Double-check your commands before executing them to prevent unintended consequences. With practice and exploration, you’ll gradually become proficient in using the Linux command line and harness its full potential.

What are some tips for using a Linux user guide?

Using a Linux User Guide: Tips for Success

  1. Read the Introduction: Start by reading the introduction section of the Linux user guide. This will provide an overview of the guide’s structure, key concepts, and any prerequisites you need to be aware of before diving into specific topics.
  2. Identify Your Goals: Determine what you want to achieve with Linux. Are you looking to learn basic commands, set up a server, or explore advanced topics? Knowing your goals will help you navigate the guide more effectively and focus on the relevant sections.
  3. Follow a Logical Order: Most Linux user guides are organized in a logical manner, covering fundamental concepts first and progressing towards more advanced topics. It’s advisable to follow this order to build a solid foundation before moving on to complex subjects.
  4. Take Notes: Keep a notebook handy while going through the user guide. Jot down important commands, tips, or any questions that arise. This will serve as a handy reference later and help reinforce your understanding.
  5. Experiment in a Safe Environment: Linux encourages exploration and experimentation. Create a virtual machine or use spare hardware to practice commands and configurations without risking your primary system’s stability or data.
  6. Make Use of Examples: Many Linux user guides include practical examples that illustrate how commands are used in real-world scenarios. Take advantage of these examples to better understand how different concepts can be applied.
  7. Utilize Online Resources: While the user guide is an excellent starting point, don’t hesitate to explore additional online resources such as forums, blogs, and video tutorials for further clarification or alternative explanations.
  8. Practice Regularly: Learning Linux requires hands-on experience. Set aside dedicated time each day or week to practice what you’ve learned from the user guide by executing commands, configuring settings, or solving real-world problems.
  9. Join the Community: Engage with other Linux users through forums, chat channels, or local meetups. The Linux community is known for its helpfulness and willingness to share knowledge. Don’t hesitate to seek assistance or contribute your expertise.
  10. Embrace the Learning Process: Linux is a vast ecosystem, and no one becomes an expert overnight. Embrace the learning process, be patient with yourself, and celebrate each milestone achieved. Remember, every step forward brings you closer to mastering Linux.

By following these tips, you can make the most of your Linux user guide and embark on a rewarding journey towards becoming proficient in this powerful open-source operating system.

What are some common commands in Linux?

Linux offers a wide range of commands that allow users to interact with the operating system and perform various tasks efficiently. Here are some common commands in Linux:

  1. ls: Lists files and directories in the current directory.
  2. cd: Changes the current directory.
  3. pwd: Prints the current working directory.
  4. mkdir: Creates a new directory.
  5. rm: Removes files and directories.
  6. cp: Copies files and directories.
  7. mv: Moves or renames files and directories.
  8. cat: Displays the contents of a file.
  9. grep: Searches for a specific pattern in files or output.
  10. chmod: Changes permissions of files and directories.
  11. chown: Changes ownership of files and directories.
  12. ps: Displays information about running processes.
  13. kill: Terminates running processes.
  14. man: Displays the manual pages for commands.
  15. sudo: Executes commands with administrative privileges.

These are just a few examples, and there are many more commands available in Linux, each serving different purposes and providing extensive functionality to users.

It’s worth noting that most Linux distributions provide comprehensive documentation for each command, which can be accessed by typing “man [command]” in the terminal, providing detailed information on usage, options, and examples for each command.

How can I customize my desktop environment in Linux?

Customizing your desktop environment in Linux allows you to personalize your user interface and tailor it to your preferences. Here are some common ways to customize your Linux desktop:

  1. Themes: Most desktop environments offer a variety of themes that change the appearance of windows, menus, icons, and other graphical elements. You can easily switch between pre-installed themes or download new ones from online repositories.
  2. Wallpapers: Changing the wallpaper is a simple way to give your desktop a fresh look. Many desktop environments provide options to set wallpapers from a collection of images or use custom images of your choice.
  3. Icons: You can customize the icons for applications, folders, and files on your desktop. Some desktop environments allow you to select different icon sets or even create your own.
  4. Window Managers: If you’re using a more lightweight or minimalist desktop environment, you may have the option to choose different window managers that control how windows are displayed and managed. Each window manager has its own set of features and visual styles.
  5. Desktop Effects: Some desktop environments offer visual effects like transparency, animations, and window transitions that can be enabled or disabled according to your preference.
  6. Panel Configuration: The panel (or taskbar) in your desktop environment can often be customized by adding or removing applets, rearranging items, changing their sizes or positions, and adjusting panel properties such as color and transparency.
  7. Keyboard Shortcuts: Customizing keyboard shortcuts allows you to define key combinations for various actions like launching applications, switching between virtual workspaces, or executing specific commands.
  8. File Manager Preferences: Your file manager may have customizable settings such as the default view mode (icon view vs list view), sorting options, column widths, and thumbnail sizes.
  9. Terminal Customization: If you frequently use the terminal emulator in Linux, you can customize its appearance by modifying font settings, color schemes, transparency levels, and other preferences.
  10. Extensions and Plugins: Some desktop environments, such as GNOME and KDE Plasma, support extensions or plugins that add extra functionality or modify the behavior of the desktop environment. These can range from simple enhancements to advanced tools for customization.

It’s important to note that the customization options may vary depending on the specific desktop environment you are using. Explore the settings and preferences menus within your chosen desktop environment to discover the available customization options. Additionally, online communities and forums dedicated to your specific desktop environment can provide valuable tips, tutorials, and resources for further customization.

How can I troubleshoot problems with my Linux system?

Troubleshooting Problems with Your Linux System

Linux is known for its stability and reliability, but like any operating system, it can encounter issues from time to time. When faced with problems on your Linux system, here are some troubleshooting steps you can take to identify and resolve the issue:

Identify the Problem:

– Pay attention to any error messages or unusual behavior that may indicate the source of the problem.

– Determine if the issue is specific to a particular application, hardware component, or system-wide.

Check System Logs:

– Linux maintains various logs that record system events and errors. The main log file is usually located at /var/log/syslog or /var/log/messages.

– Use tools like “tail” or “less” to view the log files in real-time or search for specific keywords related to the problem.

Update Software Packages:

– Ensure that your software packages are up-to-date as outdated packages can sometimes cause compatibility issues or security vulnerabilities.

– Use your distribution’s package manager (e.g., apt-get, dnf, yum) to update all installed packages.

Restart Affected Services:

– If you are experiencing issues with specific services (e.g., web server, database), try restarting them using commands like “systemctl restart ” or “/etc/init.d/ restart”.

– Check service status using commands like “systemctl status ” or “/etc/init.d/ status” for any error messages.

Verify Hardware Connections:

– If you suspect a hardware-related problem (e.g., network connectivity, peripherals), check all cables and connections to ensure they are properly plugged in.

– Test hardware components on another system if possible to isolate the issue.

Run System Diagnostics:

– Linux provides various diagnostic tools that can help identify hardware issues (e.g., memtest86+ for memory testing, smartctl for hard drive health).

– Install the necessary diagnostic tools and run them to check the health of your hardware components.

Use Command-Line Tools:

– Linux offers a range of command-line tools that can help diagnose and troubleshoot specific issues. For example:

– “dmesg” displays kernel messages, which can be useful for identifying hardware-related problems.

– “top” or “htop” shows real-time system resource usage, allowing you to identify processes causing high CPU or memory usage.

– “ifconfig” or “ip addr” displays network interface information and helps diagnose network connectivity issues.

Consult Online Resources and Forums:

– The Linux community is vast and supportive. If you are unable to resolve the issue on your own, consult online forums, mailing lists, or official documentation specific to your distribution.

– Provide detailed information about the problem, including error messages, steps you have taken so far, and any relevant system configurations.

Remember that troubleshooting Linux systems often requires a systematic approach and patience. By following these steps and leveraging community resources, you can effectively identify and resolve issues with your Linux system.

Is there a way to automate tasks in Linux?

Absolutely! Linux provides a wide range of tools and techniques to automate tasks, making it a powerful platform for streamlining repetitive or complex operations. Here are a few methods commonly used for task automation in Linux:

  1. Shell scripting: Linux shells, such as Bash, provide scripting capabilities that allow you to write scripts to automate tasks. Shell scripts can execute commands, perform calculations, handle conditional statements, and more. By writing scripts, you can automate a series of commands or actions and schedule them to run at specific times or events.
  2. Cron: Cron is a time-based job scheduler in Linux that allows you to schedule tasks at predetermined intervals or specific times. By creating cron jobs, you can automate routine tasks like backups, system maintenance, log rotation, and data synchronization.
  3. systemd: systemd is a system initialization and service manager in modern Linux distributions. It includes a feature called “systemd timers” that enables automated task scheduling similar to cron but with more flexibility and control. systemd timers can be used to start services, run scripts, or execute commands at specified intervals.
  4. Task automation tools: There are various task automation tools available for Linux that provide advanced capabilities for automating complex workflows and processes. Some popular examples include Ansible, Puppet, and Chef. These tools allow you to define infrastructure as code and automate the deployment, configuration management, and orchestration of systems.
  5. GUI automation: If you need to automate interactions with graphical applications or user interfaces in Linux desktop environments, tools like AutoKey or SikuliX can be used. These tools use visual recognition techniques or keyboard macros to simulate user input and automate tasks within GUI applications.

Remember that automation requires careful planning and consideration of security implications. Always ensure that automated tasks are properly tested before deploying them in production environments.

With the vast array of automation options available in Linux, you have the power to simplify your workflows, save time, and increase efficiency by automating repetitive or complex tasks.

rpm package manager

Mastering Software Management: Exploring the Power of RPM Package Manager

RPM Package Manager: Streamlining Software Management

In the world of Linux, package management plays a crucial role in ensuring a smooth and efficient user experience. Among the various package managers available, RPM (Red Hat Package Manager) stands out as a powerful and widely adopted solution. In this article, we delve into the features and benefits of RPM, exploring how it simplifies software management for Linux distributions.

What is RPM?

RPM is a package management system that facilitates the installation, updating, and removal of software packages on Linux-based operating systems. Originally developed by Red Hat, RPM has become an industry standard adopted by numerous Linux distributions such as Fedora, CentOS, and openSUSE.

Simplified Installation

One of the key advantages of RPM is its streamlined installation process. With just a few simple commands or clicks, users can effortlessly install software packages onto their systems. RPM handles dependencies automatically, ensuring that all required libraries and components are installed alongside the desired package. This eliminates much of the manual effort traditionally associated with software installation on Linux.

Efficient Updates

Keeping software up to date is essential for security and performance reasons. RPM excels in this aspect by providing an efficient update mechanism. Users can easily check for updates to their installed packages and apply them with minimal effort. The ability to manage updates at the system level ensures that all installed software remains current and compatible with the underlying operating system.

Dependency Management

Software often relies on other libraries or components to function correctly. Managing these dependencies manually can be challenging and time-consuming. However, RPM simplifies this process by automatically resolving dependencies during installation or update operations. This ensures that all required dependencies are properly installed or updated alongside the desired software package.

Package Verification

RPM incorporates robust verification mechanisms to ensure package integrity and security. Each package contains checksums that allow RPM to verify its authenticity before installation. This helps protect against tampering or corruption during transit or storage. Additionally, RPM can also check the digital signatures of packages, providing an extra layer of security and trust.

Extensibility and Customization

RPM offers flexibility for developers and system administrators to create custom software packages tailored to their specific needs. With RPM, it is possible to define package specifications, including file locations, dependencies, and installation scripts. This enables the creation of customized packages that adhere to specific system requirements or organizational policies.

Community Support

RPM benefits from a thriving community of developers, maintainers, and users who contribute to its ongoing development and support. This active community ensures that RPM remains up-to-date with the latest advancements in software management. Users can access forums, mailing lists, and online resources to seek assistance, share knowledge, and collaborate on improving the RPM ecosystem.

In conclusion, RPM Package Manager plays a vital role in simplifying software management for Linux distributions. Its user-friendly installation process, efficient update mechanism, dependency handling capabilities, package verification features, extensibility options, and strong community support make it an invaluable tool for both end-users and system administrators alike. Whether you are a Linux enthusiast or a professional managing large-scale deployments, embracing RPM can significantly enhance your software management experience on Linux-based systems.


Commonly Asked Questions About RPM Package Manager in English (UK)

  1. What is RPM package manager?
  2. How do I install an RPM package?
  3. How do I update an RPM package?
  4. How do I remove an RPM package?
  5. What is the difference between YUM and RPM?

What is RPM package manager?

The RPM Package Manager, commonly known as RPM, is a powerful package management system primarily used in Linux-based operating systems. It was initially developed by Red Hat but has since become an industry standard and is adopted by various Linux distributions such as Fedora, CentOS, and openSUSE.

At its core, RPM is designed to simplify the installation, updating, and removal of software packages on a Linux system. It provides a standardized format for packaging software along with tools to manage these packages effectively.

RPM packages are typically distributed as files with the “.rpm” extension. Each package contains the necessary files, libraries, and metadata required to install and run a specific software application or component. These packages can be installed individually or in groups to fulfill different requirements.

One of the key features of RPM is its ability to handle dependencies automatically. Dependencies refer to other software components or libraries that a package relies on to function correctly. When installing or updating a package, RPM resolves these dependencies by ensuring that all required components are present on the system. This simplifies the process for users and reduces the likelihood of compatibility issues.

RPM also provides mechanisms for verifying package integrity and authenticity. Each package includes checksums that allow RPM to verify its integrity before installation. Additionally, digital signatures can be used to ensure that packages come from trusted sources.

With RPM, users can easily manage their installed packages through commands or graphical interfaces provided by their Linux distribution. They can check for updates, install new software, remove unwanted applications, and perform various other actions related to software management.

Furthermore, RPM offers extensibility options for developers and system administrators. It allows them to create custom packages tailored to specific needs or organizational requirements. By defining package specifications such as file locations, dependencies, and installation scripts, they can create self-contained packages that adhere to desired configurations.

The widespread adoption of RPM across different Linux distributions has led to a strong community support network. Users can find forums, mailing lists, and online resources where they can seek help, share knowledge, and collaborate on improving the RPM ecosystem.

In summary, RPM is a package management system that simplifies software installation, updating, and removal on Linux-based operating systems. It automates dependency resolution, provides package verification mechanisms, supports customization through extensibility options, and benefits from a dedicated community of users and developers.

How do I install an RPM package?

Installing an RPM package is a straightforward process on Linux-based operating systems that use the RPM Package Manager. Here’s a step-by-step guide to help you install an RPM package:

Download the RPM package: Obtain the RPM package file from a trusted source or official repository. Make sure to choose the correct version and architecture that matches your system.

Open the terminal: Launch the terminal application on your Linux system. You can typically find it in the applications menu or by using the keyboard shortcut Ctrl+Alt+T.

Navigate to the directory containing the RPM package: Use the `cd` command to change your current directory to where you downloaded or saved the RPM package. For example, if it’s in your Downloads folder, you can use `cd ~/Downloads` to navigate there.

Install the RPM package: Once you are in the correct directory, use the following command to install the RPM package:

“`

sudo rpm -i .rpm

“`

Replace `` with the actual name of your RPM package file.

Note: The `sudo` command might prompt you for your administrator password before proceeding with installation.

Wait for installation: The installation process will begin, and you will see progress information in your terminal window. The time it takes depends on various factors, including package size and system performance.

Verify successful installation: After completion, you can verify if the RPM package was installed successfully by running appropriate commands specific to your distribution or checking if any new application or service associated with that package is now available.

Congratulations! You have successfully installed an RPM package on your Linux system using the RPM Package Manager.

Remember, when installing packages from external sources, always ensure they come from trusted repositories or official vendors to maintain system security and stability.

How do I update an RPM package?

Updating an RPM package is a straightforward process that can be accomplished using the package manager on your Linux distribution. Here are the general steps to update an RPM package:

Open a terminal or command-line interface on your Linux system.

Log in as the root user or use the “sudo” command to run commands with administrative privileges.

Use the appropriate package manager command for your distribution:

– For distributions using YUM (Yellowdog Updater, Modified) or DNF (Dandified YUM):

“`

sudo yum update

“`

or

“`

sudo dnf update

“`

– For distributions using Zypper (openSUSE):

“`

sudo zypper update

“`

– For distributions using APT (Advanced Packaging Tool) such as Debian or Ubuntu:

“`

sudo apt-get update

sudo apt-get upgrade

“`

Note: Replace `` with the actual name of the package you want to update.

The package manager will check for updates and display a list of available updates for the specified package(s). Review the list to ensure you want to proceed with the updates.

Confirm and proceed with the update by entering “Y” or “Yes” when prompted.

The package manager will download and install the updated version of the package, along with any necessary dependencies.

Once completed, you will see a message indicating that the update was successful.

It’s important to note that some distributions may have specific variations in their package management commands, so it’s always recommended to consult your distribution’s documentation or online resources for precise instructions tailored to your system.

Remember, keeping your packages up to date is essential for security and performance reasons, so regular updates are recommended.

How do I remove an RPM package?

Removing an RPM package is a straightforward process. You can use the RPM command-line tool to uninstall the package from your Linux system. Here’s a step-by-step guide on how to remove an RPM package:

Open your terminal or command prompt.

Log in as the root user or use the sudo command to gain administrative privileges.

Run the following command to remove the RPM package:

“`shell

rpm -e package_name

“`

Replace “package_name” with the actual name of the RPM package you want to remove.

Press Enter and wait for the removal process to complete. The system will display messages indicating the progress and any errors encountered during removal.

Note: If there are other packages that depend on the one you’re trying to remove, RPM will display a warning and ask for confirmation before proceeding with the removal. You can choose to proceed or cancel based on your requirements.

After successful removal, you can verify that the package is no longer installed by running:

“`shell

rpm -q package_name

“`

Replace “package_name” with the name of the removed package. If no output is displayed, it means that the package has been successfully removed from your system.

It’s important to note that removing an RPM package may affect other software dependent on it, so exercise caution when removing packages and review any warnings provided by RPM during removal.

What is the difference between YUM and RPM?

YUM (Yellowdog Updater, Modified) and RPM (Red Hat Package Manager) are both package management tools commonly used in Linux distributions. While they are closely related, there are significant differences between them.

RPM is the lower-level package management system that handles the actual installation, updating, and removal of software packages. It manages individual package files and performs operations based on instructions provided by the package metadata. RPM primarily focuses on managing packages at a local level and does not handle complex dependency resolution.

On the other hand, YUM is a higher-level package management tool that utilizes RPM as its underlying engine. YUM acts as a front-end to RPM, providing a more user-friendly interface and advanced features. It simplifies package management by automatically resolving dependencies during installations or updates. YUM maintains a repository of packages, allowing users to easily search for and install software from a centralized source.

Here are some key differences between YUM and RPM:

  1. Dependency Resolution: RPM does not have built-in dependency resolution capabilities. Users need to manually handle dependencies when installing or updating packages using RPM. In contrast, YUM automatically resolves dependencies by fetching required packages from repositories.
  2. Repository Management: While RPM can directly install packages from local files, YUM focuses on managing repositories of packages hosted on remote servers. YUM allows users to add or remove repositories easily and provides commands to search, install, update, or remove packages from these repositories.
  3. System Updates: YUM excels in managing system-wide updates by handling groups of packages collectively known as “update sets.” It ensures that all installed software remains up to date with the latest versions available in the configured repositories. RPM primarily focuses on individual package operations rather than system-wide updates.
  4. User Interface: RPM operates through command-line tools with specific options for various operations such as installation or removal of packages. While it provides detailed control over package management tasks, it requires users to manually handle dependencies and other complexities. YUM, on the other hand, offers a more user-friendly command-line interface and can also be used with graphical front-ends like DNF (Dandified YUM).

In summary, RPM is the core package management tool that directly handles package operations, while YUM is a higher-level tool that utilizes RPM to provide advanced features such as dependency resolution, repository management, and system-wide updates. YUM simplifies the package management process and enhances the user experience by automating complex tasks that would otherwise need to be manually performed using RPM.