rpmlinux.org

Loading

small linux os

Unleashing the Power of Small Linux OS: Lightweight, Efficient, and Versatile

Small Linux OS: Lightweight and Efficient

In the vast landscape of operating systems, there is a niche that caters to those seeking simplicity, speed, and efficiency. Small Linux OS, also known as lightweight Linux distributions, offer a streamlined experience without compromising functionality. These compact operating systems are designed to run smoothly on older hardware or devices with limited resources, making them an excellent choice for revitalizing older machines or maximizing performance on low-spec devices.

One of the key advantages of small Linux OS is their minimal resource requirements. They are built with a focus on efficiency, allowing them to function smoothly even on machines with limited RAM or processing power. This makes them ideal for repurposing old computers that would otherwise struggle to run modern operating systems.

Despite their small size and resource-friendly nature, these Linux distributions do not compromise on functionality. They come bundled with essential software packages and applications necessary for everyday tasks such as web browsing, document editing, multimedia playback, and more. Additionally, users have the freedom to customize their small Linux OS by installing additional software from vast repositories available in the Linux ecosystem.

Another notable feature of small Linux OS is their quick boot times. Unlike some mainstream operating systems that take minutes to load, these lightweight alternatives can boot up in mere seconds. This speediness not only enhances user experience but also saves valuable time when working on time-sensitive tasks.

Security is another area where small Linux OS shines. Due to their minimalist design and reduced attack surface compared to larger operating systems, they are inherently more secure against malware and cyber threats. Additionally, frequent updates and active community support ensure that vulnerabilities are promptly addressed.

Small Linux OS also fosters a sense of community among its users. The dedicated enthusiasts who contribute to the development and maintenance of these distributions often provide extensive documentation, forums, and chat channels where users can seek help or share knowledge with like-minded individuals.

Whether you are repurposing an old computer or seeking optimal performance on low-end hardware, small Linux OS offers a lightweight and efficient solution. These distributions provide a reliable and user-friendly environment without overwhelming system resources. With their minimalistic design, quick boot times, security features, and active community support, they are an excellent choice for those who value simplicity, speed, and efficiency.

Embrace the world of small Linux OS and experience the power of lightweight computing. Discover the possibilities of breathing new life into older hardware or maximizing performance on low-spec devices. Explore the various small Linux distributions available and find the perfect fit for your needs.


Frequently Asked Questions About Small Linux Operating Systems in the UK

  1. What Linux distros are under 500 MB?
  2. What’s the lightest Linux OS?
  3. Which is the smallest Linux OS?
  4. Which Linux is best for 1GB RAM?

What Linux distros are under 500 MB?

There are several Linux distributions available that have a small footprint, typically under 500 MB. Here are a few popular options:

  1. Puppy Linux: Puppy Linux is a lightweight distribution designed to be fast and efficient. It can run entirely in RAM, making it incredibly quick and suitable for older hardware. The ISO file size is usually around 200-300 MB.
  2. Tiny Core Linux: Tiny Core Linux is a minimalistic distribution that focuses on providing a basic foundation for users to build upon. The core ISO file size is around 15-20 MB, but additional extensions can be installed to customize the system further.
  3. Damn Small Linux (DSL): DSL is known for its extremely small size, with the ISO file coming in at around 50 MB. Despite its tiny footprint, DSL offers a range of applications and tools necessary for everyday use.
  4. Slitaz: Slitaz is another lightweight distribution that aims to provide a full-featured system while keeping resource usage low. The ISO file size is approximately 35-50 MB, making it suitable for older machines or devices with limited resources.
  5. AntiX: AntiX is designed to be fast and efficient while offering users a variety of desktop environments to choose from. The base ISO file size ranges from 330-400 MB, depending on the edition selected.
  6. LXLE: LXLE is based on Lubuntu and provides a lightweight environment with an emphasis on simplicity and ease of use. The ISO file size typically falls under 500 MB, making it suitable for older hardware.

These are just a few examples of small Linux distributions available today. It’s worth noting that some distributions may have different editions or versions with varying sizes, so it’s always best to check their official websites for the most up-to-date information on their sizes and features before downloading or installing them on your system.

What’s the lightest Linux OS?

When it comes to lightweight Linux operating systems, there are several options available. However, it’s important to note that the “lightest” Linux OS can vary depending on specific requirements and preferences. Here are a few notable lightweight Linux distributions known for their minimal resource usage:

  1. Puppy Linux: Puppy Linux is renowned for its incredibly small size and efficiency. It can run entirely in RAM, allowing for fast boot times and smooth performance even on older hardware.
  2. Damn Small Linux (DSL): As the name suggests, DSL is designed to be extremely compact, fitting within just 50MB of space. Despite its small size, it includes a range of applications and tools suitable for basic computing tasks.
  3. Tiny Core Linux: Tiny Core Linux is a minimalist distribution that provides users with a basic core system upon installation. Users can then customize their system by adding only the necessary components, resulting in an incredibly lightweight and tailored experience.
  4. Bodhi Linux: Bodhi Linux utilizes the Enlightenment desktop environment, known for its lightweight nature and visually appealing aesthetics. It offers a balance between minimalism and functionality, making it suitable for both older hardware and modern machines.
  5. Lubuntu: Lubuntu is an official Ubuntu flavor that utilizes the LXQt desktop environment, which is designed to be lightweight while providing a familiar user interface similar to Windows. It offers a good balance between resource efficiency and usability.

These are just a few examples of lightweight Linux distributions available today. Each has its own strengths and focuses on different aspects of lightness and efficiency. Ultimately, the choice of the lightest Linux OS depends on your specific needs, hardware specifications, desired features, and personal preferences.

Which is the smallest Linux OS?

When it comes to small Linux OS, there are several lightweight distributions available, each with its own unique features and advantages. One of the most well-known and smallest Linux OS is Tiny Core Linux.

Tiny Core Linux is an incredibly compact distribution that can run entirely in RAM, requiring minimal system resources. The base installation of Tiny Core Linux is only about 16MB in size, making it one of the smallest Linux distributions available. Despite its small footprint, it provides a fully functional desktop environment and supports a wide range of applications.

Another notable small Linux OS is Puppy Linux. Puppy Linux is designed to be extremely lightweight and fast, with the ability to run on older hardware or low-spec devices. Depending on the specific variant you choose, Puppy Linux can range from around 100MB to 300MB in size. Puppy Linux offers a user-friendly interface and includes essential applications for everyday use.

Another popular option is Damn Small Linux (DSL). DSL was specifically designed to be a minimalistic yet functional operating system that can run on older hardware or systems with limited resources. The ISO file size of DSL is around 50MB, making it one of the smallest distributions available. Despite its small size, DSL includes a variety of applications and tools for basic computing tasks.

It’s worth noting that new lightweight distributions are constantly being developed, so the landscape may change over time as new options emerge. It’s always recommended to research and explore different small Linux OS options to find the one that best suits your needs in terms of size requirements, hardware compatibility, software availability, and user experience.

Which Linux is best for 1GB RAM?

When it comes to choosing a Linux distribution for a system with 1GB of RAM, it’s important to consider lightweight options that can run efficiently on limited resources. Here are a few Linux distributions that are well-suited for systems with 1GB of RAM:

  1. Lubuntu: Lubuntu is a lightweight variant of Ubuntu that uses the LXQt desktop environment. It is designed to be fast, energy-efficient, and resource-friendly. Lubuntu provides a familiar Ubuntu experience while keeping resource usage minimal.
  2. Xubuntu: Xubuntu is another lightweight Ubuntu-based distribution that uses the XFCE desktop environment. It offers a balance between functionality and system requirements, making it suitable for older or low-spec machines.
  3. Peppermint OS: Peppermint OS is a cloud-focused Linux distribution that combines the LXDE desktop environment with web applications integration. It aims to provide a lightweight and responsive experience while integrating web-based tools seamlessly.
  4. Bodhi Linux: Bodhi Linux utilizes the Enlightenment desktop environment, known for its simplicity and low system requirements. It offers a customizable interface and focuses on minimalism without compromising functionality.
  5. Puppy Linux: Puppy Linux is an extremely lightweight distribution designed to run entirely in RAM, making it ideal for systems with limited resources like 1GB of RAM. Despite its small size, Puppy Linux provides essential applications and offers great flexibility.

These distributions prioritize efficiency and performance on low-spec hardware while still providing essential features and functionalities. However, keep in mind that depending on your specific needs and hardware configuration, you may need to experiment with different distributions to find the one that best suits your requirements.

linux basics for beginners

Linux Basics for Beginners: A Guide to Getting Started with the Open-Source Operating System

Linux Basics for Beginners

Linux, an open-source operating system, has gained immense popularity over the years due to its stability, security, and flexibility. If you’re new to Linux and eager to explore this powerful platform, here are some basics to help you get started.

  1. Understanding Linux: Linux is a Unix-like operating system that powers a wide range of devices, from servers and desktop computers to smartphones and embedded systems. Unlike proprietary operating systems like Windows or macOS, Linux is built collaboratively by a global community of developers who contribute their expertise to create a free and open-source software ecosystem.
  2. Distributions: Linux comes in various distributions or “distros,” each offering a different set of features and user interfaces. Popular distros include Ubuntu, Fedora, Debian, and CentOS. It’s recommended for beginners to start with user-friendly distros such as Ubuntu or Mint, which provide intuitive interfaces and extensive documentation.
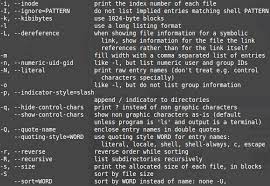
  3. Command Line Interface (CLI): The command line interface is an essential part of Linux that allows users to interact with the system using text commands. While it may seem intimidating at first, learning basic CLI commands can greatly enhance your efficiency and control over the system. Commands like ls (list files), cd (change directory), mkdir (create directory), and sudo (execute commands as superuser) are fundamental for navigating the file system and managing permissions.
  4. File System Hierarchy: Unlike Windows or macOS, Linux organizes files in a hierarchical structure known as the File System Hierarchy Standard (FSH). Directories such as /home (user home directories), /etc (system configuration files), /bin (essential binary programs), and /var (variable data) have specific purposes within the file system. Understanding this structure will help you locate files efficiently.
  5. Package Management: One of Linux’s strengths is its package management system, which simplifies software installation and updates. Each distribution has its own package manager, such as APT for Debian-based distros or DNF for Fedora. These tools allow you to search for, install, and remove software packages effortlessly.
  6. User Accounts and Permissions: Linux is a multi-user operating system, meaning it can handle multiple user accounts simultaneously. Understanding user management and permissions is crucial for maintaining security and privacy. The root user (superuser) has administrative privileges, while regular users have limited access to system resources. Learning how to create users, assign permissions, and manage passwords will give you control over your Linux environment.
  7. Documentation and Community Support: The Linux community is known for its strong support network and extensive documentation. Online forums, mailing lists, and dedicated websites provide valuable resources for troubleshooting issues or seeking guidance. Don’t hesitate to ask questions or join discussions; the community is always ready to help.

Remember that learning Linux is a journey that requires patience and practice. Start by familiarizing yourself with the basics mentioned above before diving into more advanced topics like scripting or system administration. Embrace the open-source philosophy of collaboration and exploration as you delve into this exciting world of Linux.

Whether you’re a student, developer, or simply curious about technology, Linux offers a vast playground where you can unleash your creativity and build your skills. So take the leap into the world of Linux today – an adventure awaits!


Frequently Asked Questions: Linux Basics for Beginners in English (UK)

  1. Is Linux hard for beginners?
  2. Can Linux be self taught?
  3. How can a beginner learn Linux?
  4. How to use Linux step by step?
  5. What are the basics of Linux?

Is Linux hard for beginners?

Linux can be perceived as challenging for beginners who are accustomed to using other operating systems like Windows or macOS. However, with the right approach and resources, Linux can be learned and mastered by anyone, regardless of their technical background. Here are a few factors to consider when assessing the difficulty level of Linux for beginners:

  1. Familiarity: If you have been using Windows or macOS for a long time, transitioning to Linux may require some adjustment. The user interface and terminology in Linux can differ from what you’re used to. However, many Linux distributions offer user-friendly interfaces that make the transition smoother.
  2. Learning Curve: Linux does have a learning curve, especially if you are new to command line interfaces (CLI). Understanding basic CLI commands and navigating the file system may take some time and practice. However, there are numerous online tutorials, documentation, and communities available that can help beginners get up to speed.
  3. Community Support: The Linux community is known for its strong support network. There are countless forums, discussion boards, and dedicated websites where you can seek help and guidance from experienced users. This community-driven approach ensures that assistance is readily available for beginners facing challenges.
  4. Distributions: Choosing the right distribution can greatly impact the beginner-friendliness of Linux. Some distributions, like Ubuntu or Mint, focus on providing a user-friendly experience with intuitive interfaces and extensive documentation tailored towards newcomers.
  5. Purpose: Consider your purpose for using Linux. If you’re looking to perform simple tasks like web browsing or word processing, many user-friendly distributions offer graphical interfaces similar to other operating systems. On the other hand, if you want to delve into more advanced topics like system administration or software development, expect a steeper learning curve.

Ultimately, while there may be initial challenges when starting with Linux as a beginner, perseverance and willingness to learn will help overcome them. With time and practice, users often find that Linux offers greater control, customization options, and a more rewarding computing experience.

Can Linux be self taught?

Yes, Linux can be self-taught. In fact, many people have successfully learned Linux on their own through self-study and practice. With the abundance of online resources, tutorials, documentation, and community support available, it is entirely possible to gain proficiency in Linux without formal training or classes.

Here are some steps to help you get started with self-learning Linux:

  1. Set a Learning Goal: Determine what you want to achieve with Linux. Whether it’s becoming proficient in using the command line interface, understanding system administration tasks, or exploring Linux for specific purposes like web development or data analysis, having a clear goal will guide your learning path.
  2. Choose a Distro: Select a Linux distribution that suits your needs and preferences. Popular beginner-friendly choices include Ubuntu, Mint, Fedora, and Debian. Each distribution has its own strengths and user community.
  3. Online Resources: Utilize online resources such as tutorials, guides, forums, and documentation provided by the Linux community. Websites like Linux.com, Ubuntu Documentation, Arch Wiki, and Stack Exchange offer valuable information for learners at all levels.
  4. Hands-on Practice: The best way to learn Linux is by doing. Create a virtual machine or set up a dual-boot system on your computer to have a dedicated environment for experimentation without affecting your main operating system. Practice using the command line interface (CLI), installing software packages with package managers like APT or DNF, configuring system settings, and exploring various utilities.
  5. Join Communities: Engage with the vibrant Linux community through forums like Reddit’s r/linux or specialized forums dedicated to specific distributions or topics of interest. Participate in discussions, ask questions when you encounter difficulties, and share your knowledge with others.
  6. Projects and Challenges: Undertake projects that align with your learning goals to apply what you’ve learned practically. This could involve setting up a web server using Apache or Nginx or creating a script to automate a task. Challenges and projects will help reinforce your understanding and provide real-world experience.
  7. Continuous Learning: Linux is a vast ecosystem, and there’s always something new to learn. Stay updated with the latest developments, security practices, and emerging technologies in the Linux world. Follow relevant blogs, subscribe to newsletters, and explore advanced topics as you progress.

Remember, self-learning requires dedication, patience, and perseverance. It’s essential to break down complex concepts into manageable chunks and build upon your knowledge gradually. With determination and consistent effort, you can become proficient in Linux through self-teaching.

How can a beginner learn Linux?

Learning Linux as a beginner can be an exciting and rewarding journey. Here are some steps to help you get started:

  1. Choose a Beginner-Friendly Distribution: Start by selecting a user-friendly Linux distribution like Ubuntu, Linux Mint, or Fedora. These distributions offer intuitive interfaces and extensive documentation, making it easier for beginners to get acquainted with the system.
  2. Install Linux on Your Computer: Set up a dual-boot system or install Linux on a virtual machine to create a safe learning environment without affecting your existing operating system. Follow the installation instructions provided by your chosen distribution to ensure a smooth setup process.
  3. Familiarize Yourself with the Command Line Interface (CLI): The command line interface is an essential part of using Linux effectively. Start by learning basic commands like ls (list files), cd (change directory), mkdir (create directory), and sudo (execute commands as superuser). Online tutorials and cheat sheets can help you understand and practice these commands.
  4. Explore the File System Hierarchy: Learn how files are organized in the Linux file system hierarchy, such as /home (user home directories), /etc (system configuration files), /bin (essential binary programs), and /var (variable data). Understanding this structure will help you navigate through the file system efficiently.
  5. Practice Regularly: The best way to learn Linux is through hands-on practice. Experiment with different commands, create and delete files and directories, and explore various features of your chosen distribution. The more you use Linux, the more comfortable you’ll become with its functionalities.
  6. Utilize Online Resources: Take advantage of online tutorials, forums, blogs, and YouTube channels dedicated to teaching Linux basics for beginners. Websites like Linux.com, Ubuntu Forums, and Reddit’s r/linux community are excellent resources for seeking guidance or asking questions.
  7. Read Documentation: Most distributions provide comprehensive documentation that covers various aspects of using their specific version of Linux. Refer to the official documentation for your chosen distribution to understand its features, configuration options, and troubleshooting techniques.
  8. Join Linux Communities: Engage with the Linux community by joining forums, mailing lists, or social media groups. These communities are filled with experienced users who are often willing to help beginners. Participating in discussions and asking questions can enhance your learning experience.
  9. Try Out Different Applications: Explore the vast array of open-source software available for Linux. Experiment with different applications for productivity, multimedia, programming, and more. This will give you a broader understanding of the capabilities of Linux and help you find tools that suit your needs.
  10. Set Small Goals and Build Upon Them: Break down your learning process into small achievable goals. Start with basic tasks like navigating directories or installing software packages, then gradually move on to more complex tasks like scripting or system administration. Building upon these small goals will boost your confidence and knowledge over time.

Remember that learning Linux is a continuous process. Embrace curiosity, be patient with yourself, and don’t hesitate to ask for help when needed. With dedication and practice, you’ll become proficient in using Linux and unlock a world of possibilities in open-source computing.

How to use Linux step by step?

Using Linux Step by Step

Linux is a powerful operating system with a wide range of applications and possibilities. If you’re new to Linux and want to learn how to use it effectively, follow these step-by-step instructions:

  1. Choose a Linux Distribution: Start by selecting a Linux distribution that suits your needs. Popular options include Ubuntu, Fedora, Debian, or Mint. Download the ISO file from the distribution’s official website.
  2. Create Installation Media: Burn the downloaded ISO file onto a DVD or create a bootable USB drive using tools like Rufus or Etcher. This will allow you to install Linux on your computer.
  3. Install Linux: Insert the installation media into your computer and reboot it. Follow the on-screen instructions to install Linux on your hard drive. You can choose to install it alongside your existing operating system or replace it entirely.
  4. Explore the Desktop Environment: After installation, you’ll be greeted with a desktop environment (DE) that provides a graphical user interface (GUI). Common DEs include GNOME, KDE Plasma, Xfce, and Cinnamon. Spend some time familiarizing yourself with the DE’s layout and features.
  5. Navigate the File System: Understanding how files are organized in Linux is crucial. The root directory (“/”) is the top-level directory from which all other directories branch out. Use the file manager provided by your DE to navigate through directories, create new folders, and manage files.
  6. Install Software: Linux offers various methods for installing software packages. Most distributions have their own package managers (e.g., APT for Debian-based distros or DNF for Fedora) that allow you to search for software and install it with just a few commands in the terminal.
  7. Learn Basic Terminal Commands: The terminal provides direct access to the command line interface (CLI), where you can execute commands and perform advanced tasks in Linux. Start by learning basic commands like ls (list files), cd (change directory), mkdir (create directory), and rm (remove files).
  8. Customize Your Environment: Linux offers extensive customization options, allowing you to personalize your desktop, themes, icons, and more. Explore the settings and preferences of your DE to tailor the environment to your liking.
  9. Join the Linux Community: Engage with the Linux community to enhance your learning experience. Participate in online forums, join mailing lists, or attend local meetups to connect with fellow Linux users and seek help when needed.
  10. Continue Learning: Linux is a vast ecosystem with endless possibilities. As you become more comfortable using Linux, consider expanding your knowledge by exploring advanced topics like scripting, system administration, or networking.

Remember that learning Linux takes time and practice. Don’t be afraid to experiment and make mistakes – it’s all part of the learning process. Embrace the open-source philosophy and enjoy the freedom that Linux offers.

With these step-by-step instructions, you’re well on your way to becoming proficient in using Linux. Happy exploring!

What are the basics of Linux?

The basics of Linux revolve around understanding its key components, command line interface, file system structure, user management, and package management. Here is a brief overview:

  1. Kernel: The Linux kernel is the core component of the operating system. It interacts directly with the hardware and manages resources such as memory, processes, and device drivers.
  2. Distributions: Linux comes in various distributions or “distros.” Each distro packages the Linux kernel with different software, configurations, and user interfaces to cater to different needs. Popular distros include Ubuntu, Fedora, Debian, and CentOS.
  3. Command Line Interface (CLI): The CLI allows users to interact with the system through text-based commands. Learning basic CLI commands is essential for navigating the file system, managing files and directories, executing programs, and configuring the system.
  4. File System Hierarchy: Linux organizes files in a hierarchical structure known as the File System Hierarchy Standard (FSH). Directories such as /home (user home directories), /etc (system configuration files), /bin (essential binary programs), and /var (variable data) have specific purposes within the file system.
  5. User Accounts and Permissions: Linux is a multi-user operating system where each user has their own account with specific permissions. The root user (superuser) has administrative privileges while regular users have limited access to system resources. Understanding user management and permissions is crucial for maintaining security.
  6. Package Management: Linux offers package managers that simplify software installation and updates. These tools allow users to search for software packages in repositories, install them with dependencies resolved automatically, update installed packages, and remove unnecessary ones.
  7. Documentation and Community Support: The Linux community provides extensive documentation along with active support forums where users can seek help or share knowledge. Exploring online resources will assist you in troubleshooting issues or learning advanced topics.

By grasping these basics of Linux, you can navigate the system, execute commands, manage files and users, and utilize package management effectively. With time and practice, you can delve deeper into advanced topics like shell scripting, network configuration, system administration, or software development.

windows me

Windows ME: Navigating the Millennial Edition of Microsoft’s Operating System

Windows ME: The Millennial Edition

In the realm of operating systems, Windows ME holds a unique place in history. Released in the year 2000, it was the last installment of the Windows 9x series and aimed to bring enhanced multimedia capabilities and improved usability to home users. Often referred to as “Windows ME” or simply “Millennium Edition,” this operating system left a lasting impression on many computer enthusiasts.

One of the key features introduced in Windows ME was the System Restore functionality. This innovative tool allowed users to roll back their system to a previous state, effectively undoing any changes that may have caused instability or issues. This feature provided a much-needed sense of security for users who wanted to experiment with new software or drivers without worrying about potential consequences.

Multimedia enthusiasts were also treated to several enhancements in Windows ME. The introduction of Windows Media Player 7 brought improved media playback capabilities, supporting popular formats such as MP3 and DivX. Additionally, Windows Movie Maker made its debut, enabling users to create their own videos with ease. These additions made Windows ME an attractive choice for those looking to explore their creative side.

However, despite its positive aspects, Windows ME was not without its flaws. Stability issues were a common complaint among users, with frequent crashes and system freezes being reported. The operating system’s reliance on outdated technology from the Windows 9x series contributed to these problems. Furthermore, device driver compatibility was often an issue, leading to frustrating experiences for those attempting to use hardware that lacked proper support.

Windows ME also marked the transition towards a more user-friendly interface compared to its predecessors. The inclusion of features like AutoUpdate ensured that users could easily keep their systems up-to-date with the latest patches and security fixes. Additionally, Internet Explorer 5.5 offered improved browsing capabilities for web-savvy individuals.

Despite its mixed reception among users and critics alike, Windows ME played an important role in the evolution of Microsoft’s operating systems. It served as a stepping stone towards the more stable and reliable Windows XP, which would become one of the most popular versions of Windows to date.

In retrospect, Windows ME can be seen as a product of its time, capturing the excitement and challenges of a rapidly evolving digital landscape. Its attempts to cater to the multimedia needs of home users were commendable, even if they fell short in terms of stability and compatibility.

Today, Windows ME remains a nostalgic reminder for those who experienced its quirks and innovations. While it may not have achieved widespread acclaim or longevity, it holds a unique place in the history of operating systems as an important milestone in Microsoft’s journey towards creating user-friendly and robust software.

In conclusion, Windows ME may have had its shortcomings, but it undeniably left an indelible mark on the world of operating systems. Its introduction of features like System Restore and improved multimedia capabilities showcased Microsoft’s commitment to enhancing the user experience. Despite its flaws, Windows ME remains an interesting chapter in the ever-evolving story of computer technology.


7 Essential Tips for Windows ME: Enhancing Performance and Security

  1. Keep your system updated
  2. Optimize system resources
  3. Use a reliable antivirus software
  4. Create regular backups
  5. Customize settings
  6. Utilize System Restore
  7. Explore online resources

Keep your system updated

Tip: Keep Your Windows ME System Updated for Enhanced Performance

In the fast-paced world of technology, it’s crucial to keep your operating system up to date. This applies to Windows ME as well, despite it being an older version of Microsoft’s operating system. Regularly updating your Windows ME system can bring several benefits, including enhanced performance, improved stability, and strengthened security.

Updating your Windows ME system involves installing the latest patches, updates, and service packs released by Microsoft. These updates address various issues discovered after the initial release of the operating system and provide fixes for known bugs and vulnerabilities. By keeping your system updated, you ensure that it remains compatible with newer software and hardware components.

Enhanced Performance: Updates often include performance improvements that can optimize the way your Windows ME system operates. These improvements can lead to faster boot times, smoother multitasking capabilities, and overall better responsiveness. By taking advantage of these updates, you can make the most out of your computer’s resources.

Improved Stability: Updates also address stability issues that may cause crashes or freezes. By installing these updates on your Windows ME system, you reduce the likelihood of encountering frustrating errors or unexpected shutdowns during critical tasks. This ensures a more reliable computing experience.

Strengthened Security: Cybersecurity is a top concern in today’s digital landscape. Even though Windows ME is an older operating system, it is still important to prioritize security measures. Regularly updating your Windows ME system helps protect it from potential threats by patching security vulnerabilities that may have been discovered since its release. This reduces the risk of malware infections and unauthorized access to your computer.

To keep your Windows ME system updated:

  1. Enable Automatic Updates: Open the Control Panel from the Start menu and navigate to “Automatic Updates.” Ensure that automatic updates are enabled so that important updates are downloaded and installed automatically.
  2. Check for Updates Manually: Periodically check for updates manually by visiting Microsoft’s Windows Update website. This ensures that you don’t miss any critical updates that may not be included in automatic updates.
  3. Install Service Packs: Service packs are comprehensive updates that include multiple fixes and enhancements. Make sure to install the latest service pack available for Windows ME to benefit from the most significant improvements.

By following these steps and keeping your Windows ME system updated, you can enjoy a smoother, more secure computing experience. Remember to prioritize regular updates to ensure optimal performance and protect your system against potential threats.

Optimize system resources

Optimize System Resources on Windows ME

Windows ME, also known as Windows Millennium Edition, may be a nostalgic operating system for some, but it had its own set of tips and tricks to enhance performance. One useful tip for Windows ME users was to optimize system resources, which could help improve overall system responsiveness and efficiency.

To optimize system resources on Windows ME, follow these steps:

  1. Close unnecessary programs: Running multiple programs simultaneously can consume valuable system resources. Take a moment to close any applications that are not currently in use. This will free up memory and CPU usage, allowing your system to allocate resources more efficiently.
  2. Disable unnecessary startup programs: Many applications tend to automatically start up when you boot your computer. However, having too many startup programs can slow down your system’s performance. To disable unnecessary startup programs, go to the Start menu, select “Run,” type “msconfig,” and press Enter. In the System Configuration Utility window that appears, navigate to the “Startup” tab and uncheck any programs that you don’t need running at startup.
  3. Adjust visual effects: Windows ME offered various visual effects that could strain system resources. By adjusting or disabling these effects, you can free up additional resources for other tasks. To do this, right-click on “My Computer” and select “Properties.” In the System Properties window, click on the “Performance” tab and choose either the “Adjust for best performance” option or customize specific visual effects according to your preferences.
  4. Defragment your hard drive: Over time, files on your hard drive become fragmented, causing slower access times and decreased performance. To defragment your hard drive on Windows ME, go to Start > Programs > Accessories > System Tools > Disk Defragmenter. Run the defragmentation tool regularly to keep your files organized and optimize disk performance.
  5. Keep your system updated: Microsoft periodically released updates and patches for Windows ME to address performance issues and security vulnerabilities. Make sure to visit the Windows Update website regularly to download and install the latest updates for your system. These updates can help optimize system resources and improve overall stability.

By following these tips, you can optimize system resources on your Windows ME machine, resulting in a smoother and more efficient computing experience. Remember that Windows ME is an older operating system, so it may not provide the same level of optimization as modern versions. However, these steps can still help you make the most of the resources available on your Windows ME system.

Use a reliable antivirus software

Use a Reliable Antivirus Software to Safeguard Your Windows ME System

When it comes to ensuring the security and integrity of your Windows ME system, one of the most crucial steps you can take is to install and use a reliable antivirus software. With the rapid evolution of technology and the ever-increasing threats posed by malicious software, having robust protection in place is essential.

Windows ME, being an older operating system, may be more vulnerable to various forms of malware, including viruses, worms, and trojans. These malicious programs can wreak havoc on your system, compromising your personal data, slowing down performance, and even causing irreversible damage. To prevent such issues and maintain a secure computing environment, investing in a reputable antivirus solution is highly recommended.

A reliable antivirus software provides several significant benefits for Windows ME users. Firstly, it acts as a shield against known viruses by scanning files and programs for any signs of infection. It identifies and eliminates threats before they can cause harm to your system or compromise your sensitive information.

Furthermore, antivirus software often includes real-time protection features that actively monitor your system for any suspicious activities or attempts at unauthorized access. This proactive approach helps detect and block potential threats in real-time, preventing them from infiltrating your system.

Regular updates are another critical aspect of antivirus software. Cybercriminals continuously develop new techniques to exploit vulnerabilities in operating systems and applications. Antivirus vendors release regular updates that include the latest virus definitions and security patches to combat these evolving threats effectively. By keeping your antivirus software up-to-date with these updates, you ensure that your Windows ME system remains protected against emerging dangers.

Using a reliable antivirus program also offers peace of mind when browsing the internet or downloading files from external sources. It scans websites for potential dangers such as phishing attempts or malicious downloads before you interact with them. This added layer of protection significantly reduces the risk of accidentally exposing your system to harmful elements online.

Remember that no operating system is entirely immune to threats, and Windows ME is no exception. By taking the proactive step of installing a reliable antivirus software, you enhance the security of your system and reduce the likelihood of falling victim to malware attacks.

When selecting an antivirus solution for your Windows ME system, ensure that it is compatible with the operating system and has a proven track record of effectively detecting and neutralizing threats. Additionally, consider features such as real-time protection, regular updates, and a user-friendly interface that suits your requirements.

By prioritizing the installation and use of a reliable antivirus software on your Windows ME system, you take a significant step towards safeguarding your digital environment. Protecting your personal data, maintaining system performance, and staying one step ahead of cyber threats become achievable goals with this essential security measure in place.

Create regular backups

Create Regular Backups: A Crucial Tip for Windows ME Users

In the fast-paced digital world, where our computers hold valuable data and cherished memories, it is essential to prioritize the safety of our files. One crucial tip for Windows ME users is to create regular backups of their important data. By doing so, you can protect yourself from potential data loss due to system crashes, hardware failures, or even accidental deletions.

Windows ME, despite its innovative features and capabilities, was known for its occasional stability issues. While Microsoft made efforts to address these problems with updates and patches, it is always wise to have a backup plan in place. Regularly backing up your important files ensures that even if something goes wrong with your operating system or hardware, you won’t lose precious documents, photos, or videos.

Creating backups on Windows ME can be done using various methods. One simple approach is to copy your important files onto an external storage device such as a USB flash drive or an external hard drive. This way, you have a separate copy of your data that can be easily accessed in case of emergencies.

Another option is to utilize backup software specifically designed for Windows ME. These programs offer advanced features like automated backups and incremental backups that only save changes made since the last backup. Such software streamlines the process and provides added convenience and peace of mind.

Cloud storage services are also worth considering for creating backups on Windows ME. Platforms like Google Drive, Dropbox, or Microsoft OneDrive offer free or affordable storage options where you can upload your files securely. This approach ensures that even if your computer experiences a catastrophic failure or gets lost or stolen, your data remains safe in the cloud.

Remember that creating backups should not be a one-time task but rather an ongoing practice. As you continue using your computer and generating new files or making changes to existing ones, regularly updating your backups becomes crucial. Setting up a recurring schedule—whether it’s weekly, monthly, or quarterly—will help you maintain a consistent backup routine.

In summary, creating regular backups is a vital tip for Windows ME users to safeguard their valuable data. By taking proactive measures to protect your files, you can minimize the impact of potential system failures or accidental data loss. Whether it’s through external storage devices, backup software, or cloud storage services, find a method that suits your needs and ensure that your important files are always backed up and secure.

Customize settings

Customize Your Windows ME Experience: A Tip for Personalizing Your System

Windows ME, also known as the Millennium Edition, may be a blast from the past, but it still holds some hidden treasures for those who want to make their computing experience unique. One of the advantages of Windows ME is the ability to customize various settings and personalize your system to suit your preferences.

One of the first areas you can explore is the desktop. Right-clicking on an empty space on your desktop will bring up a menu where you can access “Properties.” Clicking on this option will open up a window that allows you to modify various aspects of your desktop. From here, you can change your wallpaper, screen saver, and even adjust icon sizes and spacing.

If you’re someone who enjoys organizing files and folders in a particular way, Windows ME offers customization options for your file explorer as well. By opening any folder and clicking on “View” in the menu bar, you can choose how files are displayed. You can opt for different icon sizes or change to a detailed list view that provides more information about each file.

Another way to personalize your Windows ME experience is by customizing the appearance of windows themselves. Right-clicking on any window’s title bar will give you access to options such as resizing or minimizing/maximizing windows. Additionally, by navigating to “Control Panel” and selecting “Display,” you can modify settings like font size and color schemes.

For those who appreciate keyboard shortcuts, Windows ME has got you covered too. By right-clicking on any shortcut or program icon and selecting “Properties,” you can assign a keyboard shortcut that allows for quick access without needing to navigate through menus or search for icons.

Windows ME may not have all the bells and whistles of modern operating systems, but its customization options provide an opportunity to tailor your computing experience according to your preferences. Whether it’s changing aesthetics or optimizing functionality with keyboard shortcuts, Windows ME allows you to make your system truly yours.

So, if you find yourself using Windows ME and want to inject some personal flair into your computing experience, take advantage of the customization options available. Explore the settings, experiment with different configurations, and create a system that reflects your unique style and workflow.

Remember, even though Windows ME may be a bit dated, there’s no reason why you can’t make it feel like home. Embrace the opportunity to customize and enjoy a personalized Windows ME experience that suits your needs and preferences.

Utilize System Restore

Utilize System Restore: A Lifesaver for Windows ME Users

If you are a Windows ME user, one of the most valuable tools at your disposal is the System Restore feature. Introduced in this version of Windows, System Restore can be a lifesaver when it comes to troubleshooting and resolving issues on your computer.

System Restore allows you to create restore points, which are essentially snapshots of your system’s settings and configuration at a specific point in time. These restore points serve as checkpoints that you can revert back to if something goes wrong with your system or if you encounter any unexpected issues.

Imagine installing a new program or driver that causes your computer to become unstable or malfunction. Instead of panicking or spending hours trying to troubleshoot the problem, you can simply use System Restore to roll back your system to a previous state where everything was working fine. This means that any changes made after the selected restore point will be undone, effectively restoring your computer’s stability and functionality.

To utilize System Restore on Windows ME, follow these simple steps:

  1. Click on the “Start” button located at the bottom-left corner of your screen.
  2. Go to “Programs” and then select “Accessories.”
  3. From there, choose “System Tools” and click on “System Restore.”

Once you have launched System Restore, you will be presented with a calendar view displaying available restore points. It is recommended to select the most recent restore point before the issue occurred. However, if you are unsure about which restore point to choose, Windows ME provides descriptions for each restore point based on significant changes made during that time.

After selecting the desired restore point, follow the prompts provided by the System Restore wizard to initiate the restoration process. Your computer will restart and revert back to the chosen state.

It is important to note that while System Restore can be extremely helpful in resolving software-related issues, it does not affect personal files such as documents, photos, or emails. It primarily focuses on system settings and configurations.

By utilizing System Restore, Windows ME users can save time and avoid unnecessary frustration when faced with system instability or unexpected issues. It provides a straightforward and effective way to undo changes and restore your computer to a previously stable state.

So, the next time you encounter a problem on your Windows ME system, don’t panic. Instead, utilize the power of System Restore to bring your computer back to a healthier state and get back to using your computer with peace of mind.

Explore online resources

Explore Online Resources: Unleashing the Potential of Windows ME

Windows ME, also known as Windows Millennium Edition, may be a vintage operating system, but that doesn’t mean it lacks the power to connect you to a world of online resources. While newer versions of Windows have taken center stage, Windows ME can still be a gateway to valuable information and tools available on the internet.

One of the most significant advantages of exploring online resources with Windows ME is access to a vast array of knowledge and support. Online forums, communities, and websites dedicated to Windows ME can provide valuable insights, troubleshooting tips, and even software updates specifically tailored for this nostalgic operating system. Engaging with these resources can help you overcome challenges and make the most out of your Windows ME experience.

Additionally, online resources can introduce you to a wealth of software applications compatible with Windows ME. From productivity tools to multimedia software and games, there are numerous websites that offer downloads specifically designed for this older operating system. Exploring these resources opens up new possibilities for customizing your computing experience and discovering hidden gems from the past.

For those interested in preserving or reliving the nostalgia of Windows ME, online archives offer access to screenshots, articles, and even virtual machines that emulate the original operating system environment. These resources allow you to take a trip down memory lane or study the history of computing while using an authentic representation of Windows ME.

It’s worth noting that while exploring online resources with any operating system, including Windows ME, it’s essential to prioritize security. Ensure that your antivirus software is up-to-date and exercise caution when downloading files from unfamiliar sources. Stick to reputable websites and forums known for their dedication to providing safe content for users.

In conclusion, don’t underestimate the potential of your trusty old Windows ME when it comes to accessing online resources. Whether you’re seeking knowledge or looking for compatible software applications or simply indulging in nostalgia, there is a plethora of online platforms waiting to be explored. Embrace the charm of this vintage operating system and unlock its hidden treasures by venturing into the vast world of online resources.

windows 8.1

Unleashing the Power of Windows 8.1: A User-Friendly and Innovative Operating System

Windows 8.1: A User-Friendly and Powerful Operating System

When it comes to operating systems, Windows has long been a household name. With each new version, Microsoft aims to improve upon its previous offerings, providing users with enhanced features and a more seamless computing experience. One such iteration that garnered attention was Windows 8.

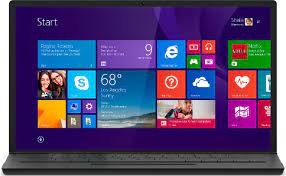
Released in 2013 as an upgrade to Windows 8, Windows 8.1 aimed to address some of the criticisms and concerns raised by users while building upon the innovative foundations laid by its predecessor. This updated version introduced several notable improvements that made it a compelling choice for both home and business users.

One of the standout features of Windows 8.1 was the return of the beloved Start button, which had been absent in Windows

This small but significant change brought back a sense of familiarity and ease of navigation for users accustomed to previous versions of Windows. With just a click on the Start button, users could access their favorite applications, settings, and files effortlessly.

Furthermore, Windows 8.1 introduced an improved user interface that seamlessly blended the traditional desktop environment with modern touch-friendly elements. This integration allowed users to enjoy the best of both worlds – the familiarity of the classic desktop experience combined with the fluidity and convenience of touch-based interactions on tablets and touchscreen devices.

Another noteworthy addition was the inclusion of various customization options in Windows 8.

Users could personalize their desktop backgrounds, colors, and lock screens according to their preferences, adding a touch of individuality to their computing experience.

Additionally, Windows 8.1 offered enhanced multitasking capabilities. Users could now run multiple applications side by side using Snap View or easily switch between open apps with just a swipe or click. This feature proved particularly useful for productivity-oriented tasks or when working with multiple documents simultaneously.

Windows 8.1 also placed emphasis on improving search functionality within the operating system itself. The integrated search feature allowed users to quickly find files, applications, and settings, saving valuable time and effort.

In terms of performance and security, Windows 8.1 brought notable improvements as well. It boasted faster boot times and improved power management, ensuring a more efficient and responsive system. Microsoft also implemented various security enhancements, such as built-in antivirus protection (Windows Defender) and increased compatibility with modern security protocols, to safeguard users’ data and privacy.

While Windows 8.1 may have initially faced some criticism due to its departure from the traditional Windows interface, the subsequent updates and refinements addressed many of these concerns. With its user-friendly features, improved performance, and enhanced security measures, Windows 8.1 proved to be a reliable operating system that catered to the diverse needs of users across different devices.

As technology continues to evolve, Microsoft’s commitment to innovation remains evident in their subsequent releases. However, for those still using Windows 8.1, it remains a solid choice that provides a stable and familiar computing environment.

Whether you are a casual user or a professional relying on your computer for work, Windows 8.1 offers an array of features designed to enhance your productivity and streamline your digital experience. Give it a try and discover how this operating system can meet your computing needs effectively while providing an enjoyable user interface.


Frequently Asked Questions about Windows 8.1: Answers to Your Queries

  1. Can I still use Windows 8.1 after 2023?
  2. Is Windows 8.1 faster than Windows 10?
  3. Can I upgrade my Windows 8.1 to 10 for free?
  4. Is Windows 8.1 a success or failure?

Can I still use Windows 8.1 after 2023?

While Windows 8.1 has been a reliable operating system for many users, it’s important to note that Microsoft has announced the end of support for this version. Mainstream support for Windows 8.1 ended on January 9, 2018, and extended support is set to end on January 10, 2023.

After the end of extended support, Microsoft will no longer provide security updates or technical assistance for Windows 8.1. This means that using the operating system beyond this date may expose your computer to potential security vulnerabilities and compatibility issues with newer software and hardware.

While you can technically continue using Windows 8.1 after its end of support, it is strongly recommended to upgrade to a newer supported version of Windows to ensure ongoing security and compatibility. Microsoft regularly releases new versions of their operating systems with improved features, enhanced performance, and better security measures.

Upgrading to a newer version such as Windows 10 or later will not only provide you with continued support from Microsoft but also grant access to the latest features and updates that can enhance your computing experience.

It’s always advisable to stay up-to-date with the latest operating system versions to benefit from ongoing improvements in performance, security, and compatibility.

Is Windows 8.1 faster than Windows 10?

The performance of an operating system can vary depending on various factors, including the hardware configuration of the computer and the specific tasks being performed. Comparing the overall speed of Windows 8.1 and Windows 10 is subjective and can vary from user to user.

That being said, Microsoft has made significant improvements in performance with each subsequent release of Windows. Windows 10 was designed with optimization in mind, aiming to provide a faster and more efficient experience compared to its predecessors. It introduced various performance enhancements, such as improved boot times, better power management, and enhanced resource allocation.

However, it’s important to note that the performance of an operating system can also depend on the hardware it is running on. Older or less powerful hardware may not fully leverage the optimizations introduced in newer operating systems like Windows 10, potentially leading to a perceived difference in speed compared to Windows 8.1.

Ultimately, it is recommended to consider factors such as hardware compatibility and personal preferences when deciding which operating system to use. It’s also worth noting that Microsoft regularly releases updates for both Windows 8.1 and Windows 10 that may further improve their respective performances over time.

Can I upgrade my Windows 8.1 to 10 for free?

Yes, you can upgrade your Windows 8.1 operating system to Windows 10 for free. Microsoft offered a free upgrade promotion for Windows 7, Windows 8, and Windows 8.1 users during the first year after the release of Windows 10. This promotion allowed eligible users to upgrade their existing operating system to Windows 10 without any additional cost.

However, it is important to note that this free upgrade offer has officially ended. The promotion was available until July 29, 2016. If you missed the deadline, you will now need to purchase a license for Windows 10 if you wish to upgrade from Windows 8.1.

To check if your device is eligible for the free upgrade or to obtain a license for Windows 10, you can visit the official Microsoft website or contact Microsoft support for further assistance.

Is Windows 8.1 a success or failure?

Determining whether Windows 8.1 is a success or failure is subjective and can vary depending on individual opinions and specific criteria used for evaluation. However, it is worth noting that Windows 8.1 received mixed reviews upon its release and faced some criticism due to significant changes in the user interface compared to previous versions of Windows.

While some users appreciated the improved performance, enhanced security features, and the ability to seamlessly transition between touch-based devices and traditional desktop environments, others found the new interface confusing or difficult to navigate.

Microsoft acknowledged the feedback and made several updates and refinements to address user concerns. The reintroduction of the Start button in Windows 8.1 was one such response to user feedback.

Ultimately, Windows 8.1 did not achieve the same level of widespread adoption as its predecessors like Windows 7 or subsequent versions like Windows 10. However, it still had a significant user base during its time and provided a stable operating system for many users.

In conclusion, whether Windows 8.1 is considered a success or failure depends on individual perspectives and specific criteria used for evaluation. It had its merits but also faced challenges in terms of user acceptance and adoption rates compared to other versions of Windows.

windows 98

Windows 98: A Nostalgic Journey Through Computing History

Windows 98: A Nostalgic Journey into Computing History

In the ever-evolving landscape of operating systems, few have left as indelible a mark as Windows 98. Released by Microsoft in June 1998, Windows 98 was a significant leap forward in terms of user interface and functionality. It introduced numerous features that shaped the future of computing and became an iconic symbol of the late ’90s digital era.

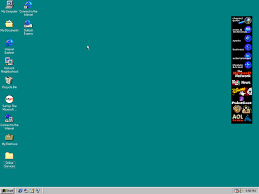
One of the standout features of Windows 98 was its revamped graphical user interface (GUI). The Start menu, taskbar, and desktop icons underwent a visual makeover, providing users with a more intuitive and streamlined experience. The introduction of the Quick Launch toolbar allowed for easy access to frequently used applications, enhancing productivity for millions of users worldwide.

Windows 98 also brought with it enhanced hardware support, making it compatible with a wider range of devices. Plug-and-Play functionality made connecting peripherals such as printers, scanners, and digital cameras a breeze. This simplified setup process was a significant improvement over its predecessor, Windows 95.

Internet integration was another area where Windows 98 excelled. With the inclusion of Internet Explorer 4.0, web browsing became more accessible to users. The operating system embraced the internet era by integrating web-based technologies into its core functionalities. This marked the beginning of an era where computing and the internet became increasingly intertwined.

Gaming enthusiasts fondly remember Windows 98 for its support of DirectX technology. DirectX enabled developers to create immersive gaming experiences by harnessing the full potential of graphics and audio hardware. Many popular games from that era were optimized for Windows 98, solidifying its reputation as a gaming platform.

While Windows 98 brought numerous advancements to the computing world, it was not without its flaws. Stability issues were prevalent in early versions, leading to occasional crashes or system freezes. However, subsequent updates and service packs addressed many of these concerns.

Despite its eventual obsolescence, Windows 98 holds a special place in the hearts of many technology enthusiasts. It represents a time when personal computing was rapidly evolving, and the possibilities seemed limitless. The nostalgia associated with Windows 98 stems from the memories of dial-up internet connections, pixelated screensavers, and the excitement of exploring a digital world that was still in its infancy.

Today, Windows 98 may seem archaic compared to modern operating systems, but its impact on the trajectory of computing cannot be overstated. It laid the foundation for subsequent versions of Windows, influencing their design and functionality. It served as a bridge between the early days of personal computing and the digital revolution that followed.

As we look back on Windows 98, we appreciate its role as a pioneer in shaping the modern computing landscape. Its legacy lives on in our memories and in the continued evolution of operating systems that owe their existence to its groundbreaking features. Windows 98 will forever hold a special place in computing history as an emblematic symbol of an era defined by technological innovation and rapid progress.


8 Essential Tips to Maximize Your Windows 98 Experience

  1. Organize your desktop
  2. Customize the taskbar
  3. Utilize keyboard shortcuts
  4. Optimize system performance
  5. Install antivirus software
  6. Use system restore points
  7. Explore Internet Explorer 5
  8. Regularly update drivers

Organize your desktop

Organize Your Desktop: A Handy Tip for Windows 98 Users

In the bustling world of computing, a cluttered desktop can quickly become overwhelming. Fortunately, Windows 98 offers a simple yet effective solution to keep your digital workspace tidy and efficient. By organizing your desktop, you can easily locate files, folders, and shortcuts, enhancing productivity and reducing frustration.

To begin organizing your desktop on Windows 98, start by assessing the items that are currently scattered across the screen. Identify any unnecessary or outdated icons that can be removed or relocated. This will help declutter your desktop and create a more focused and visually appealing workspace.

Next, create folders to group related files together. Right-click on an empty area of your desktop and select “New” from the context menu. Choose “Folder” to create a new folder. Give it a descriptive name that reflects the contents it will hold. For example, you could have separate folders for documents, images, music, or work-related files.

Once you have created folders, you can start organizing your files. Simply drag and drop them into the appropriate folder icon on your desktop. This will help streamline file management and make it easier to find specific items when needed.

To further optimize your desktop organization in Windows 98, consider arranging icons in a logical manner. You can manually move icons around by clicking and dragging them to desired locations. Group similar items together or arrange them based on frequency of use for quick access.

Another useful feature in Windows 98 is the ability to create shortcuts to frequently used applications or files. Right-click on an item and select “Create Shortcut.” This will generate a shortcut icon that can be placed anywhere on your desktop for easy access.

Remember to periodically review and update your desktop organization as new files accumulate or old ones become obsolete. Regular maintenance ensures that your digital workspace remains efficient and clutter-free.

By implementing these simple tips for organizing your desktop in Windows 98, you can transform your digital environment into a well-structured and streamlined workspace. Not only will this enhance productivity, but it will also provide a more visually pleasing and stress-free computing experience.

Take control of your desktop today and enjoy the benefits of an organized workspace. With Windows 98’s intuitive features, you can easily maintain order amidst the digital chaos and make the most of your computing journey.

Customize the taskbar

Customize the Taskbar in Windows 98: Personalize Your Computing Experience

In Windows 98, one of the standout features was the ability to customize the taskbar, allowing users to personalize their computing experience. The taskbar, located at the bottom of the screen, served as a central hub for launching applications and managing open windows. With a few simple steps, users could tailor the taskbar to their preferences and make it work more efficiently for their needs.

To begin customizing the taskbar in Windows 98, right-click on an empty area of the taskbar itself. A context menu will appear with various options to choose from. By selecting “Properties,” a new window will open up, presenting several customization options.

One of the first things users could do was change the position of the taskbar. By default, it was located at the bottom of the screen, but it could be moved to either side or even to the top if desired. This flexibility allowed users to adapt their desktop layout based on personal preference or screen space availability.

Windows 98 also provided options for customizing how open windows were displayed on the taskbar. In the “Taskbar Appearance” section of the properties window, users could choose between grouping similar windows or displaying them individually. Grouping similar windows made it easier to manage multiple instances of an application by consolidating them into a single button on the taskbar.

Furthermore, users had control over how buttons were displayed on the taskbar. They could choose whether buttons showed just an icon or both an icon and text label. This feature was particularly useful for those who preferred visual cues or needed additional context when switching between applications.

Additionally, Windows 98 allowed users to add shortcuts directly onto the taskbar for quick access to frequently used programs or files. By dragging and dropping icons onto an empty area of the taskbar, shortcuts would be created for easy one-click access.

Customizing the taskbar in Windows 98 not only enhanced productivity but also provided a sense of personalization. Users could tailor their computing environment to suit their workflow and aesthetic preferences, making their experience more efficient and enjoyable.

Although Windows 98 is now considered a relic of the past, its customization options for the taskbar paved the way for future iterations of Windows. The ability to personalize the taskbar has become a standard feature in modern operating systems, empowering users to create a desktop layout that suits their individual needs.

While newer versions of Windows offer even more advanced customization options, it’s worth acknowledging the influence that Windows 98 had on shaping our expectations for personalizing our computing environments. It was a stepping stone towards creating user-friendly interfaces that prioritize flexibility and user preference.

So, if you still have an old Windows 98 machine lying around or feel nostalgic for the early days of personal computing, take a moment to explore the taskbar customization options. Relive those moments when customizing your desktop was an exciting adventure and make your computing experience truly your own.

Utilize keyboard shortcuts

Boost Your Productivity with Keyboard Shortcuts in Windows 98

In the fast-paced world of computing, finding ways to streamline tasks and increase productivity is essential. One often overlooked but incredibly useful feature in Windows 98 is the ability to utilize keyboard shortcuts. These shortcuts allow you to perform actions quickly and efficiently without relying solely on your mouse.

Keyboard shortcuts can save you valuable time by eliminating the need to navigate through menus or click on various options. They provide a direct and immediate way to execute commands, making your workflow smoother and more efficient.

Here are a few essential keyboard shortcuts that can enhance your Windows 98 experience:

  1. Ctrl + C (Copy) / Ctrl + X (Cut) / Ctrl + V (Paste): These shortcuts are fundamental for managing files and text. Use Ctrl + C to copy selected items, Ctrl + X to cut them, and Ctrl + V to paste them into another location.
  2. Ctrl + Z (Undo) / Ctrl + Y (Redo): Made a mistake? No worries! Pressing Ctrl + Z will undo your last action, while Ctrl + Y will redo it if you change your mind.
  3. Alt + Tab: This shortcut allows you to quickly switch between open windows or applications. Hold down the Alt key and press Tab repeatedly until you reach the desired window.
  4. Alt + F4: Need to close an application or window? Pressing Alt + F4 will instantly close the active window without needing to reach for the mouse.
  5. Windows key: The Windows key, usually located between the Ctrl and Alt keys on your keyboard, opens the Start menu. Pressing it once will bring up the Start menu, allowing you to access programs, files, and settings efficiently.
  6. Windows key + D: This combination minimizes all open windows and takes you directly to the desktop—a handy shortcut when you want a clutter-free view or need quick access to desktop icons.
  7. Ctrl + Alt + Delete: This powerful shortcut opens the Task Manager, which allows you to monitor running processes, end unresponsive applications, and manage system performance. It’s a useful tool for troubleshooting and optimizing your Windows 98 experience.

By incorporating these keyboard shortcuts into your Windows 98 routine, you can navigate your computer more swiftly and accomplish tasks with greater ease. As you become familiar with these shortcuts, you’ll notice a significant boost in productivity and efficiency.

Remember, practice makes perfect. Take the time to learn and memorize these shortcuts, and soon they will become second nature. Windows 98 may be a nostalgic operating system, but its keyboard shortcuts remain timeless tools for enhancing your computing experience.

So why not give keyboard shortcuts a try? Unlock their potential in Windows 98 and discover just how much time and effort they can save you on a daily basis.

Optimize system performance

Optimize System Performance on Windows 98: Boosting Efficiency for a Smooth Experience

Windows 98, the iconic operating system of the late ’90s, may no longer be in widespread use, but for those who still enjoy its nostalgic charm, optimizing system performance can greatly enhance the user experience. By following a few simple tips and tricks, you can make your Windows 98 system run more efficiently and smoothly.

Clean up your hard drive: Over time, unnecessary files and clutter can accumulate on your hard drive, slowing down your system. Use the built-in Disk Cleanup utility to remove temporary files, empty the recycle bin, and free up valuable disk space. This will not only improve performance but also help organize your files.

Defragment your hard drive: Fragmentation occurs when files are split into multiple parts across different areas of the hard drive. This can lead to slower access times. Running the Disk Defragmenter utility will rearrange fragmented files, optimizing data storage and improving overall system performance.

Manage startup programs: Windows 98 allows various programs to launch automatically at startup, which can significantly slow down boot times. Review the list of startup programs using the System Configuration Utility (MSCONFIG) and disable any unnecessary ones. This will reduce the load on your system during startup and improve its responsiveness.

Adjust visual effects: Windows 98 offers several visual effects that may impact performance on older hardware. To optimize system performance, consider disabling or reducing these effects by accessing the Display Properties settings from the Control Panel. Disabling features such as animated cursors or desktop wallpaper transitions can free up resources for other tasks.

Update drivers and software: Outdated drivers or software can lead to compatibility issues and decreased performance. Check for updates regularly from manufacturers’ websites or use dedicated driver update utilities to ensure you have the latest versions installed on your system.

Increase virtual memory: Virtual memory, also known as the paging file, is a portion of your hard drive used as temporary storage when your system runs out of physical memory (RAM). Adjusting the virtual memory settings can help improve performance. Increase the initial and maximum size of the paging file to provide more space for Windows 98 to work with.

Remember that Windows 98 is an older operating system, and its performance may be limited by hardware constraints. However, by following these optimization tips, you can make the most of your Windows 98 experience and enjoy a smoother, more efficient system.

While newer operating systems offer more advanced features and improved performance, there’s something special about revisiting the simplicity and charm of Windows 98. By optimizing its performance, you can relive those nostalgic moments with a system that runs as smoothly as possible.

Install antivirus software

Protecting Your Windows 98: Installing Antivirus Software

In the digital age, ensuring the security of your computer is of utmost importance. Even though Windows 98 may be considered a vintage operating system, it still requires protection against viruses and malware. Installing antivirus software on your Windows 98 system is a crucial step in safeguarding your data and maintaining a smooth computing experience.

Windows 98, like any other operating system, is vulnerable to various online threats that can compromise your personal information and disrupt your computer’s performance. By installing antivirus software specifically designed for Windows 98, you can significantly reduce the risk of falling victim to these malicious attacks.

Antivirus software acts as a shield against viruses, worms, Trojans, and other forms of malware that can infiltrate your system through email attachments, downloads, or malicious websites. It scans files and programs for any suspicious activity or known patterns of malicious code, allowing you to identify and remove potential threats before they can cause harm.

When choosing an antivirus solution for Windows 98, ensure that it is compatible with the operating system version you are using. While many modern antivirus programs are designed for newer operating systems, there are still options available that cater specifically to older systems like Windows 98. Look for reputable antivirus software providers that offer legacy support or versions tailored for older operating systems.

Once you have selected an appropriate antivirus program, follow the installation instructions provided by the software provider. Typically, this involves downloading the installation file from their website and running it on your Windows 98 system. During the installation process, you may be prompted to customize settings such as scan schedules or real-time protection options. It is recommended to enable real-time protection so that your computer remains guarded against threats in real-time.

After completing the installation, ensure that you regularly update your antivirus software. New viruses and malware are constantly emerging, so keeping your antivirus program up-to-date ensures that it has the latest virus definitions and security patches. Most antivirus software includes an automatic update feature, which you can enable to simplify the process.

Remember that antivirus software is just one layer of protection. It is essential to practice safe browsing habits, avoid suspicious websites and downloads, and exercise caution when opening email attachments. Regularly backing up your important files is also recommended as an additional precautionary measure.

By installing antivirus software on your Windows 98 system, you are taking a proactive step towards safeguarding your computer from potential threats. Protecting your data and preserving the longevity of your operating system will allow you to continue enjoying the nostalgic experience that Windows 98 provides, while also ensuring a secure computing environment.

Use system restore points

Unlock the Power of Windows 98 with System Restore Points

In the world of computing, unexpected issues can arise, leaving us frustrated and searching for a solution. Fortunately, Windows 98 offers a valuable feature that can save the day: System Restore Points. By utilizing this feature, you can easily roll back your system to a previous state and undo any recent changes that may have caused problems.

System Restore Points act as checkpoints in time, capturing a snapshot of your computer’s settings and configuration. Whenever you make significant changes to your system, such as installing new software or drivers, it’s wise to create a restore point beforehand. This way, if something goes wrong or you encounter compatibility issues, you can revert back to a stable state without losing important data.

To create a System Restore Point in Windows 98, follow these simple steps:

Click on “Start” and go to “Programs.”

Open the “Accessories” folder and select “System Tools.”

Choose “System Restore” from the list.

In the System Restore window, click on “Create a restore point” and give it a descriptive name.

Click on “Create.”

Once you’ve created a restore point, it’s time to explore its benefits:

Easy Recovery: If your system starts acting up or becomes unstable after making changes, simply access the System Restore utility again and choose the option to restore your computer to an earlier time using one of the available restore points.

Peace of Mind: With System Restore Points in place, you can experiment with new software or configurations without fear of irreversible consequences. If something goes awry, just roll back to a previous state where everything was working smoothly.

Time-Saver: Instead of spending hours troubleshooting complex issues or reinstalling your entire operating system from scratch, System Restore Points offer a quick and efficient way to resolve problems caused by recent changes.

It’s important to note that System Restore Points do not affect personal files, such as documents, photos, or music. They primarily focus on system settings and configurations.

While Windows 98 may be considered outdated by today’s standards, its System Restore Points feature remains a valuable tool for users who still rely on this classic operating system. By taking advantage of this feature, you can navigate the occasional bumps in the road with confidence and peace of mind.

So, next time you find yourself facing an unexpected issue on your Windows 98 machine, remember to harness the power of System Restore Points. They are there to help you regain control of your system and get back to smooth sailing in no time.

Explore Internet Explorer 5

Explore Internet Explorer 5: Unleashing the Power of Web Browsing on Windows 98

For Windows 98 users, one of the most exciting features was the inclusion of Internet Explorer 5, a web browser that revolutionized the way we accessed and interacted with the internet. With its release, users were introduced to a whole new world of online possibilities, making web browsing faster, more efficient, and visually appealing.

Internet Explorer 5 brought with it a range of enhancements that made navigating the internet a seamless experience. One notable feature was its improved rendering engine, which significantly enhanced webpage loading times. This meant that users could access their favorite websites more quickly and efficiently, saving valuable time in their online endeavors.

The browser also introduced support for Dynamic HTML (DHTML), a technology that allowed for more interactive and dynamic webpages. With DHTML, websites could incorporate animations, transitions, and other visual effects to create engaging user experiences. This opened up a whole new realm of possibilities for web developers and designers to create immersive online content.

Another noteworthy addition was the integration of Microsoft Outlook Express. This email client provided users with an intuitive interface to manage their email accounts directly from within Internet Explorer

It streamlined communication by allowing users to send and receive emails without needing to open a separate application.

Furthermore, Internet Explorer 5 introduced AutoComplete functionality. This feature saved time by automatically filling in commonly used information such as names or addresses in online forms. It eliminated the need for repetitive typing and made online transactions or registrations quicker and more convenient.

With Internet Explorer 5’s improved security features, browsing the web became safer on Windows

The browser included enhanced support for SSL (Secure Sockets Layer) encryption protocols, ensuring secure connections when visiting websites that required sensitive information like passwords or credit card details.

To make exploring the internet even more enjoyable, Internet Explorer 5 allowed users to customize their browsing experience through the use of add-ons and extensions. These additional components expanded the capabilities of the browser, enabling users to personalize it according to their preferences and needs.

While Windows 98 and Internet Explorer 5 may now be considered relics in the fast-paced world of technology, they played a significant role in shaping the internet as we know it today. They introduced countless users to the wonders of web browsing, laying the foundation for future advancements in online connectivity.

So, if you’re still using Windows 98 or feeling nostalgic about this iconic operating system, don’t miss out on exploring Internet Explorer 5. It will transport you back to a time when the internet was just beginning to capture our imaginations and open up a world of information and possibilities at our fingertips.

Regularly update drivers

Boost Performance and Stability: Regularly Update Drivers in Windows 98

In the world of computing, keeping your system up to date is crucial for optimal performance and stability. One often overlooked aspect of maintenance is updating device drivers. In Windows 98, regularly updating drivers can significantly enhance your computer’s performance and ensure compatibility with the latest hardware and software.

Device drivers act as intermediaries between your operating system and hardware components such as graphics cards, sound cards, printers, and more. They facilitate communication and enable these devices to function correctly. Outdated or incompatible drivers can result in various issues, including system crashes, slow performance, or even device malfunctions.

To update drivers in Windows 98, follow these simple steps:

Identify the devices: Start by identifying the hardware components for which you need updated drivers. This can be done through the Device Manager utility found in the Control Panel. Look for any devices marked with a yellow exclamation mark or question mark, as they indicate driver issues.

Obtain updated drivers: Visit the manufacturer’s website for each device or use a reliable driver update software to find the latest driver versions compatible with Windows 98. Ensure that you download drivers specifically designed for Windows 98 to avoid compatibility problems.

Install updated drivers: Once you have downloaded the updated drivers, double-click on each file to initiate the installation process. Follow the on-screen instructions provided by the installer to complete the installation.

Restart your computer: After installing new drivers, it is essential to restart your computer to allow the changes to take effect properly.

By regularly updating your device drivers in Windows 98, you can experience several benefits:

Improved performance: Updated drivers often include bug fixes and optimizations that can enhance overall system performance. This can lead to faster response times and smoother operation of hardware components.

Enhanced compatibility: As technology advances rapidly, new software applications and hardware devices may require updated drivers to function correctly. By staying up to date, you ensure compatibility with the latest software and hardware, preventing any compatibility-related issues.

Increased stability: Outdated or faulty drivers can cause system crashes, freezes, or other stability issues. Updating drivers can help resolve these problems by providing improved stability and reliability.

Security patches: Driver updates often include security patches that address vulnerabilities in the previous versions. By keeping your drivers up to date, you reduce the risk of potential security breaches and protect your system from potential threats.

In conclusion, regularly updating drivers in Windows 98 is a simple yet effective way to boost performance and stability while ensuring compatibility with the latest software and hardware developments. By following the steps outlined above and staying proactive in driver maintenance, you can enjoy a smoother computing experience on your Windows 98 system.

microsoft windows

Mastering Microsoft Windows: Unlocking the Potential of a Powerful Operating System

Microsoft Windows: Empowering Users with a Rich Computing Experience

In the vast landscape of operating systems, Microsoft Windows stands tall as one of the most recognizable and widely used platforms. With a history spanning several decades, Windows has evolved into a powerful and versatile operating system that continues to shape the way we interact with computers.

Windows, developed by technology giant Microsoft, has played a pivotal role in revolutionizing personal computing. From its humble beginnings in the 1980s to the present day, Windows has consistently adapted to meet the ever-changing needs of users around the world.

One of Windows’ greatest strengths lies in its user-friendly interface. The familiar desktop environment, complete with icons, taskbar, and start menu, allows users to navigate effortlessly through their files and applications. Whether you’re a novice or an experienced user, Windows provides an intuitive experience that minimizes the learning curve.

Compatibility is another hallmark of Microsoft Windows. With a vast library of software applications designed specifically for the platform, users have access to an extensive range of tools for work, creativity, entertainment, and more. From productivity suites like Microsoft Office to graphic design software and gaming applications, Windows offers an ecosystem that caters to diverse needs.

Moreover, Windows provides seamless integration with other Microsoft products and services. The integration between Windows and cloud-based services like OneDrive allows users to effortlessly synchronize their files across devices. This feature ensures that your documents are accessible from anywhere while maintaining data security.

Windows also places great emphasis on connectivity. With built-in networking capabilities, users can easily connect their devices to Wi-Fi networks or create ad-hoc networks for file sharing or collaboration. Additionally, features such as Bluetooth support enable seamless connectivity with peripheral devices like printers or headphones.

Security is an essential aspect of any operating system, and Microsoft takes this responsibility seriously with regular updates and robust security measures. The constant evolution of threats necessitates proactive measures against malware and cyber-attacks. With features like Windows Defender and automatic updates, Microsoft Windows strives to provide a secure environment for users to work, browse the web, and communicate.

Accessibility is another area where Windows excels. Microsoft has made significant strides in ensuring that the operating system caters to users with diverse needs. From built-in accessibility features like screen readers, magnifiers, and high contrast modes to support for assistive technologies, Windows aims to empower every user to navigate and interact with their devices comfortably.

Microsoft’s commitment to continuous improvement is evident through its regular updates and new releases. With each iteration of Windows, new features are introduced, user feedback is incorporated, and performance enhancements are made. This dedication to innovation ensures that Windows remains at the forefront of technological advancements.

In conclusion, Microsoft Windows has become an integral part of our digital lives by providing a robust and versatile platform that empowers users with a rich computing experience. Its user-friendly interface, extensive software compatibility, seamless integration with other Microsoft products and services, strong security measures, accessibility features, and commitment to continuous improvement make it a preferred choice for millions worldwide. As technology continues to evolve rapidly, we can expect Microsoft Windows to adapt and innovate further in order to meet the needs of an ever-changing digital landscape.


9 Essential Tips for Maximizing Your Microsoft Windows Experience

  1. Keyboard shortcuts
  2. File organization
  3. Windows Updates
  4. Antivirus software
  5. Backup important data
  6. Customize the Start menu
  7. Taskbar customization
  8. Snapping windows
  9. Troubleshooting tools

Keyboard shortcuts

Boost Your Productivity with Keyboard Shortcuts on Microsoft Windows

In the fast-paced world of computing, efficiency and productivity are key. One way to supercharge your workflow on Microsoft Windows is by mastering the art of keyboard shortcuts. These nifty combinations of keys can save you time and effort, allowing you to navigate your computer with lightning speed.

Keyboard shortcuts provide a convenient alternative to using your mouse or trackpad for various tasks. By memorizing a few key combinations, you can perform actions quickly and seamlessly, without interrupting your flow. Whether you’re working on documents, browsing the web, or managing files, keyboard shortcuts can significantly enhance your overall computing experience.

Here are some essential keyboard shortcuts that every Windows user should know:

  1. Copy (Ctrl + C) and Paste (Ctrl + V): These two shortcuts are fundamental for moving text or files from one location to another. Simply select the content you want to copy, press Ctrl + C, navigate to the desired location, and press Ctrl + V to paste it.
  2. Cut (Ctrl + X) and Paste (Ctrl + V): Similar to copy and paste, these shortcuts allow you to move content rather than duplicating it. Use Ctrl + X to cut the selected text or files, navigate to the destination, and press Ctrl + V to paste them there.
  3. Undo (Ctrl + Z) and Redo (Ctrl + Y): Made a mistake? No worries! Press Ctrl + Z to undo your last action or use Ctrl + Y to redo it if you change your mind.
  4. Select All (Ctrl + A): Need to select all the text in a document or all files in a folder? Press Ctrl + A, and everything will be highlighted for easy manipulation.
  5. Save (Ctrl + S): Don’t forget this crucial shortcut! Pressing Ctrl + S ensures that any changes made in a document or file are saved instantly, preventing the loss of valuable work.
  6. Switch between Open Windows (Alt + Tab): If you have multiple applications or windows open simultaneously, press Alt + Tab to quickly switch between them. Hold down the Alt key and press Tab repeatedly to cycle through your open windows until you find the one you need.
  7. Task Manager (Ctrl + Shift + Esc): When your computer freezes or an application becomes unresponsive, use this shortcut to open the Task Manager directly. It allows you to end processes or programs that are causing issues.

These are just a few examples of the many keyboard shortcuts available in Windows. To discover more, explore the menus of your favorite applications or do a quick online search for comprehensive lists of shortcuts specific to your version of Windows.

By incorporating keyboard shortcuts into your daily computing routine, you’ll streamline your workflow and become a more efficient user. With practice, these shortcuts will become second nature, allowing you to navigate Microsoft Windows with ease and accomplish tasks in record time. So why not give them a try? Your productivity will thank you!

File organization

Efficient File Organization: Unlocking the Power of Microsoft Windows

In the digital age, where files and documents inundate our devices, maintaining an organized file system can be a game-changer. Microsoft Windows provides a range of tools and features that can help users streamline their file organization process, making it easier to find what they need when they need it.

One of the key aspects of effective file organization is creating a logical folder structure. This involves categorizing files into meaningful folders and subfolders, allowing for easy navigation and retrieval. To create a new folder in Windows, simply right-click on your desktop or within an existing folder and select “New” followed by “Folder.” Give your new folder a descriptive name that reflects its contents.

Once you have established your main folders, consider creating subfolders to further categorize your files. For example, within a “Documents” folder, you might have subfolders for work-related documents, personal files, or specific projects. This hierarchical structure helps maintain order and makes locating files a breeze.

Windows offers various options to sort and view files within folders. The default option is usually “Details,” which displays columns such as name, size, type, and date modified. However, you can customize this view by right-clicking on the column headers and selecting or deselecting the desired columns. Experiment with different views to find one that suits your preferences.

Another useful feature in Windows is the ability to search for specific files or documents using keywords or filters. The search bar located at the top-right corner of any Explorer window allows you to quickly locate files by typing in keywords related to their names or content. Additionally, you can refine your search using filters such as file type, date modified, or size.

To further enhance your file organization experience in Windows, take advantage of metadata and tags. Metadata refers to additional information embedded within a file that describes its properties or attributes. By utilizing metadata effectively, you can easily search for files based on specific criteria, such as author, date created, or keywords. Tags, on the other hand, are customizable labels that you can assign to files to provide additional context or categorization. To add tags or view metadata in Windows, right-click on a file, select “Properties,” and navigate to the relevant tabs.

Lastly, regular maintenance is essential to keep your file system organized and clutter-free. Take some time periodically to review your folders, delete unnecessary files, and ensure that everything is in its proper place. This practice will not only help you locate files quickly but also optimize your device’s storage capacity.

In conclusion, efficient file organization is a valuable skill that can save time and frustration when working with Microsoft Windows. By creating a logical folder structure, utilizing sorting options and search features, leveraging metadata and tags, and performing routine maintenance tasks, users can unlock the full potential of their file organization system. With a well-organized digital environment at your fingertips, you can focus on being productive and efficient in your daily computing tasks.

Windows Updates

Windows Updates: Keeping Your System Secure and Up-to-Date

In the realm of Microsoft Windows, one of the crucial aspects that ensures the smooth functioning and security of your system is Windows Updates. These updates are designed to provide users with the latest features, performance improvements, and most importantly, essential security patches.

Regularly updating your Windows operating system is vital for safeguarding your computer against potential vulnerabilities and exploits. Microsoft diligently works to identify and address any security loopholes that may arise. By installing Windows Updates, you are effectively fortifying your system against potential threats.

Windows Updates also play a significant role in enhancing the overall performance of your computer. These updates often include bug fixes and optimizations that can help streamline operations, improve stability, and boost efficiency. With each update, Microsoft strives to refine its operating system based on user feedback and evolving technology trends.

To ensure that you never miss out on critical updates, it’s recommended to enable automatic updates on your Windows device. This way, your system will automatically download and install updates in the background without interrupting your workflow. Automatic updates provide a hassle-free experience while keeping your system secure and up-to-date.

In addition to security patches and performance improvements, Windows Updates may also introduce new features or functionalities to enhance user experience. These updates can bring exciting additions such as improved user interfaces, additional customization options, or enhanced compatibility with new software applications.

It’s worth noting that while Windows Updates are generally beneficial for most users, there might be instances where specific updates could cause compatibility issues with certain hardware or software configurations. In such cases, Microsoft typically addresses these concerns promptly by providing patches or workarounds through subsequent updates.

To manually check for available updates on your Windows device, you can navigate to the Settings menu and select “Update & Security.” From there, click on “Windows Update” to access the update options. Here you can check for any pending updates or modify settings according to your preferences.

In conclusion, Windows Updates are a crucial aspect of maintaining a secure and efficient computing environment. By regularly installing these updates, you can benefit from the latest features, performance enhancements, and most importantly, protect your system against potential security threats. Embracing Windows Updates ensures that your Windows operating system remains up-to-date, reliable, and optimized for the best possible user experience.

Antivirus software

Antivirus Software: Safeguarding Your Windows Experience

In the digital age, where cyber threats are becoming increasingly sophisticated, protecting your computer and personal data is of paramount importance. That’s where antivirus software comes into play, acting as a shield against malicious software and cyber-attacks. When it comes to safeguarding your Microsoft Windows experience, having reliable antivirus software is crucial.

Antivirus software is designed to detect, prevent, and remove malicious programs such as viruses, worms, Trojans, ransomware, and spyware from infecting your computer. These programs can cause havoc by compromising your data, stealing personal information, or even rendering your system inoperable.

One of the key benefits of using antivirus software on your Windows device is its ability to provide real-time protection. As you browse the web or download files, the software actively scans for any potential threats and alerts you if it detects anything suspicious. This proactive approach ensures that you are protected from malware before it can wreak havoc on your system.

Another advantage of antivirus software is its ability to perform regular system scans. These scans delve deep into your computer’s files and directories to identify any hidden threats that may have slipped through initial detection. By running scheduled scans or performing manual scans at regular intervals, you can ensure that your system remains clean and secure.

Antivirus software also offers additional features that enhance your overall security. These features may include firewalls to monitor incoming and outgoing network traffic, email scanners to check for infected attachments or links in emails, and browser extensions to warn against potentially harmful websites. These added layers of protection fortify your Windows experience against a wide range of cyber threats.

It’s important to note that antivirus software requires regular updates in order to stay effective against emerging threats. Developers continually update their databases with information about new malware strains so that their software can recognize and neutralize them. Keeping your antivirus program up-to-date ensures that you have the latest protection against the ever-evolving landscape of cyber threats.

When selecting antivirus software for your Windows device, it’s essential to choose a reputable and trusted provider. Look for software that offers a comprehensive suite of features, regular updates, and excellent customer support. Reading reviews and seeking recommendations can help you make an informed decision.

In conclusion, antivirus software is an essential tool for protecting your Microsoft Windows experience from malware and cyber-attacks. By providing real-time protection, regular system scans, and additional security features, it acts as a vital line of defense against the ever-present threats in the digital world. Remember to keep your antivirus software updated to ensure maximum effectiveness. With the right antivirus software by your side, you can enjoy a safe and secure computing experience on your Windows device.

Backup important data

Microsoft Windows Tip: Backup Important Data

In today’s digital age, where our lives are increasingly intertwined with technology, it is crucial to prioritize the safety and security of our important data. Whether it’s cherished memories captured in photos and videos, important work documents, or personal information, losing such data can be devastating. That’s why one of the most valuable tips for Microsoft Windows users is to regularly backup their important data.

Windows provides several built-in tools and options that make backing up your data a straightforward process. One such tool is File History, which allows you to automatically back up your files to an external storage device or network location. By enabling File History and selecting the folders you want to back up, Windows will automatically create copies of your files at regular intervals. This ensures that even if something happens to your primary storage or files get accidentally deleted, you can easily restore them from the backup.

Another option offered by Windows is the creation of system image backups. This feature allows you to create a complete snapshot of your system, including the operating system, installed programs, settings, and files. By creating a system image backup on an external hard drive or network location, you can restore your entire system in case of a major hardware failure or other critical issues.

Cloud storage services also provide an excellent off-site backup solution for Windows users. Services like OneDrive offer seamless integration with Windows, allowing you to automatically sync selected folders and files to the cloud. This ensures that your data is securely stored online and accessible from any device with an internet connection.

Remember that backups should be done regularly to ensure that your most recent data is protected. Set reminders or create automatic schedules for backups so that you don’t forget this essential task.

Backing up your important data not only provides peace of mind but also allows for quick recovery in case of unforeseen events like hardware failures, malware attacks, or accidental deletions. It safeguards against potential loss and ensures that your valuable information remains intact.

In conclusion, Microsoft Windows offers various options and tools to help you backup your important data effectively. Whether you choose to use File History, create system image backups, or leverage cloud storage services, taking the time to regularly backup your data is a vital step in safeguarding against potential loss. Don’t wait until it’s too late – start implementing a backup strategy today and ensure the long-term security and availability of your valuable files and information.

Customize the Start menu

Customize the Start Menu: Personalize Your Windows Experience

The Start menu has been a staple feature of Microsoft Windows since its inception, providing users with quick and convenient access to their favorite apps, files, and settings. However, did you know that you can customize the Start menu to suit your preferences and make it even more tailored to your needs? Let’s explore how you can personalize your Windows experience by customizing the Start menu.

One of the simplest ways to customize the Start menu is by rearranging tiles. Tiles are the colorful icons that represent your installed apps. By dragging and dropping them, you can organize them in a way that makes sense to you. You can group similar apps together or prioritize frequently used ones for easy access. This simple tweak allows you to create a personalized layout that aligns with your workflow.

In addition to rearranging tiles, you can also resize them. Some apps may have larger or smaller tiles by default, but you have the freedom to adjust their size according to your preference. Whether you want a larger tile for an app you frequently use or prefer a smaller one for less-used apps, resizing tiles gives you control over how they appear on your Start menu.

If you find yourself overwhelmed by too many tiles cluttering up your Start menu, fear not! Windows offers a feature called “Pin to Start” that allows you to add important files or folders directly to the Start menu for easy access. Simply right-click on any file or folder and select “Pin to Start,” and it will appear as a tile on your Start menu. This feature is particularly handy for quickly accessing documents or projects without navigating through multiple folders.

Furthermore, Windows provides an option to customize which system settings are displayed on the Start menu. By right-clicking on the taskbar and selecting “Taskbar settings,” you can choose which system icons appear in the notification area (commonly known as the system tray) of the taskbar. This customization feature ensures that only the most relevant and frequently used settings are readily available, reducing clutter and enhancing efficiency.

Lastly, Windows allows you to personalize the appearance of your Start menu by selecting different color schemes and themes. By right-clicking on the desktop and choosing “Personalize,” you can access various options to change the background, colors, and overall visual style of your Windows interface. This customization not only adds a personal touch but also enhances the overall aesthetic appeal of your Start menu.

In conclusion, customizing the Start menu in Microsoft Windows is a fantastic way to personalize your computing experience. Whether it’s rearranging tiles, resizing them, pinning files or folders for quick access, customizing system settings visibility, or personalizing the appearance with color schemes and themes, these simple tweaks allow you to tailor your Start menu to suit your workflow and preferences. So go ahead and make Windows truly yours by customizing your Start menu today!

Taskbar customization

Taskbar Customization: Tailoring Your Windows Experience

The taskbar in Microsoft Windows is a central hub for navigating through your applications and managing your workflow. Did you know that you can customize the taskbar to suit your preferences and enhance your productivity? Let’s explore some handy tips for taskbar customization that can help streamline your Windows experience.

One of the simplest yet effective ways to personalize your taskbar is by rearranging its icons. By default, Windows places commonly used applications on the left side of the taskbar, followed by any open windows or pinned programs. However, you can easily rearrange these icons to prioritize your most frequently accessed apps. Simply click and drag an icon to move it around, allowing you to create a customized layout that suits your workflow.

Pinning frequently used applications to the taskbar is another great way to save time and effort. Right-click on any application icon in the Start menu or on the desktop and select “Pin to Taskbar.” This will keep the app permanently accessible in the taskbar, even when it’s not running. Pinning allows you to launch your favorite programs with a single click, eliminating the need to search for them in menus or on the desktop.

If you find yourself overwhelmed with multiple open windows cluttering up your taskbar, consider enabling “Combine Taskbar Buttons” for a more organized look. Right-click on an empty space in the taskbar, go to “Taskbar settings,” and under “Combine taskbar buttons,” choose how you want Windows to group similar windows together. This feature helps reduce clutter by combining multiple instances of an application into a single button, making it easier to switch between tasks without losing track of open windows.

For those who prefer a minimalist approach or have limited screen space, you can auto-hide the taskbar when it’s not in use. Right-click on an empty space in the taskbar, select “Taskbar settings,” and toggle on the “Automatically hide the taskbar in desktop mode” option. This setting allows the taskbar to disappear when you’re not actively using it, giving you more screen real estate. Simply move your cursor to the bottom of the screen to reveal the taskbar whenever you need it.

Windows also offers a range of additional customization options for the taskbar. You can change its color, adjust its size, and even add toolbars for quick access to specific folders or files. Right-click on an empty space in the taskbar, go to “Taskbar settings,” and explore the various options available to personalize your taskbar further.

Customizing your Windows taskbar not only enhances its visual appeal but also improves your overall productivity by tailoring it to your specific needs. Whether it’s rearranging icons, pinning frequently used applications, enabling grouping, auto-hiding, or exploring other customization options, take some time to experiment and find a setup that works best for you.

Remember, Microsoft Windows provides a flexible and customizable environment that empowers users to create a computing experience that suits their unique preferences. So go ahead and make your taskbar truly yours – a personalized command center that makes navigating through applications and managing tasks a breeze.

Snapping windows

Boost Your Productivity with Windows’ Snapping Feature

In today’s fast-paced digital world, multitasking has become a necessity. Managing multiple windows and applications simultaneously can sometimes be overwhelming, leading to a loss of focus and productivity. Thankfully, Microsoft Windows offers a handy feature called “Snapping” that can help streamline your workflow and make multitasking a breeze.

Snapping allows you to effortlessly arrange and resize windows on your desktop, making it easier to view and work with multiple applications side by side. This feature is particularly useful when you need to reference information from one window while working in another or when you want to compare two documents or web pages.

To use the Snapping feature, simply click and drag the title bar of a window towards the left or right edge of your screen until it snaps into place. The window will automatically resize to occupy half of your screen’s real estate. You can then repeat this process with another window on the opposite side, creating a split-screen view that lets you work with both applications simultaneously.

But that’s not all! Windows also offers additional snapping options for even greater flexibility. For example, if you have more than two windows open, you can snap them into quadrants by dragging them to the corners of your screen. This allows you to have four different applications visible at once, perfect for tasks that require frequent switching between multiple programs.

Furthermore, if you find yourself needing more space for a specific application, you can adjust the size of snapped windows by hovering over the divider between them until your cursor changes into a double-headed arrow. Then simply click and drag to resize the windows according to your preference.

The Snapping feature is not only limited to traditional desktop applications but also works seamlessly with modern apps from the Microsoft Store. So whether you’re working on documents in Microsoft Word or PowerPoint or browsing the web using Microsoft Edge or any other browser, snapping helps optimize your screen real estate and enhances your multitasking capabilities.

By taking advantage of Windows’ Snapping feature, you can boost your productivity and make the most out of your screen space. Whether you’re a student, professional, or casual computer user, this simple yet powerful tool can revolutionize the way you work with multiple applications. So go ahead and give it a try – start snapping windows and experience a more efficient and organized workflow on your Microsoft Windows-powered device.

Troubleshooting tools

Troubleshooting Tools: Unleashing the Power of Microsoft Windows

When it comes to solving technical issues on your computer, Microsoft Windows offers a range of powerful troubleshooting tools that can help you diagnose and resolve problems efficiently. These built-in tools are designed to empower users with the ability to troubleshoot and fix common issues without the need for external assistance. Let’s explore some of these invaluable tools that can save you time and frustration.

One of the most fundamental troubleshooting tools in Windows is the Task Manager. Accessible by pressing Ctrl+Shift+Esc or by right-clicking on the taskbar and selecting “Task Manager,” this tool provides an overview of running processes, CPU usage, memory consumption, and more. It allows you to identify resource-intensive applications or processes that may be causing system slowdowns or crashes. You can also use it to end unresponsive programs or start new tasks.

Another useful tool is the Event Viewer, which can be accessed by typing “Event Viewer” in the Start menu search bar. The Event Viewer records system events and errors, providing detailed information about what went wrong. By examining event logs under different categories like Application, Security, or System, you can pinpoint specific issues that occurred at a particular time. This information is invaluable when troubleshooting software conflicts or identifying hardware failures.

The Control Panel is a treasure trove of troubleshooting tools in Windows. From here, you can access various utilities such as Device Manager, which helps diagnose hardware-related problems by displaying devices installed on your computer and their status. Device Manager allows you to update drivers, disable malfunctioning devices, or check for conflicts between hardware components.

Windows also provides a built-in Troubleshooter utility that can automatically detect and fix common problems across different areas of your system. To access it, go to Settings > Update & Security > Troubleshoot. From there, you can run troubleshooters for issues related to network connectivity, audio playback, printer setup, and more. These troubleshooters guide you through step-by-step solutions, making problem-solving a breeze.

For advanced users, the Command Prompt (CMD) and PowerShell are powerful tools for troubleshooting. These command-line interfaces allow you to execute commands and scripts to diagnose and fix issues. With their extensive range of commands, you can perform tasks like checking disk integrity (using the chkdsk command), repairing system files (using the sfc /scannow command), or resetting network configurations (using ipconfig commands).

In addition to these tools, Windows provides a plethora of support resources online, including knowledge bases, forums, and virtual assistant services. These resources can help you find solutions to specific problems or provide guidance when troubleshooting becomes complex.

By harnessing the power of these built-in troubleshooting tools in Microsoft Windows, users gain greater control over their systems and can resolve issues independently. From monitoring system performance with Task Manager to diagnosing hardware problems with Device Manager or running automated troubleshooters, Windows equips users with an array of tools to tackle common technical challenges effectively.

So empower yourself with these troubleshooting tools and unlock the potential of Microsoft Windows to keep your computer running smoothly and efficiently.

free linux server

Unleashing the Potential: Harnessing the Power of a Free Linux Server

The Power of Free Linux Servers

In the world of technology, the word “free” often raises eyebrows. However, when it comes to Linux servers, this term takes on a whole new meaning. A free Linux server offers a plethora of benefits that make it an attractive choice for businesses and individuals alike.

First and foremost, let’s clarify what we mean by a “free” Linux server. In this context, “free” refers to freedom rather than cost. Linux is an open-source operating system, which means that its source code is freely available for anyone to view, modify, and distribute. This openness allows users to customize their servers according to their specific needs and preferences.

One of the key advantages of using a free Linux server is its cost-effectiveness. Unlike proprietary operating systems that require expensive licenses or subscriptions, Linux is completely free to use. This makes it an ideal solution for startups or small businesses with limited budgets. By leveraging a free Linux server, these organizations can allocate their resources towards other critical areas without compromising on quality or functionality.

Moreover, the flexibility offered by a free Linux server is unparalleled. With access to the source code, users have complete control over their server environment. They can fine-tune performance settings, install custom software packages, and optimize security measures according to their unique requirements. This level of customization empowers businesses to create tailored solutions that align perfectly with their objectives.

Security is another aspect where free Linux servers shine brightly. The open-source nature of Linux fosters a community-driven approach towards security enhancements. A vast network of developers continuously scrutinizes the code for vulnerabilities and promptly releases patches and updates when necessary. This collaborative effort ensures that potential threats are identified swiftly and mitigated effectively.

Additionally, the stability and reliability offered by free Linux servers are renowned in the industry. The robust architecture of Linux enables servers to handle heavy workloads with ease while maintaining consistent performance levels over time. This reliability is crucial for businesses that rely heavily on their servers to deliver services or host critical applications.

Furthermore, a free Linux server provides seamless integration with a wide range of software and technologies. Whether it’s web servers, databases, programming languages, or networking tools, Linux supports an extensive ecosystem of applications. This compatibility allows businesses to leverage existing software investments or explore new solutions effortlessly.

Lastly, the vibrant and supportive Linux community is a valuable asset for users of free Linux servers. Online forums, discussion boards, and dedicated user groups provide a wealth of knowledge and assistance. Whether you are seeking advice on troubleshooting issues or looking for recommendations on the best practices for server management, the Linux community is always ready to help.

In conclusion, the power of free Linux servers lies in their cost-effectiveness, flexibility, security, stability, compatibility, and the support of a thriving community. By embracing this open-source solution, businesses and individuals can harness its potential to build robust and tailored server environments that meet their unique needs. So why settle for less when you can unlock the full potential of your server with a free Linux operating system?


Advantages of Free Linux Server: Cost-Effectiveness, Flexibility and Customization, Security, Stability and Reliability, Wide Compatibility

  1. Cost-Effectiveness
  2. Flexibility and Customization
  3. Security
  4. Stability and Reliability
  5. Wide Compatibility


Drawbacks of Free Linux Servers: A Comprehensive Analysis

  1. Technical Expertise
  2. Limited Support
  3. Compatibility Challenges
  4. Software Availability
  5. Maintenance Responsibility
  6. Scalability Limitations

Cost-Effectiveness

The Cost-Effectiveness of Free Linux Servers

In a world where businesses strive to optimize their budgets, finding cost-effective solutions becomes paramount. When it comes to servers, the cost savings offered by free Linux servers make them an attractive choice for businesses and individuals alike.

One of the most significant advantages of using a free Linux server is the absence of licensing fees. Unlike proprietary operating systems that require expensive licenses, Linux is completely free to use. This means that businesses can save substantial amounts of money by adopting a free Linux server instead of investing in costly licenses.

For startups and small businesses with limited budgets, this cost-effectiveness is particularly valuable. By choosing a free Linux server, these organizations can allocate their financial resources towards other critical areas such as marketing, product development, or expanding their team. This financial flexibility allows them to grow and thrive without compromising on the quality or functionality of their server infrastructure.

Even for larger enterprises, the cost savings provided by free Linux servers can be significant. By eliminating licensing fees, businesses can reallocate those funds towards other strategic initiatives or invest in additional hardware or software resources to enhance their operations further.

Moreover, the cost-effectiveness of free Linux servers extends beyond initial savings. The open-source nature of Linux fosters a collaborative community-driven approach towards development and support. This results in a vast array of freely available software packages and tools that can be easily integrated into a Linux server environment without any additional costs.

Additionally, with access to the source code, users have complete control over their server configuration and management. This level of customization allows businesses to optimize resource allocation and performance settings according to their specific needs. By fine-tuning their servers, organizations can maximize efficiency while minimizing unnecessary expenses.

Furthermore, the stability and reliability offered by free Linux servers contribute to long-term cost savings. The robust architecture of Linux ensures consistent performance levels even under heavy workloads. This reliability reduces downtime and associated costs that may arise from system failures or interruptions in service.

In conclusion, the cost-effectiveness of free Linux servers is a significant advantage for businesses and individuals with limited budgets. By eliminating licensing fees and providing customization options, Linux allows organizations to allocate their financial resources strategically. Whether it’s startups looking to grow or larger enterprises seeking to optimize their operations, the cost savings offered by free Linux servers empower businesses to make the most of their server infrastructure without breaking the bank.

Flexibility and Customization

Unleashing the Power of Flexibility and Customization with Free Linux Servers

In the ever-evolving landscape of technology, businesses are constantly seeking solutions that can adapt to their unique requirements. This is where the flexibility and customization offered by free Linux servers truly shine. With access to the source code, users have unparalleled control over their server environment, empowering them to create tailored solutions that align perfectly with their objectives.

One of the key advantages of a free Linux server is the ability to customize and fine-tune settings according to specific needs. Unlike proprietary operating systems that restrict users to predefined configurations, Linux allows businesses to shape their server environment precisely as they desire. From adjusting performance parameters to optimizing resource allocation, every aspect can be tailored for optimal efficiency.

Moreover, free Linux servers enable users to install custom software packages. This means businesses can choose from a vast array of open-source applications that suit their exact requirements. Whether it’s a web server, database management system, or specialized software for specific tasks, Linux provides a wide range of options for seamless integration. This flexibility ensures that businesses can leverage the best tools available in the open-source community.

Security is another area where customization plays a vital role. With free Linux servers, businesses have complete control over implementing security measures. They can choose which security protocols and mechanisms are most suitable for their specific needs. By fine-tuning security settings and staying up-to-date with patches and updates from the community, businesses can create a robust defense against potential threats.

The freedom offered by free Linux servers extends beyond technical aspects; it also allows businesses to align their server environment with their overall objectives. Whether it’s streamlining workflows or meeting compliance requirements, customization enables businesses to shape their server infrastructure in a way that optimally supports their goals.

Furthermore, as business needs evolve over time, free Linux servers provide scalability without limitations imposed by proprietary systems. With access to the source code, businesses can adapt and expand their server environment as required, ensuring that it grows alongside their operations. This scalability ensures that businesses can meet the demands of a changing landscape without being constrained by rigid systems.

In conclusion, the flexibility and customization offered by free Linux servers are invaluable assets for businesses seeking tailored solutions. The ability to fine-tune settings, install custom software packages, optimize security measures, and align the server environment with objectives provides businesses with a competitive edge. With free Linux servers, businesses can create an infrastructure that adapts to their evolving needs and empowers them to thrive in the dynamic world of technology.

Security

Enhanced Security: The Strength of Free Linux Servers

When it comes to the security of your server, free Linux servers shine brightly. One of the key advantages that sets them apart is their open-source nature, which fosters a community-driven approach towards security enhancements. This unique characteristic makes free Linux servers highly secure and reliable.

In the world of open-source software, a vast network of developers continuously reviews the code for vulnerabilities. This collective effort ensures that potential threats are identified swiftly and addressed effectively. Unlike proprietary systems, where security updates might be limited to a single company’s resources, the collaborative nature of Linux means that a diverse group of experts is constantly working to improve its security measures.

Promptness is another crucial aspect of security in free Linux servers. When vulnerabilities are discovered, patches and updates are released promptly to address them. This agile response ensures that potential risks are mitigated before they can be exploited by malicious actors. With regular updates and patches readily available, users can rest assured that their server is protected against emerging threats.

Furthermore, the community-driven approach towards security in free Linux servers encourages transparency and accountability. The open-source nature allows anyone to review the code and contribute to its improvement. This level of scrutiny significantly reduces the likelihood of hidden backdoors or malicious code being present in the system. Users can have confidence in knowing that their server’s security is not compromised by any undisclosed vulnerabilities.

The collaborative effort behind free Linux servers creates an ecosystem where knowledge-sharing and best practices flourish. Developers from all over the world contribute their expertise and insights to improve security measures continuously. Online forums, discussion boards, and dedicated user groups provide a platform for users to exchange ideas and seek advice on securing their servers effectively.

In conclusion, the enhanced security offered by free Linux servers stems from their open-source nature and community-driven approach towards security enhancements. With a vast network of developers continuously reviewing code for vulnerabilities and releasing prompt patches when necessary, these servers offer a highly secure environment. By leveraging the collective expertise of the Linux community, users can rest assured that their server is well-protected against potential threats. When it comes to safeguarding your data and ensuring the integrity of your server, free Linux servers are an excellent choice.

Stability and Reliability

The Stability and Reliability of Free Linux Servers

When it comes to running a server, stability and reliability are paramount. This is where free Linux servers truly shine. Renowned for their ability to handle heavy workloads consistently over time, free Linux servers offer businesses the peace of mind they need to ensure uninterrupted services and host critical applications.

The robust architecture of Linux is one of the key factors contributing to the stability and reliability of these servers. Designed with efficiency in mind, Linux can effortlessly handle demanding tasks without compromising performance. This means that even under heavy loads, a free Linux server will continue to deliver top-notch performance without breaking a sweat.

Unlike other operating systems that may experience frequent crashes or downtime, free Linux servers are built to withstand the pressures of high-demand environments. This reliability is crucial for businesses that rely on their servers to provide uninterrupted services to their customers or host critical applications that cannot afford any disruptions.

Whether it’s an e-commerce website processing numerous transactions per second or a data-intensive application crunching vast amounts of information, a free Linux server can handle it all with ease. Its stability ensures that businesses can operate smoothly without worrying about unexpected crashes or system failures.

Moreover, the consistent performance offered by free Linux servers means that businesses can confidently plan and allocate resources. They can rely on their servers’ ability to handle workloads reliably without needing frequent maintenance or downtime for repairs.

In addition to stability and reliability, free Linux servers also benefit from the continuous improvement efforts of the open-source community. With countless developers worldwide working together, potential vulnerabilities are identified swiftly, leading to prompt updates and patches. This collaborative effort ensures that businesses using free Linux servers can stay ahead of potential security threats.

Furthermore, the long-term support provided by many distributions guarantees that businesses can rely on their free Linux servers for years without worrying about sudden obsolescence or lack of updates. This allows them to focus on their core operations instead of constantly worrying about upgrading or migrating to new server environments.

In conclusion, the stability and reliability of free Linux servers make them an excellent choice for businesses that require high-performance, uninterrupted services, and robust application hosting. With their robust architecture and continuous improvement efforts from the open-source community, free Linux servers provide businesses with the confidence they need to run their operations smoothly and efficiently. So, if stability and reliability are at the top of your server requirements list, consider harnessing the power of a free Linux server for your business needs.

Wide Compatibility

The Wide Compatibility of Free Linux Servers

When it comes to choosing a server operating system, compatibility is a crucial factor to consider. This is where free Linux servers truly shine. With their extensive ecosystem support, free Linux servers seamlessly integrate with a wide range of software applications and technologies, making them an ideal choice for businesses seeking flexibility and efficiency.

One of the key advantages of free Linux servers is their ability to work harmoniously with various platforms and environments. Whether you need to deploy web servers, manage databases, write code in different programming languages, or utilize networking tools, Linux offers compatibility across the board. This means that you can leverage your existing software investments without worrying about compatibility issues or the need for costly migrations.

For businesses that have already invested in specific software applications, migrating to a new server environment can be disruptive and time-consuming. However, with free Linux servers, this concern becomes a thing of the past. The compatibility of Linux allows for smooth integration with your current software stack, ensuring that you can continue using your preferred tools without any interruptions.

Moreover, the wide compatibility of free Linux servers extends beyond existing software investments. It also opens up opportunities for businesses to explore new solutions effortlessly. Whether you want to experiment with emerging technologies or incorporate innovative software into your operations, Linux provides a solid foundation for experimentation and growth.

The extensive ecosystem support of free Linux servers is driven by its open-source nature. Developers from around the world contribute to enhancing compatibility by creating libraries, frameworks, and APIs that seamlessly integrate with Linux-based systems. This collaborative effort ensures that businesses have access to an ever-expanding range of compatible software options.

In addition to its wide compatibility with various software applications and technologies, free Linux servers also provide excellent cross-platform capabilities. Whether you are running your server on bare metal hardware or virtualized environments such as VMware or KVM, Linux offers consistent performance and stability across different platforms.

In conclusion, the wide compatibility of free Linux servers is a significant advantage for businesses. It allows for seamless integration with a diverse range of software applications and technologies, ensuring that you can leverage your existing investments while also exploring new solutions effortlessly. With Linux, you can build a server environment that meets your specific needs and enables your business to thrive in today’s ever-evolving digital landscape.

Technical Expertise

The Learning Curve of Free Linux Servers

While free Linux servers offer numerous advantages, it is important to consider the potential challenges that come with them. One such challenge is the requirement for technical expertise in setting up and managing these servers. If you or your team lack experience with Linux systems, there may be a learning curve involved in effectively configuring and maintaining the server.

Linux, being an open-source operating system, offers a high level of customization and flexibility. However, this also means that it requires a certain level of technical know-how to navigate its intricacies. Unlike proprietary systems that often come with user-friendly interfaces and extensive documentation, Linux servers may require more hands-on configuration and troubleshooting.

For individuals or businesses new to Linux, the initial setup process can be daunting. Understanding the command-line interface, configuring network settings, managing user accounts, and installing software packages may require some time and effort to grasp. This learning curve may be particularly challenging for those accustomed to using graphical interfaces or different operating systems.

Moreover, ongoing server maintenance can also pose challenges if you lack experience with Linux systems. Regular updates, security patches, performance optimizations, and troubleshooting issues may require familiarity with command-line tools and system administration tasks specific to Linux. Without adequate knowledge or access to expert resources, these tasks can become time-consuming and potentially lead to errors or security vulnerabilities.

However, it is essential to note that while technical expertise is required for setting up and managing a free Linux server effectively, there are resources available to support users along their journey. Online communities dedicated to Linux provide valuable forums for seeking assistance from experienced users who are often willing to share their knowledge and provide guidance.

Additionally, various online tutorials and documentation exist that can help individuals familiarize themselves with Linux concepts and best practices. By investing time in learning the fundamentals of Linux server administration or by enlisting the help of a qualified professional or managed service provider specializing in Linux servers, businesses can overcome this potential hurdle.

In conclusion, the learning curve associated with setting up and managing a free Linux server should be considered when deciding whether it is the right choice for your needs. While technical expertise may be required, it is important to recognize that resources and support are available to help navigate this challenge. With dedication and a willingness to learn, individuals and businesses can harness the power of Linux servers while building their technical proficiency in the process.

Limited Support

The Drawback of Limited Support in Free Linux Servers

When it comes to free Linux servers, one important aspect that users need to consider is the limited support available. Unlike proprietary operating systems that often come with dedicated customer service, free Linux servers primarily rely on community support. While the open-source community can be a valuable resource for assistance, it’s important to acknowledge that response times and availability may vary.

One of the key advantages of using a free Linux server is the vibrant and supportive community that surrounds it. Online forums, discussion boards, and user groups provide a wealth of knowledge and expertise. Users can seek help, share ideas, and collaborate with like-minded individuals. The community-driven nature of open-source software fosters a sense of collaboration and innovation.

However, relying solely on community support does have its limitations. Response times may not be as prompt as one would expect from dedicated customer service. As the community is comprised of volunteers who contribute their time and expertise willingly, there might be delays in resolving issues or obtaining assistance.

Moreover, the availability of support can also be unpredictable. While there are active communities for popular distributions such as Ubuntu or Fedora, smaller or niche distributions might have fewer active contributors. This could result in a lack of specific expertise or resources for addressing certain issues.

For businesses or individuals who require immediate assistance or have mission-critical systems running on their servers, this limited support can pose challenges. Delays in resolving technical problems could lead to downtime or disruptions in services.

To mitigate this drawback, users can explore alternative options such as paid support services offered by commercial vendors who provide professional assistance for Linux servers. These services typically offer faster response times and guaranteed support levels tailored to specific needs.

In conclusion, while free Linux servers offer numerous benefits, it’s essential to consider the potential downside of limited support. Users should weigh their requirements and assess whether they have the necessary expertise within their organization or if they would benefit from additional support options. Understanding the trade-offs can help users make informed decisions and ensure a smooth operation of their Linux servers.

Compatibility Challenges

Navigating Compatibility Challenges with Free Linux Servers

When it comes to free Linux servers, there’s no denying the numerous benefits they offer. However, it’s essential to acknowledge that like any other technology, they do come with their fair share of challenges. One such challenge is compatibility.

Linux, being an open-source operating system, boasts excellent compatibility with a wide range of software and technologies. However, there may be instances where specific proprietary software or hardware does not have full support for the operating system. This can present hurdles when it comes to integrating certain tools or devices into your Linux server environment.

One potential compatibility challenge arises when using proprietary software that is designed explicitly for other operating systems. While many popular applications have Linux-compatible versions or alternatives available, there might still be niche or industry-specific software that is only compatible with specific platforms. In these cases, you may need to explore workarounds or consider alternative solutions to achieve the desired functionality on your free Linux server.

Similarly, hardware compatibility can sometimes pose obstacles. While Linux generally has extensive driver support for a wide range of devices, there might be instances where certain hardware components lack full support or optimized drivers for the operating system. This can result in limitations when it comes to utilizing specific features or functionalities of those devices within a Linux server setup.

However, it’s important to note that the Linux community and developers are continuously working towards improving compatibility and expanding hardware support. Many manufacturers now recognize the growing popularity of Linux and are actively developing drivers and firmware updates specifically tailored for the operating system.

In situations where compatibility challenges arise, exploring alternatives becomes crucial. The open-source nature of Linux encourages innovation and fosters a community-driven approach towards finding solutions. Often, users facing compatibility issues collaborate with others in the community to develop workarounds or create custom drivers that bridge the gap between their specific software or hardware requirements and the capabilities of their free Linux servers.

Moreover, embracing open-source alternatives can often address compatibility challenges. Linux offers a vast ecosystem of software applications that are specifically designed to work seamlessly with the operating system. By exploring these alternatives, users can find comparable solutions that meet their needs while maintaining compatibility within their Linux server environment.

In conclusion, while compatibility challenges can arise when using free Linux servers, they should not overshadow the numerous advantages that Linux offers. By being aware of potential limitations and actively seeking alternative solutions, users can navigate these challenges effectively. The collaborative nature of the Linux community and the flexibility of open-source software ensure that compatibility issues are continually addressed and resolved, allowing users to harness the power of free Linux servers while integrating the necessary tools and devices for their specific requirements.

Software Availability

Navigating the Con of Software Availability in Free Linux Servers

When considering the adoption of a free Linux server, it’s important to acknowledge a potential drawback: software availability. While Linux has made significant strides in terms of compatibility with various applications, there are still instances where certain proprietary software remains exclusive to other operating systems like Windows or macOS. It becomes crucial, therefore, to ensure that all the necessary software required for your business operations is available on the chosen free Linux distribution.

In today’s technology-driven world, businesses rely heavily on specialized software to streamline their operations and maximize productivity. While Linux offers a wide range of open-source alternatives for many popular applications, there may be specific proprietary software that your business depends on. Whether it’s industry-specific tools, design software, or accounting applications, compatibility can be a determining factor in choosing the right server operating system.

To mitigate this con effectively, it’s essential to conduct thorough research and evaluate the availability of required software on your chosen free Linux distribution. Start by identifying the critical applications your business relies upon and investigate if they have versions compatible with Linux servers. Many popular software providers now offer Linux-compatible versions or alternative open-source equivalents.

In cases where proprietary software is not available for Linux servers, there are workarounds worth exploring. One option is virtualization or containerization technologies that allow you to run Windows-based applications within a Linux environment through emulation or virtual machines. Although this approach adds complexity and may require additional resources, it can enable businesses to leverage their preferred software while benefiting from the stability and security of a free Linux server.

Another consideration is seeking out alternative open-source solutions that provide similar functionality to proprietary software. The open-source community has developed an extensive ecosystem of powerful applications across various domains. These alternatives may not have identical features or interfaces as their proprietary counterparts but can often meet business requirements effectively.

Moreover, engaging with vendors and expressing interest in Linux-compatible versions of their software can influence their future development plans. As the demand for Linux servers continues to grow, software providers are increasingly recognizing the importance of catering to this market. By actively voicing your needs, you contribute to the expansion of software availability for Linux servers.

In conclusion, while software availability can be a con when it comes to free Linux servers, it is not an insurmountable obstacle. By conducting thorough research, exploring virtualization options, considering open-source alternatives, and engaging with software vendors, businesses can navigate this challenge effectively. Ultimately, the benefits of a free Linux server in terms of cost-effectiveness, flexibility, security, and community support often outweigh the limitations imposed by software availability.

Maintenance Responsibility

The Responsibility of Maintenance: A Consideration for Free Linux Servers

When it comes to free Linux servers, there is an important aspect that requires careful attention: maintenance responsibility. While the freedom and flexibility offered by these servers are undeniable, users must assume the responsibility of keeping their systems up-to-date with the latest updates and patches.

Unlike managed or paid server solutions where maintenance is often handled by the service provider, free Linux servers place the onus of maintenance squarely on the user’s shoulders. This means that you are responsible for promptly installing updates and patches to ensure that your server remains secure and compatible with evolving technologies.

Neglecting regular maintenance can have serious consequences. One significant risk is exposing your server to security vulnerabilities. Hackers and malicious actors are constantly seeking loopholes in operating systems to exploit, and outdated software can become an easy target. By not staying vigilant with updates, you leave your server susceptible to potential breaches that could compromise sensitive data or disrupt services.

Compatibility issues also pose a concern when maintenance is overlooked. As technology advances rapidly, software developers often release updates to improve functionality or address compatibility concerns with other applications or hardware. Failure to install these updates in a timely manner may result in conflicts between different components of your system, leading to performance issues or even system failures.

To mitigate these risks, it is crucial to establish a disciplined approach towards maintaining your free Linux server. Regularly check for available updates and patches from reliable sources and apply them promptly. Many Linux distributions provide tools that simplify this process, making it easier for users to stay on top of necessary updates.

Additionally, staying informed about security best practices and following recommended guidelines can further enhance the security posture of your server. Online communities and forums dedicated to Linux offer valuable insights into system maintenance techniques and can provide guidance when encountering specific challenges.

While taking on the responsibility of maintenance may seem like an additional burden, it is important to recognize that it comes with the territory of using free Linux servers. By diligently keeping your system up-to-date, you can ensure the longevity, security, and compatibility of your server environment.

In conclusion, maintenance responsibility is a significant consideration when opting for a free Linux server. By understanding the importance of timely updates and patches, users can proactively protect their systems from security vulnerabilities and compatibility issues. Embracing this responsibility empowers individuals and businesses to fully leverage the benefits of free Linux servers while maintaining a secure and reliable server environment.

Scalability Limitations

Scalability Limitations of Free Linux Servers

While free Linux servers offer numerous advantages, it is important to acknowledge that they may have certain limitations, particularly in terms of scalability. When it comes to scaling up resources like storage or processing power, free Linux servers may present challenges compared to paid hosting services that provide scalable infrastructure solutions.

One of the primary reasons for this limitation is the fact that free Linux servers are often self-managed. As users have complete control over their server environment, they are responsible for managing and allocating resources effectively. This means that scaling up resources requires manual intervention and configuration adjustments.

In contrast, paid hosting services typically offer out-of-the-box scalability solutions. These services come equipped with tools and features that allow users to easily increase their resource capacity as their needs grow. Whether it’s adding additional storage space or upgrading processing power, these scalable infrastructure solutions can be implemented with just a few clicks or commands.

For businesses or individuals with rapidly evolving requirements or fluctuating workloads, the ability to scale resources quickly and seamlessly is crucial. Paid hosting services provide a convenient solution by offering flexible plans that can be adjusted on-demand. This allows users to adapt their server resources in real-time without experiencing downtime or disruptions.

However, it’s worth noting that while free Linux servers may have scalability limitations compared to paid hosting services, they are by no means incapable of handling growth. With proper planning and proactive resource management, it is possible to scale up a free Linux server effectively.

One approach to overcoming scalability limitations is by carefully monitoring resource usage and planning ahead for future needs. By regularly assessing server performance metrics and forecasting growth patterns, users can proactively allocate resources in anticipation of increased demand. This proactive approach helps ensure smooth operations even as requirements evolve.

Additionally, leveraging containerization technologies such as Docker or Kubernetes can enhance scalability on free Linux servers. Containers allow applications to run in isolated environments with their own allocated resources. By utilizing containerization, users can scale individual applications or services independently, optimizing resource utilization and simplifying scalability management.

Ultimately, while free Linux servers may require more manual effort and planning to scale resources compared to paid hosting services, they still offer a viable option for many users. By understanding the limitations and employing proactive resource management strategies, businesses and individuals can effectively navigate scalability challenges and continue to benefit from the cost-effectiveness and flexibility of free Linux servers.

free linux hosting

Unleashing the Power of Free Linux Hosting: Empowering Your Online Presence

Free Linux Hosting: Empowering Your Online Presence

In today’s digital age, having a strong online presence is essential for individuals and businesses alike. Whether you’re a blogger, a small business owner, or an aspiring entrepreneur, having a reliable and cost-effective hosting solution is crucial. This is where free Linux hosting comes into play.

Linux, an open-source operating system, has gained immense popularity in the web hosting industry due to its stability, security, and flexibility. Many web hosting providers offer free Linux hosting plans that allow users to launch their websites without any upfront costs. Let’s explore the benefits and considerations of opting for free Linux hosting.

Cost-Efficiency: One of the most significant advantages of free Linux hosting is the cost savings it offers. With no initial investment required, you can get your website up and running without breaking the bank. This makes it an attractive option for individuals or small businesses with limited budgets.

Reliability and Stability: Linux is renowned for its stability and reliability. It provides a solid foundation for your website by offering robust security features and efficient server performance. Free Linux hosting providers often ensure high uptime guarantees to keep your website accessible to visitors around the clock.

Flexibility and Customization: Linux offers unparalleled flexibility when it comes to customizing your hosting environment. With access to various open-source tools and technologies, you can tailor your website according to your specific needs. Whether you’re looking to run a content management system (CMS) like WordPress or set up an e-commerce platform using Magento or WooCommerce, free Linux hosting allows you to unleash your creativity without limitations.

Community Support: The open-source nature of Linux fosters a vast community of developers and enthusiasts who are always ready to lend a helping hand. If you encounter any issues or have questions regarding your free Linux hosting setup, there are numerous online forums, documentation resources, and communities available where you can seek assistance.

Considerations: While free Linux hosting offers many advantages, it’s important to consider a few factors before making your decision. Free hosting plans typically come with limitations such as limited storage space, bandwidth, or restricted features. Additionally, some providers may display advertisements on your website as a way to offset their costs. However, if you’re just starting out or have a relatively simple website, these limitations may not pose significant challenges.

When choosing a free Linux hosting provider, it’s crucial to research and compare different options. Look for providers that offer reliable customer support, scalability options for future growth, and transparent terms and conditions.

In conclusion, free Linux hosting can be an excellent choice for individuals and businesses looking to establish an online presence without the burden of upfront costs. With its stability, security features, and flexibility, Linux provides a solid foundation for your website. By leveraging the power of open-source technology and the supportive Linux community, you can embark on your online journey with confidence.

Remember to assess your specific needs and carefully choose a reputable free Linux hosting provider that aligns with your requirements. With the right choice and proper planning, free Linux hosting can empower you to create an impactful online presence without breaking the bank.


Frequently Asked Questions About Free Linux Hosting in the UK

  1. Is free Linux hosting really free?
  2. What are the limitations of free Linux hosting plans?
  3. Can I use my own domain name with free Linux hosting?
  4. How reliable is free Linux hosting in terms of uptime and performance?
  5. Are there any hidden fees or charges associated with free Linux hosting?
  6. Can I upgrade from a free Linux hosting plan to a paid plan in the future?

Is free Linux hosting really free?

Free Linux hosting typically refers to hosting plans that do not require any upfront payment. However, it’s important to note that while the hosting itself may be provided at no cost, there may be certain limitations or trade-offs involved. Here are a few considerations regarding the “free” aspect of Linux hosting:

  1. Limited Resources: Free hosting plans often come with restrictions on resources such as storage space, bandwidth, and CPU usage. These limitations can impact the performance and scalability of your website.
  2. Advertisements: Some free hosting providers offset their costs by displaying advertisements on your website. These ads may be intrusive or unrelated to your content, which can affect the user experience.
  3. Premium Features: While basic features are usually included in free plans, advanced or premium features may require an upgrade to a paid plan. This means that if you require additional functionality or more resources, you might need to pay for an upgraded hosting package.
  4. Support: Free hosting plans may offer limited customer support options compared to paid plans. This can affect the level of assistance you receive in case of technical issues or questions.
  5. Data Ownership: It’s important to review the terms and conditions of any free hosting provider regarding data ownership and backups. Ensure that you have control over your data and understand how backups are handled.

It’s crucial to carefully evaluate the terms and limitations associated with free Linux hosting before making a decision. Consider your specific needs, scalability requirements, and long-term goals for your website or online project.

If you anticipate significant growth or need more resources and support, it may be worth considering a paid hosting plan that offers greater flexibility, reliability, and additional features tailored to your requirements.

Remember to research different hosting providers thoroughly, compare their offerings, read reviews from other users, and choose a provider that aligns with your needs and budgetary constraints.

What are the limitations of free Linux hosting plans?

While free Linux hosting plans offer cost savings and a starting point for launching your website, they typically come with certain limitations. It’s important to be aware of these limitations before choosing a free hosting provider. Here are some common restrictions you may encounter:

  1. Limited Storage Space: Free hosting plans often provide limited disk space for storing your website files, databases, and other resources. This can restrict the amount of content you can host on your site.
  2. Bandwidth Restrictions: Free hosting plans usually impose bandwidth limits, which control the amount of data that can be transferred between your website and its visitors. If you exceed the allocated bandwidth, your site may become temporarily unavailable or incur additional charges.
  3. Restricted Features: Free hosting providers may limit access to certain features or functionalities that are available in paid plans. This could include advanced scripting languages, server-side software, or specific database options.
  4. Advertisements: To offset their costs, some free hosting providers display advertisements on your website. These ads can be intrusive and may not align with your website’s branding or purpose.
  5. Limited Support: Free hosting plans often come with limited customer support options compared to paid plans. You may have to rely on community forums or self-help resources for assistance rather than receiving dedicated support from the provider.
  6. Scalability Constraints: As your website grows and attracts more traffic, you may find that free hosting plans are not scalable enough to accommodate increased resource demands. This could result in performance issues or the need to upgrade to a paid plan.
  7. Domain Limitations: Free hosting plans typically offer subdomains (e.g., yoursite.providerdomain.com) instead of allowing you to use a custom domain name (e.g., www.yourdomain.com). Having a custom domain is important for establishing a professional online presence.

It’s essential to carefully review the terms and conditions of any free Linux hosting plan before committing to it. Evaluate your website’s requirements and consider whether the limitations imposed by the free plan align with your needs. If you anticipate significant growth or require advanced features, it may be worth considering a paid hosting plan that offers more resources and flexibility.

Can I use my own domain name with free Linux hosting?

Yes, in most cases, you can use your own domain name with free Linux hosting. Free Linux hosting providers typically offer the option to connect or transfer your existing domain name to their hosting platform. This allows you to maintain your unique online identity and brand consistency.

To use your own domain name with free Linux hosting, you would need to follow these general steps:

  1. Register a domain: If you haven’t already registered a domain name, you can do so through a domain registrar of your choice. Make sure to choose a registrar that offers the ability to manage DNS settings.
  2. Configure DNS settings: Once you have registered your domain name, you will need to configure its DNS (Domain Name System) settings. This involves setting up DNS records such as A records or CNAME records that point your domain to the IP address or hostname provided by your free Linux hosting provider.
  3. Update nameservers: Depending on the provider, you may also need to update the nameservers associated with your domain. Nameservers are responsible for translating human-readable domain names into machine-readable IP addresses. Your free Linux hosting provider will provide you with the necessary nameserver information that needs to be updated in your domain registrar’s control panel.
  4. Wait for propagation: After making changes to DNS settings and nameservers, it may take some time for these changes to propagate across the internet. This process can take anywhere from a few minutes to several hours or even up to 48 hours in some cases.
  5. Verify and test: Once propagation is complete, you can verify if your domain is correctly connected by accessing it through a web browser. If everything is set up correctly, your website hosted on free Linux hosting should be accessible using your own custom domain name.

It’s worth noting that while most free Linux hosting providers allow you to use your own domain name, there may be certain limitations or restrictions depending on the specific provider and their terms of service. It’s always a good idea to review the documentation or contact the hosting provider’s support team for guidance on how to connect your domain name to their hosting platform.

By using your own domain name with free Linux hosting, you can establish a professional online presence that reflects your brand identity and enhances credibility.

How reliable is free Linux hosting in terms of uptime and performance?

When it comes to the reliability of free Linux hosting in terms of uptime and performance, it’s important to understand that there can be variations among different providers. While some free hosting services maintain high standards, others may have limitations that could impact reliability.

Uptime: Uptime refers to the amount of time a website is accessible and operational. Free Linux hosting providers typically offer uptime guarantees, which can vary from provider to provider. Some may promise higher uptime percentages, such as 99% or more, while others may have lower guarantees. It’s crucial to research and choose a reputable provider that prioritizes uptime and has a track record of delivering on their promises.

Performance: Performance is another critical aspect when evaluating free Linux hosting. Factors like server hardware, network infrastructure, and server load can influence the overall performance of your website. Free hosting plans might have limitations on server resources such as CPU usage, RAM, or bandwidth, which can affect how your website performs under heavy traffic or resource-intensive tasks. It’s important to consider these limitations when choosing a free hosting plan.

To ensure reliable uptime and optimal performance with free Linux hosting:

  1. Research Providers: Look for providers with positive reviews and a reputation for reliability. Check if they have measures in place to monitor server performance and address any issues promptly.
  2. Server Infrastructure: Inquire about the hardware specifications and network infrastructure used by the hosting provider. Reliable providers often invest in robust infrastructure to deliver stable performance.
  3. Scalability Options: Consider whether the free hosting plan allows for scalability as your website grows. Having the ability to upgrade to a paid plan or access additional resources can help maintain optimal performance.
  4. Load Balancing: Some free Linux hosting providers implement load balancing techniques to distribute traffic evenly across multiple servers, ensuring better stability during peak periods.
  5. Regular Backups: Confirm if the provider offers regular backups of your website data. This ensures that even if an issue occurs, you can restore your website to a previous working state.

It’s important to note that while free Linux hosting can be a cost-effective solution, it may not always provide the same level of reliability and performance as paid hosting options. If uptime and performance are critical for your website or business, considering a paid hosting plan might be a more suitable choice.

In conclusion, the reliability of free Linux hosting in terms of uptime and performance can vary. By researching reputable providers, understanding their infrastructure, and considering scalability options, you can increase the chances of obtaining reliable uptime and satisfactory performance for your website.

Are there any hidden fees or charges associated with free Linux hosting?

When it comes to free Linux hosting, it’s essential to carefully review the terms and conditions of each hosting provider to understand any potential hidden fees or charges. While the hosting itself may be offered for free, some providers may have additional services or limitations that could result in extra costs. Here are a few factors to consider:

  1. Upgrades and Add-ons: Free hosting plans often come with limitations on storage space, bandwidth, or other features. If you require more resources or additional functionalities, the hosting provider may offer paid upgrades or add-ons to meet your needs.
  2. Domain Registration: While some free Linux hosting providers offer a subdomain (e.g., yoursite.providername.com), if you prefer a custom domain (e.g., yoursite.com), there might be fees associated with domain registration or transfer. These costs are typically separate from the free hosting service itself.
  3. Support and Maintenance: Free hosting plans may have limited customer support options, such as community forums or self-help documentation. If you require dedicated support or assistance from the hosting provider, they might offer premium support packages for an additional fee.
  4. Advertisements: To offset their costs, some free Linux hosting providers display advertisements on websites hosted on their platform. While this is not a direct fee charged to you, it is important to consider if displaying ads aligns with your website goals and aesthetics.

It’s crucial to thoroughly read the terms of service and any associated agreements provided by the hosting provider before signing up for their free Linux hosting plan. This will help you identify any potential hidden fees or charges that may arise during your use of the service.

Additionally, researching user reviews and seeking recommendations from trusted sources can provide insights into other users’ experiences regarding hidden fees or unexpected charges with specific free Linux hosting providers.

By being informed about these considerations and conducting thorough research upfront, you can make an informed decision about which free Linux hosting provider best suits your needs while minimizing the risk of unexpected costs.

Can I upgrade from a free Linux hosting plan to a paid plan in the future?

Yes, in most cases, you can upgrade from a free Linux hosting plan to a paid plan in the future. As your website grows and your needs evolve, you may find that the limitations of a free hosting plan no longer meet your requirements. Upgrading to a paid plan offers additional resources, features, and support to accommodate your expanding online presence.

When considering an upgrade, it’s important to check with your hosting provider to understand their specific upgrade policies and options. Here are some general points to keep in mind:

  1. Plan Availability: Ensure that your hosting provider offers various paid plans suitable for your needs. Check if they have different tiers or packages that provide increased resources such as storage space, bandwidth, or CPU power.
  2. Migration Process: Understand the process of migrating from a free plan to a paid plan. Some providers offer seamless upgrades where they handle the migration for you, while others may require manual migration or assistance from their support team.
  3. Cost Considerations: Evaluate the pricing structure of the paid plans offered by your hosting provider. Compare the features and resources provided with the associated costs to determine if it aligns with your budget.
  4. Scalability Options: Look for hosting providers that offer scalability options within their paid plans. This allows you to easily adjust resources as needed without experiencing downtime or significant disruptions.
  5. Support and Additional Features: Paid plans often come with enhanced customer support and additional features such as advanced security measures, automatic backups, SSL certificates, and more. Assess these offerings to see if they align with your website’s requirements.

It’s worth noting that not all free hosting providers offer direct upgrades to paid plans within their infrastructure. In such cases, you may need to migrate your website to another hosting provider that offers suitable paid plans.

Before making any decisions, thoroughly research different hosting providers and compare their offerings based on factors like reliability, customer reviews, technical support quality, scalability options, and pricing. This will help ensure a smooth transition from a free Linux hosting plan to a paid plan that meets your evolving needs.